Updated: 01/08/2026 | Views: 33616
Standard fees are typically the default charges for the practice. When creating a new fee schedule, you can easily select how you want to add the procedures and fees: either manually or by importing or copying an existing schedule. Once added, your Standard Fees list includes all fee schedules, the effective dates of the schedules, the basis or source of the fee, and the status. Fee schedules can also be edited at any time.
You always begin with navigating to Standard Fees before adding or editing a standard fee schedule.
Navigate to Standard Fees
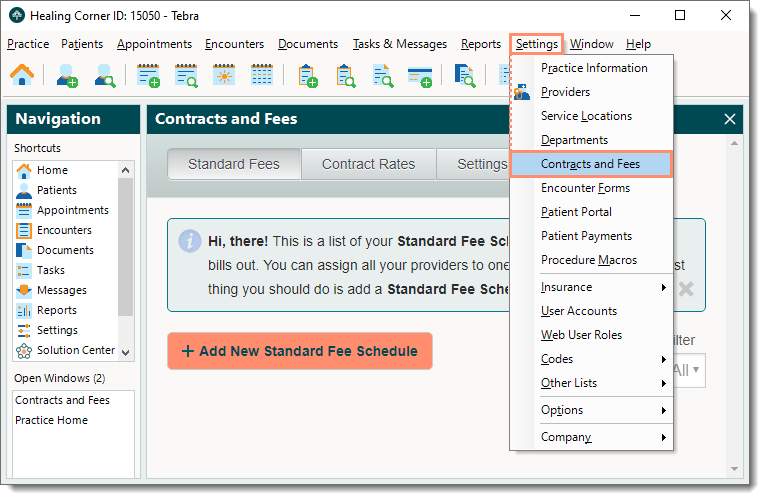
- Click Settings > Contracts and Fees. The Contracts and Fees window opens at the Standard Fees tab by default and displays the list of standard fee schedules if any have been created.
|
 |
New Standard Fee Schedule
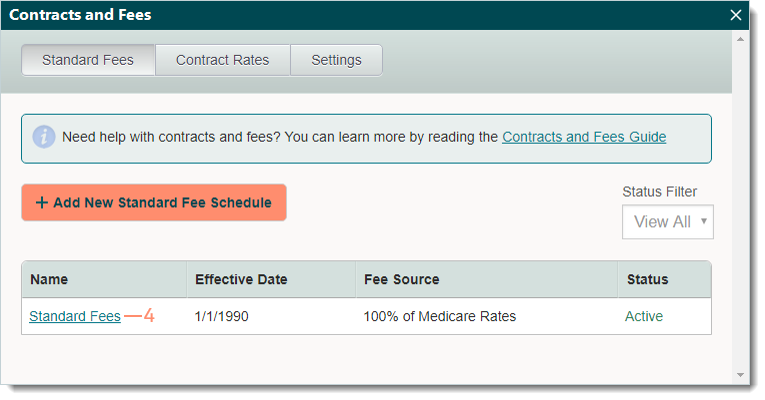
- Navigate to Standard Fees and verify the standard fee schedule is not in the system. Then, click + Add New Standard Fee Schedule. The Add Standard Fee Schedule information displays.
- If the standard fee schedule is already in the system, edit it as needed instead.
- Enter the information.
- Use the name suggested or enter a new name for the standard fee schedule.
- Select an option from the drop-down menu to add the procedures and fees.
- Import from file: Provides an Excel template to enter the fee schedule in the required format. Once finished, select the file for import then edit as needed.
- Add Procedures and Fees Manually: Allows manual entry of each procedure and fee.
- Copy from existing Standard Fee Schedule: Copies an existing fee schedule. Once selected, edit the copy as needed.
- e-Claims and Paper Claims No Response Trigger: When billed claims are still under the Pending Insurance status after the set number of days, the status automatically updates to No Response. Edit the set number of days as necessary.
- By default, all active providers are added to the fee schedule. Once saved, the provider(s) cannot be removed. If necessary, click Remove to disassociate a provider.
- By default, all service locations are added to the fee schedule. Once saved, the service locations(s) cannot be removed. If necessary, click Remove to disassociate a service location.
- Click Save & Submit. A confirmation pop-up appears then click OK. The Contracts and Fees window returns and displays the new standard fee schedule in the Standard Fees list.
|
 |
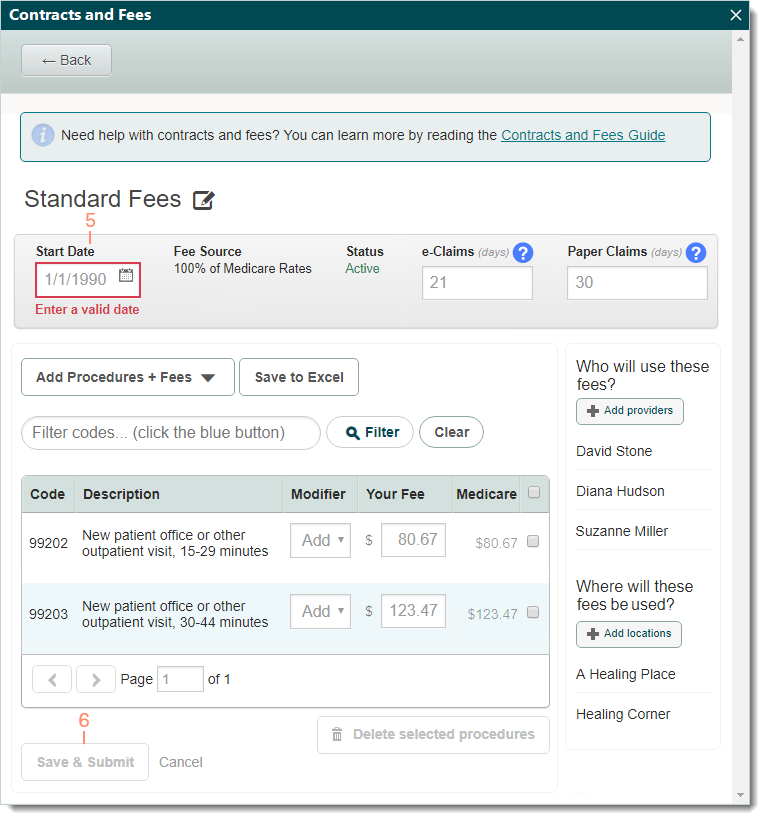
- By default, the effective date of newly created fee schedules is set to 1/1/1990. Click the fee schedule name to open and enter a valid effective date. The standard fee schedule information displays.
|
 |
- Enter a valid Start Date.
- Click Save & Submit. A confirmation pop-up appears then click OK.
- Click Back to return to the Standard Fees list or close the window if finished.
|
 |
Edit Standard Fee Schedule
- Navigate to Standard Fees and click the fee schedule name to open. The standard fee schedule information displays.
 Tip: When there are numerous standard fee schedules listed, use the Status Filter to narrow the list to Active, Scheduled, or Unused. Tip: When there are numerous standard fee schedules listed, use the Status Filter to narrow the list to Active, Scheduled, or Unused.
|
 |
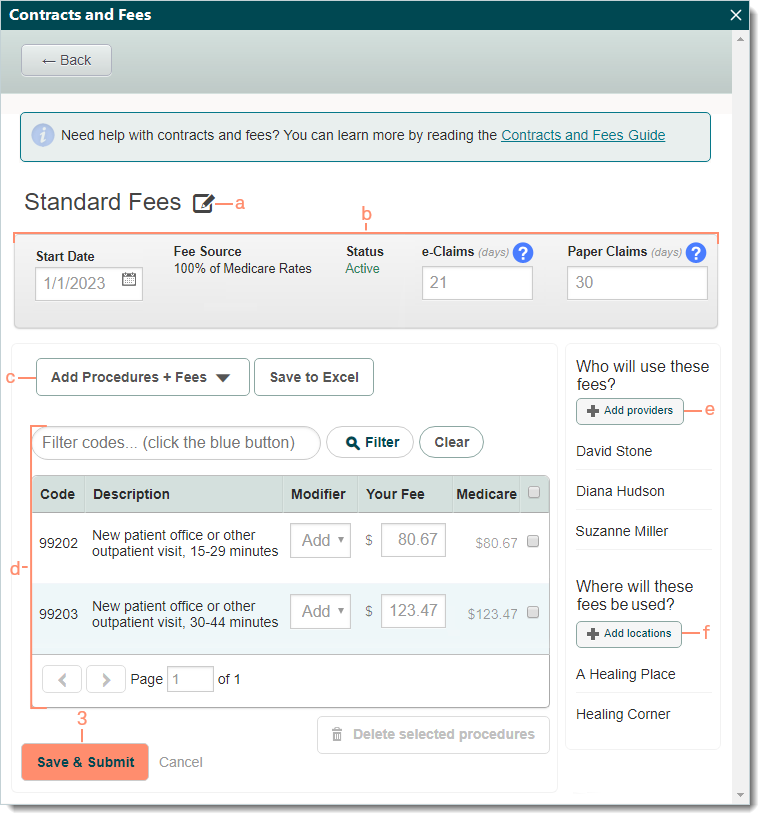
- Make the necessary changes.
- To update the standard fee schedule name, click the edit icon, enter the new name then click Save.
- Start Date, e-Claims, and Paper Claims: Enter a new effective date and number of days for no response triggers.
- To enter new procedures, click Add Procedures + Fees.
 Important Note: Selecting Base on Medicare updates all existing and newly added procedure fees to the Medicare rates. Important Note: Selecting Base on Medicare updates all existing and newly added procedure fees to the Medicare rates.
- To update an existing procedure, use the filter if necessary to find it. Then, edit as needed.
- To delete a procedure, click to select the checkbox then click Delete selected procedures.
- To associate additional providers to the fee schedule, click +Add providers, select the provider(s), then click +Continue.
- To associate additional service locations to the fee schedule, click +Add locations, select the location(s), then click +Continue.
- Click Save & Submit. A confirmation pop-up appears then click OK.
- Click Back to return to the Standard Fees list or close the window if finished.
|
 |