Upload Document
Updated: 01/08/2026
| Views: 13302
Documents such as an image, PDF, or Word file can be uploaded to the Documents page or added through a patient's chart. You can also import Summary of Care information received from other providers and view it in both the patient's chart and in the practice's Documents.
- If you are integrated with Billing, documents you upload through Clinical, Billing, or the Mobile App are viewable in both systems. Uploaded documents are stored on the patient's Documents in Clinical and under Documents in Billing.
- Once a document is assigned to a patient, it cannot be changed to a different patient. If a document is assigned to a patient in error, delete the document and start again.
- Up to 20 documents can be uploaded at one time.
- The size of a file cannot exceed 10MB.
Access Documents
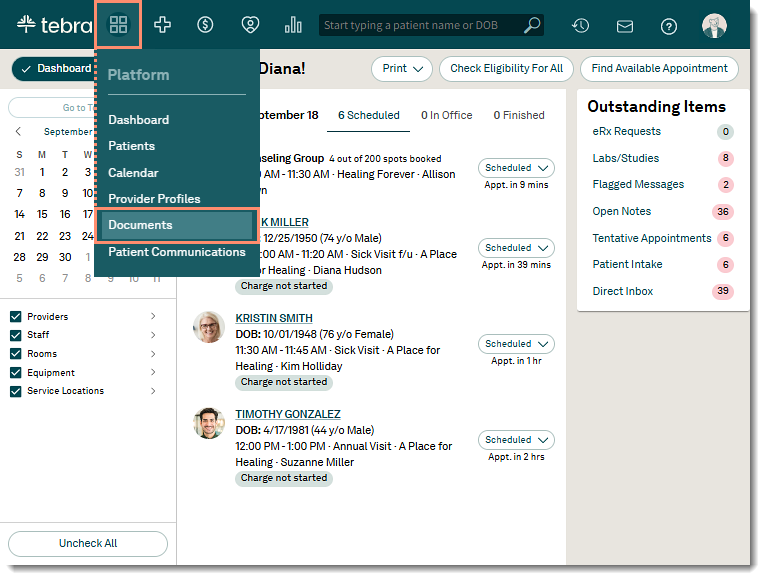
- Hover over the Platform icon and click on Documents. The Documents page opens.
|
 |
Upload Document
- Click Upload File. The computer's document library opens.
- Find and select the document(s) to upload. Then, click Open. The New Document pop-up window opens.
- Select or enter the following information:
- Name: The uploaded file name auto-populates as the document name. If applicable, enter a different name for the document.
- Label: Select a document type from the drop-down.
 Tip: Manage the document labels to show or hide preset labels. Tip: Manage the document labels to show or hide preset labels.
- Status: By defaults, the status is set to New. If applicable, click the drop-down and select a different status (In-Process or Processed).
- Date: By default, the current date displays. If applicable, click the calendar icon and set a different date.
- Patient: Optionally, associate a patient to the document. Enter the first 2–3 letters of the patient's name. Then, click to select the patient from the auto-populated results.
- Provider: Only applicable when uploading referral related documents to meet the Promoting Interoperability Receive and Incorporate measure. Click to select the corresponding provider who sent the referral.
- Notes: Optionally, enter any applicable notes related to the document.
- Click Save when finished.
|
 |