Updated: 02/20/2025 | Views: 7932
A procedure macro (sometimes referred to as an explosion code) is a special code you create that when entered into a procedure line of an encounter in the Desktop Application (PM) or charge in the web platform, loads multiple procedures, modifiers, and diagnoses codes. Since many patient visits are nearly identical, these procedure macros provide a convenient shortcut that saves time when entering procedures performed on an encounter.
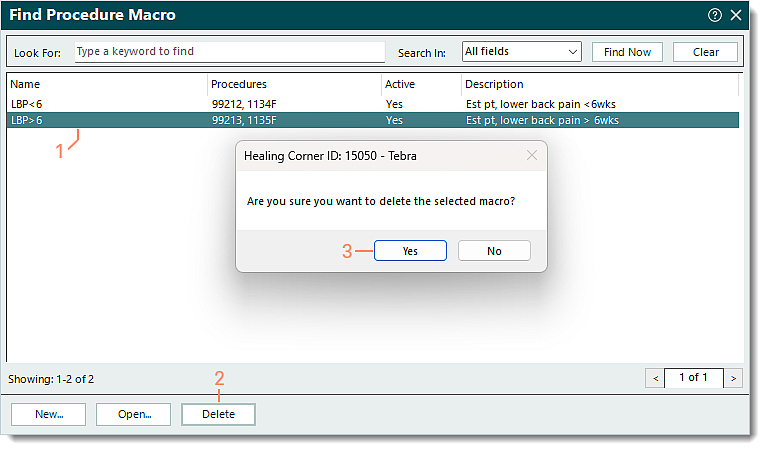
You always begin with finding the procedure macro before creating, editing, or deleting a procedure macro.
Find Procedure Macro
- Click Settings > Procedure Macros. The Find Procedure Macro window opens.
 Tip: To narrow down the list when there are numerous procedure macros, use the Look For search bar to enter all or part of a keyword for the procedure macro. Then, click Find Now. Tip: To narrow down the list when there are numerous procedure macros, use the Look For search bar to enter all or part of a keyword for the procedure macro. Then, click Find Now.
|
 |
New Procedure Macro
- To prevent duplication, verify the procedure macro is not in the system then click New at the bottom. The New Procedure Macro window opens.
- Enter the general information for the procedure macro.
- Name: A unique name for the procedure macro. If possible, limit the name to a single word as this is what is used when entering procedures on an encounter.
- Doctor: Click to select the specific provider from the drop-down menu or leave blank to apply to all providers.
- Description: A brief description to describe the purpose of the procedure macro.
- "Active": Selected by default. To change the procedure macro to inactive at any time, click to clear the selection.
|
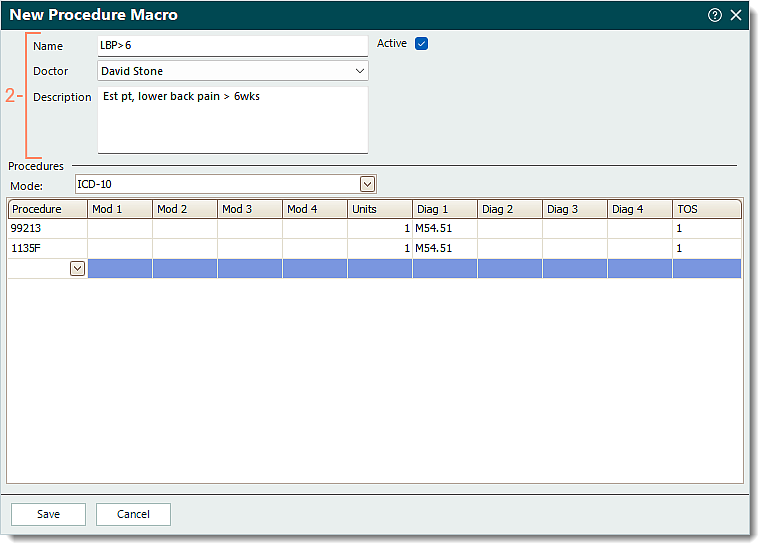 |
- Under the Procedures section, enter the procedure(s) and additional information (e.g., modifiers, units, diagnoses, NDC) as necessary.
- Mode: Click to select the diagnosis code set (e.g., ICD-10) from the drop-down menu.
- Click the field under a column to enter data.
Tip: Enter a question mark (press Shift+? on the keyboard) in the procedure or diagnosis fields to search and select from the codes list.
- To remove a column from the Procedures section, right click on the column header and select Remove This Column.
- To add an available column, right click on any column header and select Column Chooser. The Customization pop-up window opens then drag and drop the column to the desired location in the Procedures section.
- To remove a procedure line, right click on the procedure line and select Remove Procedure.
- Click Save.
|
 |
Edit Procedure Macro
- Find the procedure macro then double click to open. The Edit Procedure Macro window opens.
- Make the necessary changes.
- Click Save.
|
 |
Delete Procedure Macro
- Find the procedure macro then click to select it.
- Click Delete. A confirmation pop-up appears.
- Click Yes to confirm the deletion. The procedure macro is deleted.
|
 |