Updated: 11/05/2024 | Views: 10118
Service locations are places where providers render services to patients. This includes locations not at the same address as the main practice (e.g., local hospitals, outpatient clinics, rehabilitation centers). One or more service locations must be created before you can begin scheduling appointments, entering encounters, and sending claims.
You always begin with finding the service location before creating, editing, or deleting a service location.
Find Service Location
- Click Settings > Service Locations. The Find Service Location window opens.
 Tip: To narrow down the list when there are numerous service locations, use the Look For search bar to enter all or part of a keyword for the service location. Then, click Find Now. Tip: To narrow down the list when there are numerous service locations, use the Look For search bar to enter all or part of a keyword for the service location. Then, click Find Now.
|
 |
New Service Location
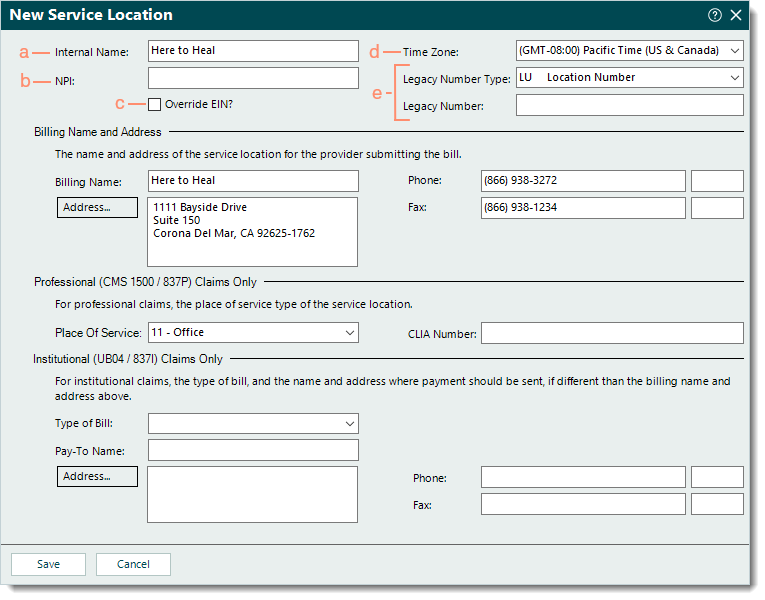
- To prevent duplication, verify the service location is not in the system then click New at the bottom. The New Service Location window opens.
- Enter the information:
- Internal Name: The name for the service location (not to exceed 32 characters) that only displays in Tebra for internal reference when creating encounters.
- NPI: If applicable, enter the NPI associated with the service location.
- If claims for this service location need to be submitted with a different EIN than the practice's EIN, click to select "Override EIN?" then enter the EIN.
- Time Zone: Click the drop-down arrow and select the service location's time zone.
- Legacy Number Type: By default, LU Location Number is selected with the Legacy Number left blank and is appropriate for most cases.
- If necessary, click the drop-down arrow to select a different Legacy Number Type then enter the Legacy Number.
|
 |
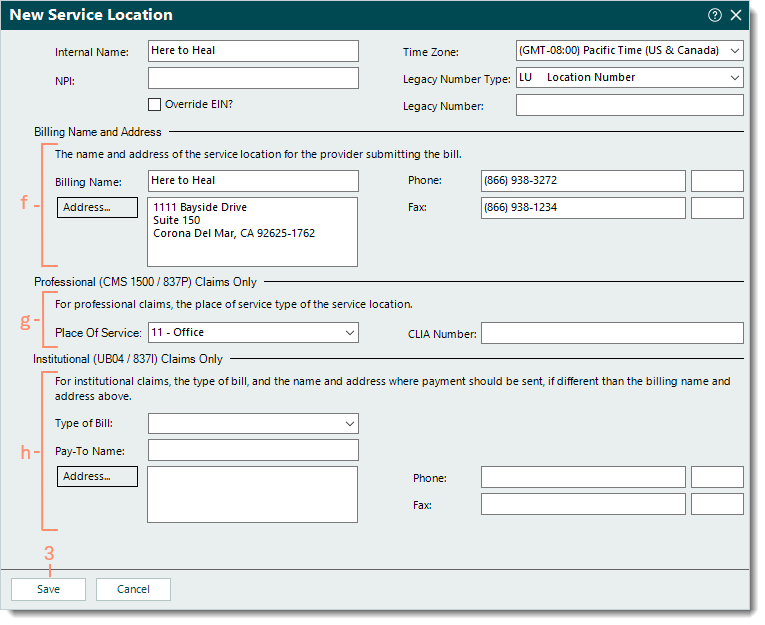
- Billing Name and Address section: Enter the service location's Billing Name and Address as it should display on claims. Then, enter the Phone/Fax number(s).
- Professional (CMS 1500/837P) Claims Only section:
- Place Of Service: Click the drop-down arrow and select the appropriate Place of Service code for the service location.
- CLIA Number: If applicable, enter the service location's CLIA number.
- Institutional (UB04/837I) Claims Only section:
- Type of Bill: Click the drop-down arrow to select the appropriate Type of Bill code for the service location.
- Pay-To Name, Address, and Phone/Fax number(s): If different from the Billing Name, Address, and Phone/Fax number(s), enter the information.
Note: For e-claim submission purposes, the address must be a physical location (cannot be a PO Box) and include a 9-digit zip code.
- When finished, click Save.
|
 |
Edit Service Location
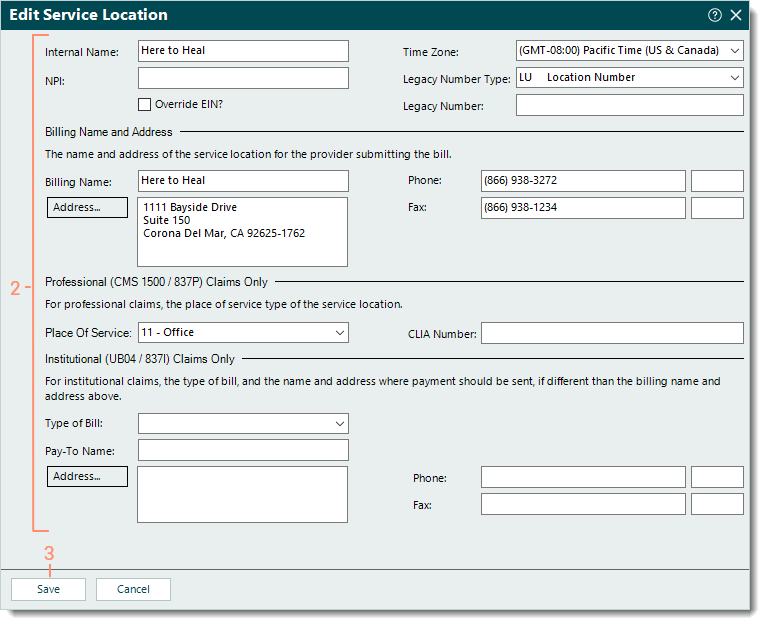
- Find the service location then double click to open. The Edit Service Location window opens.
- Make the necessary changes.
- Click Save.
|
 |
Delete Service Location
- Find the service location then click once to select it.
- Click Delete. A confirmation pop-up appears.
- Click Yes to confirm the deletion. The service location is deleted.
Note: Only service locations with no other records associated, such as an encounter or appointment, can be deleted.
|
 |


