User Account Roles
Updated: 10/26/2023 Views: 8756System Administrators of billing company accounts and accounts created prior to May 9, 2016 can assign a user account role to each user created in the Desktop Application (PM). Assigning a user account role automatically applies a pre-defined permission set to the user. You can customize each user account role or create new user account roles at any time.
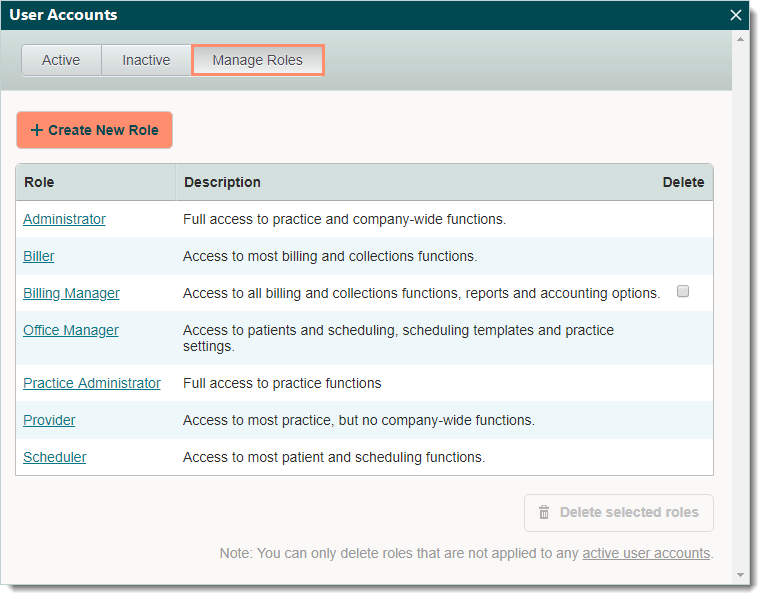
There are several preset user account roles offered:
- Administrator: Full control and access to account and practice wide functionality.
- Biller: Access to most billing and collections functionality.
- Billing Manager: Access to all billing and collections functionality, practice reports and settings, and accounting options.
- Office Manager: Access to patients and scheduling, scheduling templates and practice settings.
- Practice Administrator: Available for billing company accounts. Full control and access to practice wide functionality.
- Provider: Access to most practice wide functionality and some account management functionality.
- Scheduler: Access to most patient and scheduling functionality.
You always begin with navigating to Manage Roles before creating, editing, or deleting a user account role.
Navigate to Manage Roles
|
 |
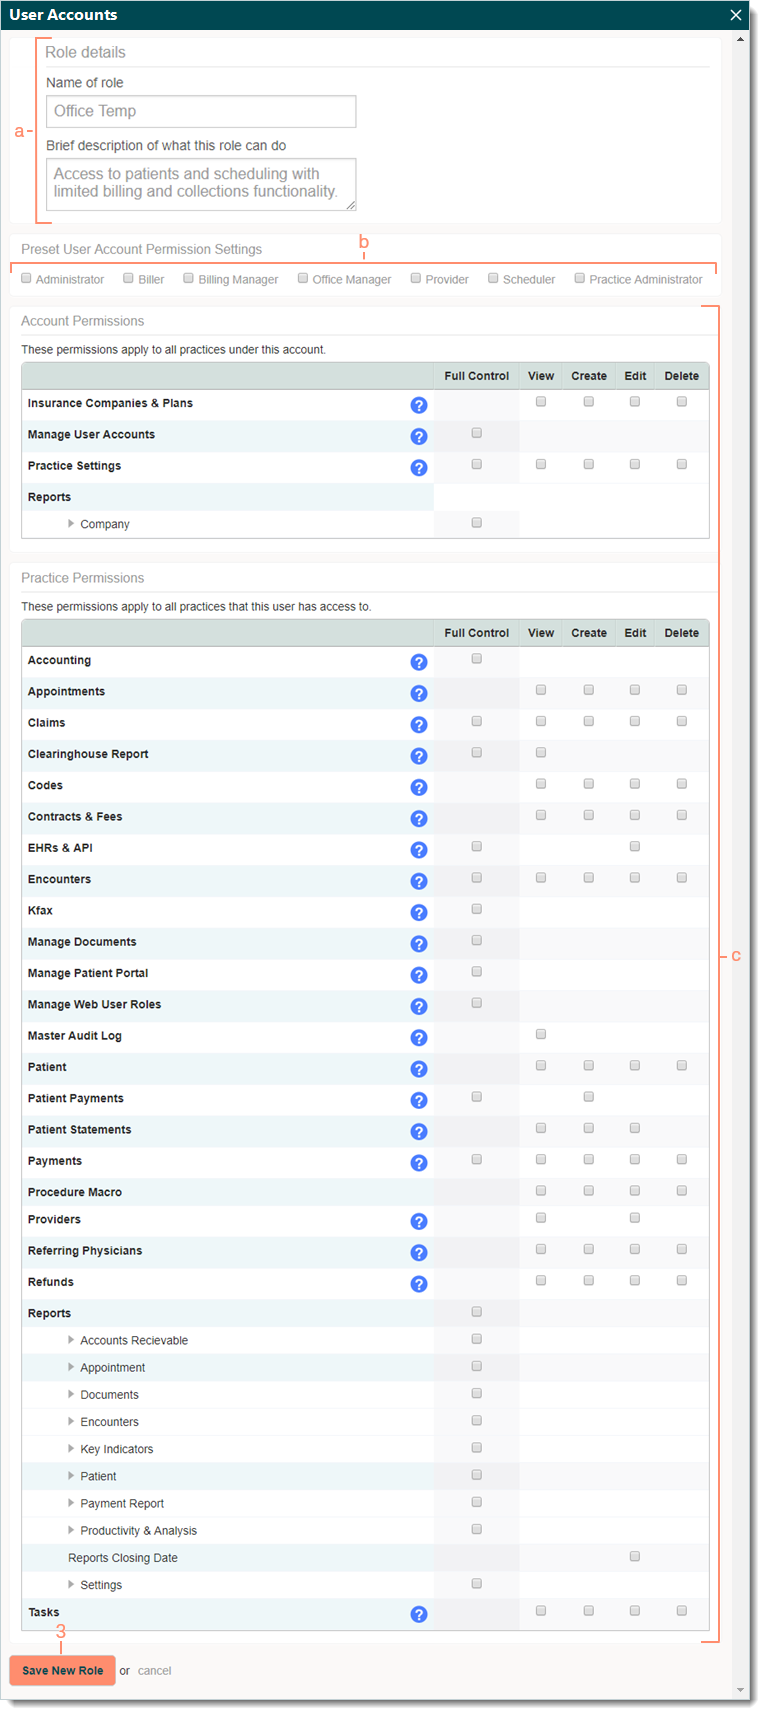
Create New RoleOnce a new role is created, the option to select it becomes available to assign to a user.
|
 |
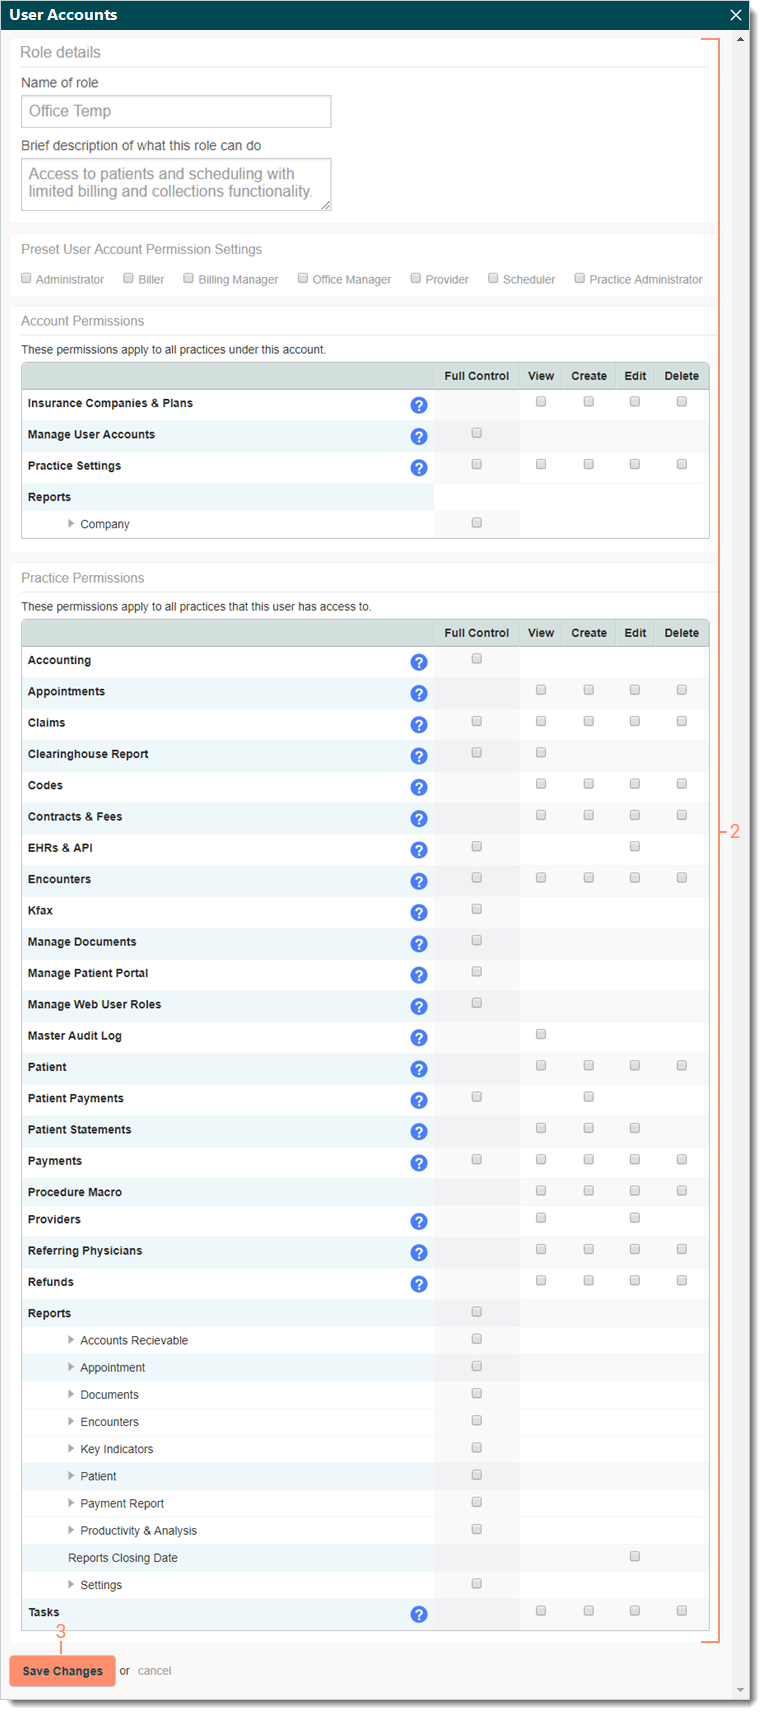
Edit Role
|
 |
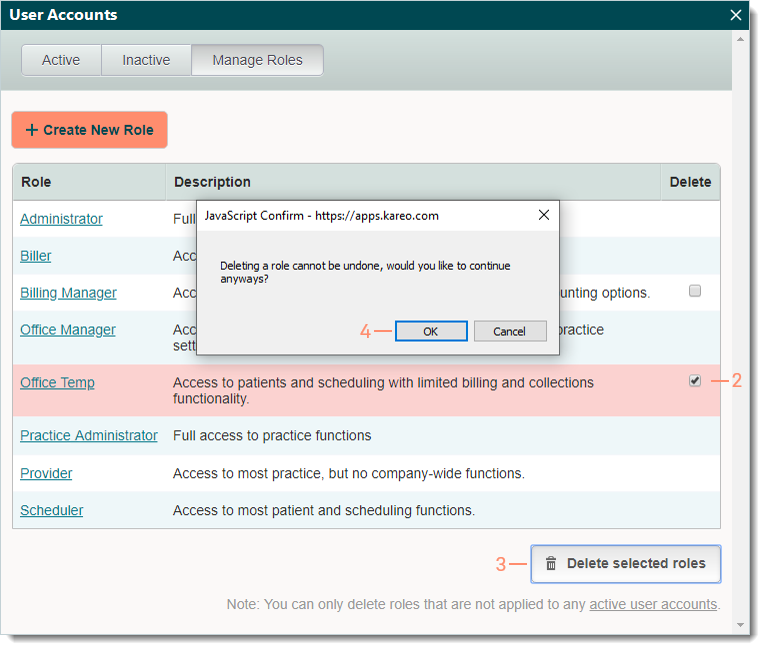
Delete Role
|
 |