Navigate Active Denials Report
- Last updated
-
-
Save as PDF
Updated: 06/17/2026 | Views: 155
The Active Denials report includes denial information at both the claim and service line level, empowering billing administrators and staff to identify, prioritize, and follow up on denied claims more effectively.
Note: The Active Denials report will be available for all customers by the end of June 2026.
Navigate to Active Denials Report
- Click Analytics > Claims > Active Denials. The Active Denials report opens.
- To access the Active Denials report in the web platform, hover over the Analytics icon and click Claims. The Insurance Collections report page opens then select Active Denials under the Claims reports menu. The Active Denials report page opens.
|
 |
Navigate Active Denials Report
The Active Denials report can be customized to include specific data and how the data displays.
Note: Customization of the report does not automatically save. Once a user closes the report, the default report view displays when the report is opened again. To save the customization, use the Save As option under Table Actions to save the report as a new customized report.
- Search: Click the search icon to search for specific report data.
- Refresh Data: Click the refresh icon to refresh the report data as necessary.
- Table Filters: By default, all claims with a Denied status display.
- To filter by specific criteria, click the filter icon and add the appropriate filter(s) (e.g., Insurance Company, Patient, Rendering Provider).
- To remove a filter, click X.
- Table Configuration: Click the gear icon to adjust the table density (e.g., Compact, Standard, Comfortable) and/or manage the table columns to hide/show a column.
- Table Actions: Click to export the report to CSV or Excel, or to save as a new customized report.
|
 |
- Columns: Customize the report to only display specific columns and in the preferred order. Available options depend on the column data.
Note: Data grouping and aggregation does not save when creating a new report.
- To reorder the columns, click the column header then drag and drop in the preferred order.
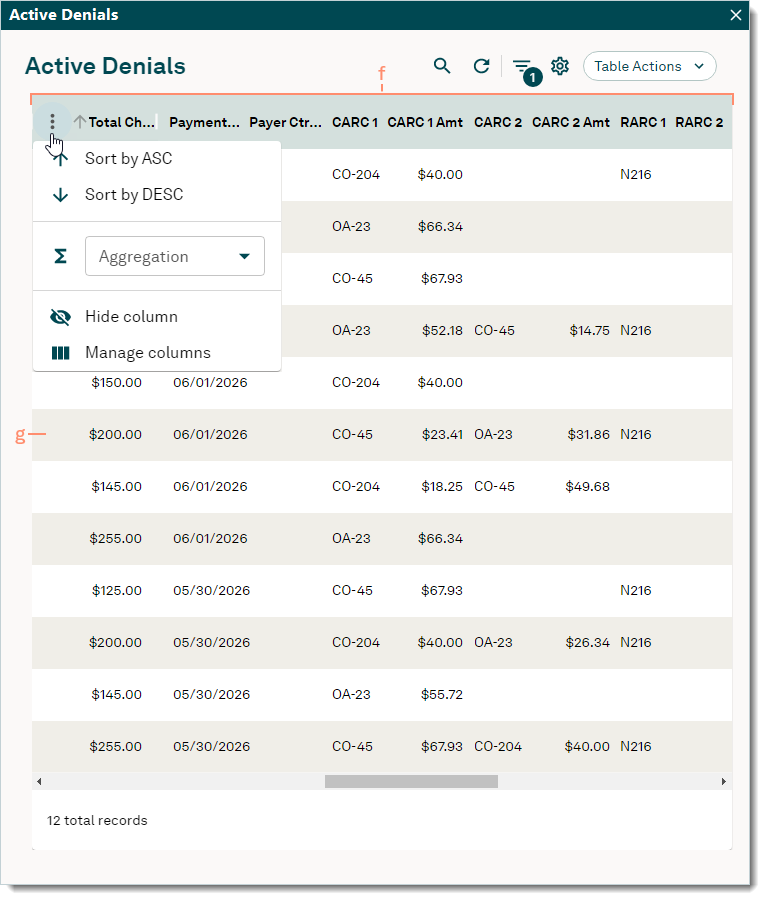
- To sort by ascending or descending, hover over the column header and click the arrow.
- To sort more than one column, hold down the Shift key on the keyboard and click to select the column(s).
- To sort, unsort, hide or manage columns, hover over the column header and click the more options icon.
- To group all records by a specific column, hover over the column header and click the more options icon. Then, select Group by (column name).
Note: Once applied, an additional column displays with the grouping.
- To aggregate a column by size (count), sum, average, etc., hover over the column header and click the more options icon. Then, select the appropriate option from the Aggregation drop-down menu.
Note: Once applied, values display at the footer of the report table and at the group level when grouping data.
- Service Line Summary: Includes denial information extracted from Electronic Remittance Advice (ERA) files such as Claim Adjustment Reason Codes (CARCs) and Remittance Advice Remark Codes (RARCs), etc. Scroll as necessary to view more information.
Note: Denial information will display data extracted from ERA files posted after the feature is enabled for the practice. If multiple ERAs were posted for the same claim, the data displayed will be from the most recently posted ERA. CARC and RARC code details will not display for manually posted denials.
- To open and view the Encounter record associated with the service line, click the Encounter ID number.
- To open and view the Patient record, click the Patient name.
|
 |