Resubmit Claims with Payer Assigned Number
- Last updated
-
-
Save as PDF
Updated: 01/08/2026 | Views: 11836
There are certain situations that require claim(s) resubmission with a payer assigned number (e.g., document/claim control number). The most common situations are for the resubmission of denied claims where:
The following sections outline the recommended steps on how to make the necessary corrections to the claim(s) and add the submission reason with the payer assigned document/claim control number for resubmission depending on the situation.
Note: Most Medicare payers only accept claim submission reason 1, and although submission reason 7 is widely accepted by all other payers, some payers may require 6 or 8 depending on the situation. To prevent further delay, confirm directly with the payer for their specific requirements when resubmitting claims.
Correct Claim Information for Resubmission
Follow the steps below to correct the submitted claim information associated with the denied claim(s) for resubmission.
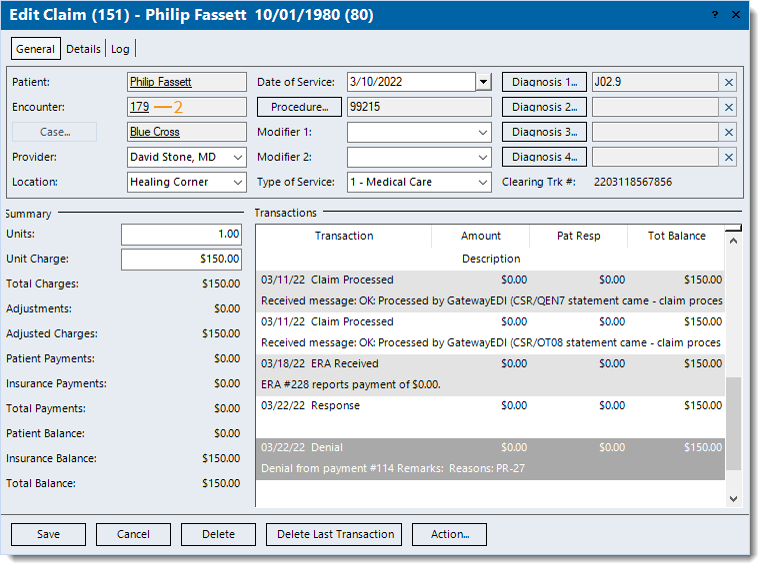
- Find the claim and double click to open. The Edit Claim window opens.
- If the patient or case records associated with the claim needs to be corrected, double click on the text link to open the record and make the necessary changes. Click Save at the bottom of each relevant window to return to the Edit Claim window.
- If the rendering provider and/or service location needs to be corrected, click the Provider drop-down arrow and/or Location drop-down arrow to select the appropriate provider and/or location. When finished, click Save. The Edit Claim window closes. Find the claim again and double click to open. The Edit Claim window opens.
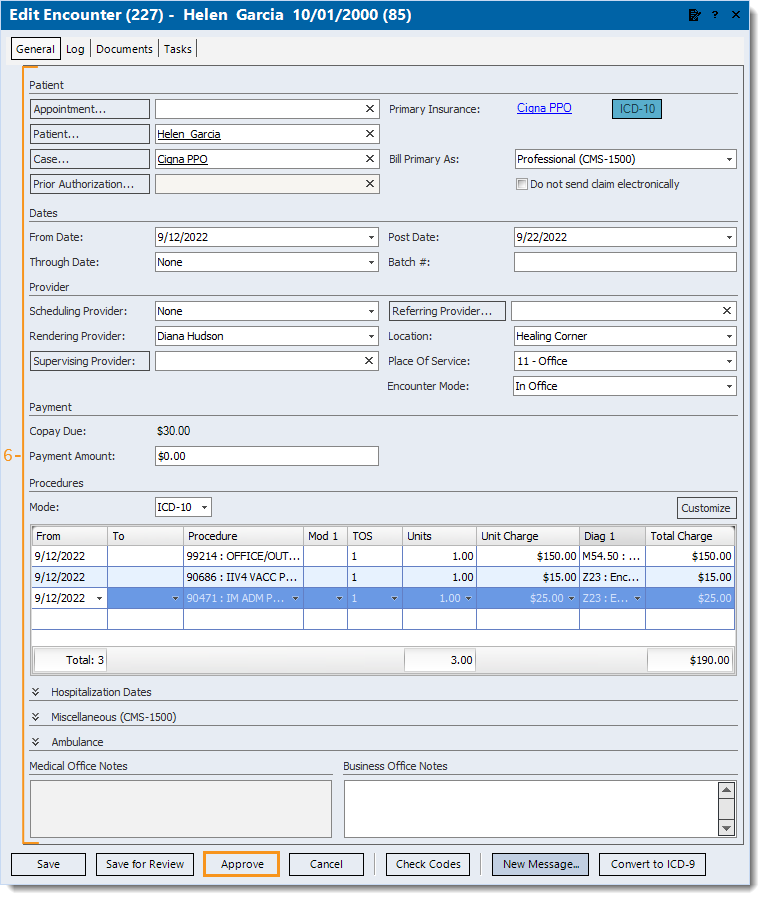
- Double click the Encounter ID number link. The Edit Encounter window opens.
 Tip: Another way to access the encounter is to double click the Created transaction line under the Transactions section. The transaction line description includes the encounter ID number (e.g., Service line created from encounter #123). Tip: Another way to access the encounter is to double click the Created transaction line under the Transactions section. The transaction line description includes the encounter ID number (e.g., Service line created from encounter #123).
|
 |
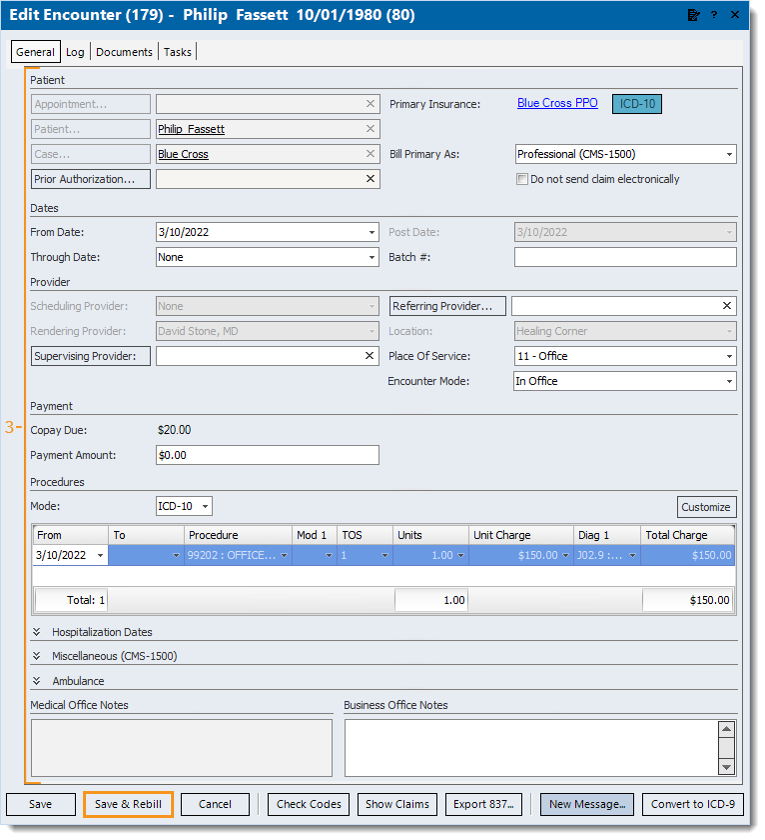
- Make the necessary correction(s) to the existing information and Add Submit Reason and Payer Assigned Number.
- Click Save & Rebill. The confirmation pop-up appears.
- Click Yes to rebill all of the claims related to the encounter. The Edit Encounter window closes.
Note: It is recommended to find the claim(s) related to the encounter. Then, select and use the Action menu to add a note detailing the actions taken to resubmit the claim(s).
Once all corrective actions are complete, resubmit all affected claims.
|
 |
Correct Claim with Paid and Denied Procedures for Resubmission
Follow the steps below to correct the denied service line(s) then resubmit the claim including the paid and settled service line(s).
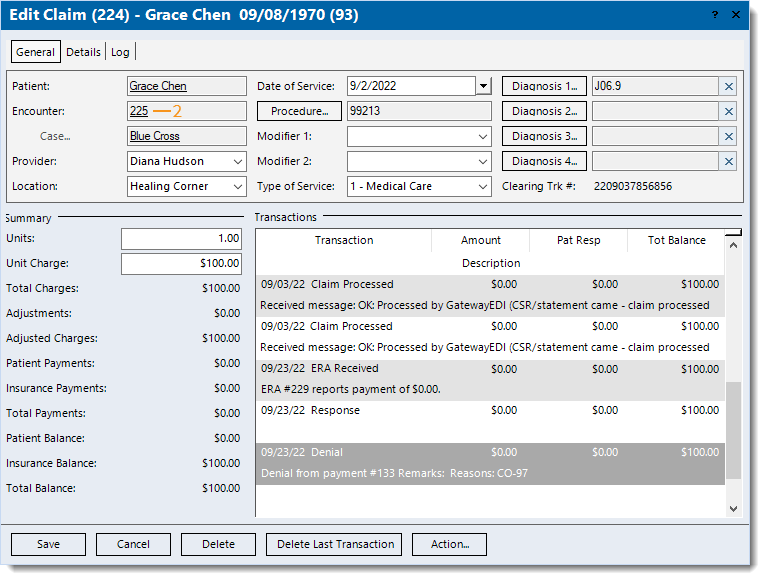
- Find the claim (service line) that was denied and double click to open. The Edit Claim window opens.
- Double click the Encounter ID number link. The Edit Encounter window opens.
Tip: Another way to access the encounter is to double click the Created transaction line under the Transactions section. The transaction line description includes the encounter ID number (e.g., Service line created from encounter #123).
|
 |
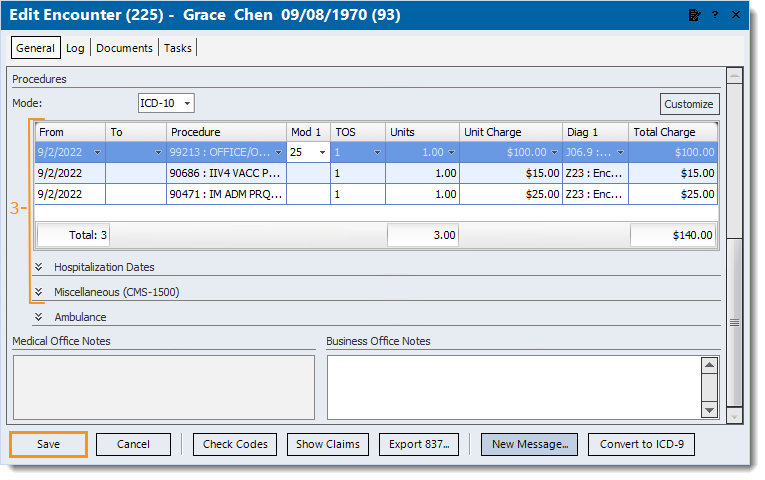
- Make the necessary correction(s) to the denied service line(s) and Add Submit Reason and Payer Assigned Number.
- Click Save. The Edit Encounter window closes and returns to the Edit Claim window.
|
 |
- Double click the Encounter ID number link to open the Edit Encounter window again. Then, click Show Claims. All claims (service lines) associated with the encounter are listed.
- If the Edit Claim window was closed after saving the encounter, find all the claims (corrected and settled service lines) associated with the encounter.
- Select the settled service line(s) (indicated with a Completed claim status) and right click or click Action to access the Action menu and reopen the line(s). Once applied, the claim status updates to Pending insurance.
|
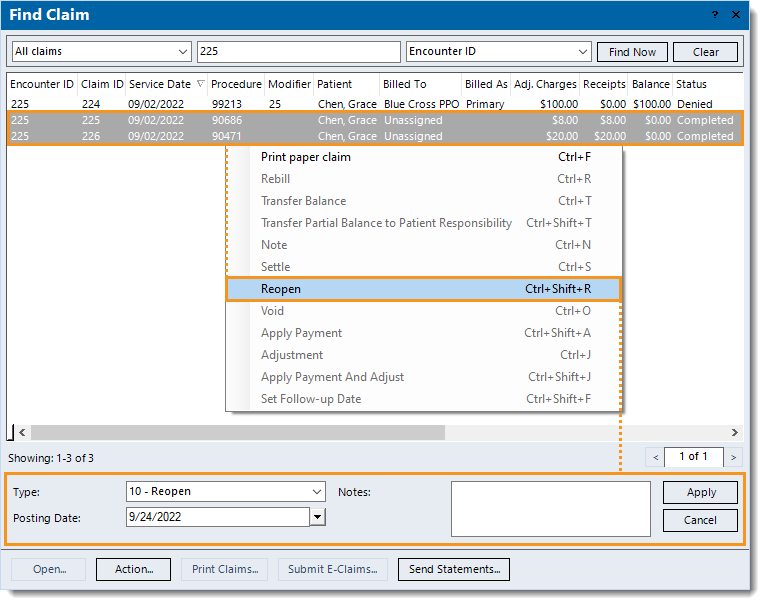 |
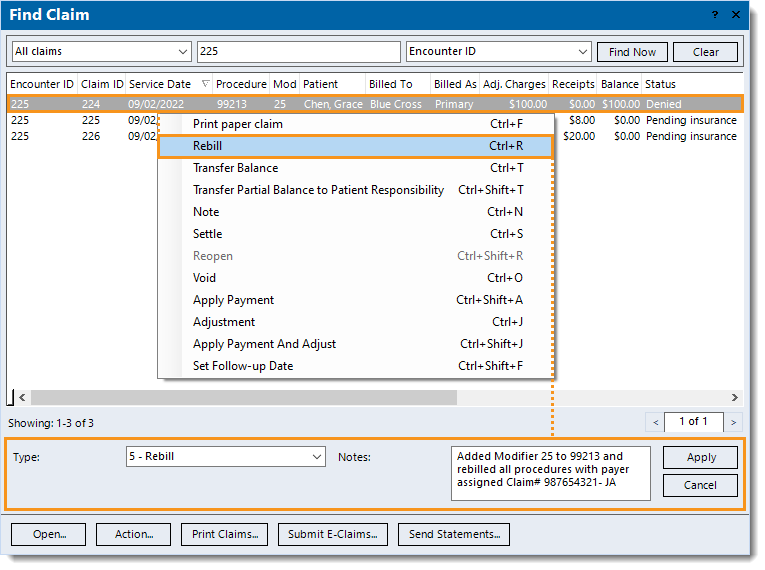
- Select the previously denied service line(s) and right click or click Action to access the Action menu and rebill the line(s). Once applied, the confirmation pop-up appears.
Note: It is recommended to enter Notes detailing the actions taken to resubmit the claim(s).
- Click Yes to rebill all of the claims related to the encounter. The claim status for all associated claims are updated to Ready to send claims.
Once all corrective actions are complete, resubmit all affected claims.
|
 |
Add Additional Procedures to the Encounter for Resubmission
Follow the steps below to void the original claim(s) associated with the encounter (that needs additional service lines) and recreate the encounter with the additional service lines for resubmission.
- Find the claim and double click to open. The Edit Claim window opens.
- Under the Transactions section, scroll if necessary to review and notate any transaction details needed for the recreated encounter and associated claim(s) notes.
Tip: Depending on the type of transaction line, hover over or right click and select Copy or View Details to copy or view additional information related to the transaction if applicable.
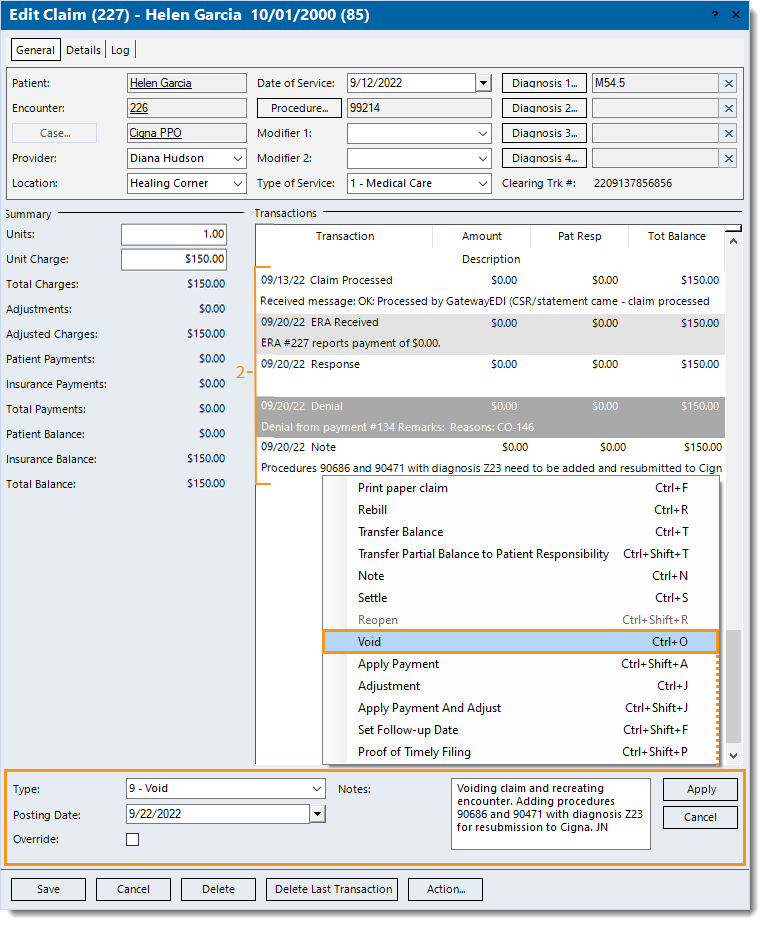
- Click Action to access the Action menu and void the claim. Once applied, the claim is voided and the status updates to Completed.
- If there are additional claims (service lines) associated with the same encounter that should be voided, repeat steps 1-3 as necessary.
|
 |
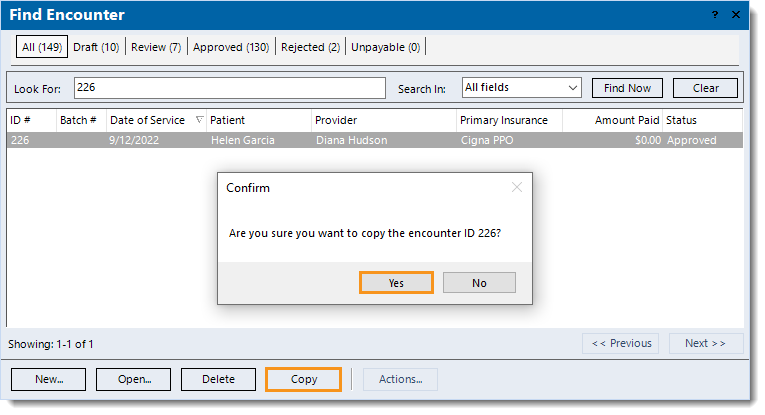
- Find the original encounter associated with the now voided claim(s) and click to select it > Copy. A confirmation pop-up appears.
- Click Yes to confirm. The Edit Encounter window opens.
|
 |
- Review all copied data for accuracy and enter the following information.
- Under the Dates section, enter the appropriate date(s) of service (as entered on the original claim submitted).
- Under the Procedures section, enter the appropriate date(s) of service (as entered on the original claim submitted) and the additional procedure(s) needed.
- Under the Miscellaneous section, Add Submit Reason and Payer Assigned Number.
Note: The submit reason and payer assigned number does not need to be added for a claim that is not on file with the payer (e.g., the claim was rejected and not forwarded for payer adjudication).
- When finished, click Approve.
Note: It is recommended to find the claim(s) associated with the encounter. Then, select and use the Action menu to add a note detailing the actions taken to resubmit the claim(s).
|
 |
Add Submit Reason and Payer Assigned Number
Follow the steps below to add the submission reason and payer document/claim control number after making the necessary corrections for claim resubmission depending on the situation.
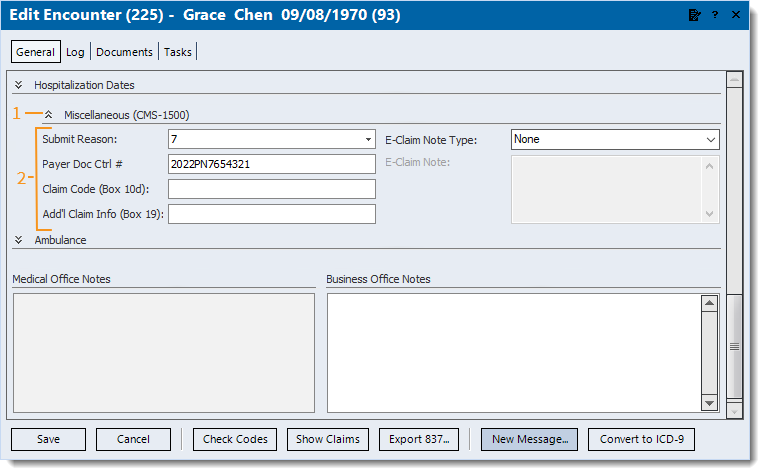
- On the encounter, scroll if necessary to the Miscellaneous section then click the double arrows. The Miscellaneous section expands.
- Enter the information.
- Submit Reason: Click to select code 7 (or 6 or 8 as required by the payer).
Note: Most Medicare payers only accept claim submission reason 1, and although submission reason 7 is widely accepted by all other payers, some payers may require 6 or 8 depending on the situation. To prevent further delay, confirm directly with the payer for their specific requirements when resubmitting claims.
- Payer Doc Ctrl #: The payer assigned reference number for the denied claim.
Tip: The payer assigned number can be found on the electronic (ERA) or paper remittance advice reporting the denial. For ERAs, it is indicated as the Payer Claim Control Number, and for paper remits, it is commonly indicated as the Claim #. If unsure, confirm with the payer directly.
- If the payer requires the Submit Reason to appear in other areas of the claim, do the following as necessary.
- For paper claims, enter the information as follows:
- Claim Code (Box 10d): Enter up to 19 characters to report appropriate claim codes to identify additional information about the claim.
- Add'l Claim Info (Box 19): Enter up to 71 characters to identify additional information about the claim.
- For e-claims, click the E-Claim Note Type drop-down arrow and select Additional Information. Then, enter the required information as an E-Claim Note.
- Continue as necessary.
|
 |