Updated: 09/19/2023 | Views: 3981
Self-Pay Only enabled practices can now view and manage patient payments in the web platform. Users with the System Admin and/or Biller roles can view payment details and history, apply and unapply payment amounts, post adjustments, record refunds, and settle or reopen charges.
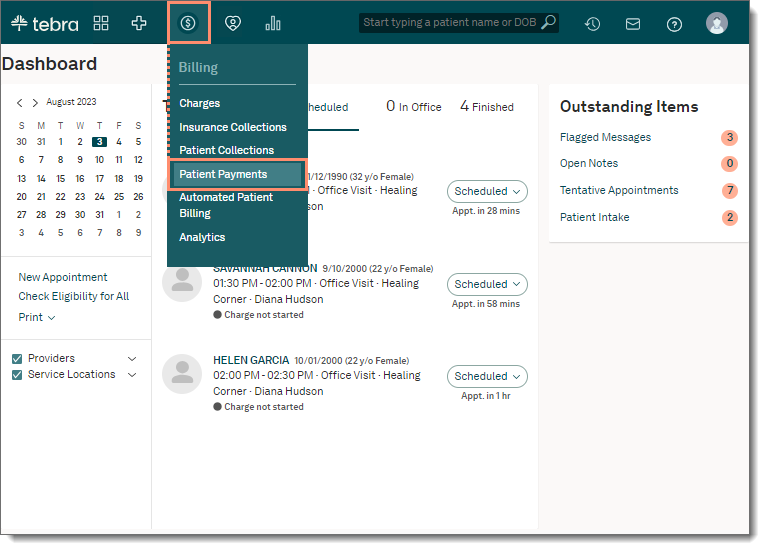
Access Patient Payments
- Hover over the Billing icon and click on Patient Payments. The Patient Payments page opens.
|
 |
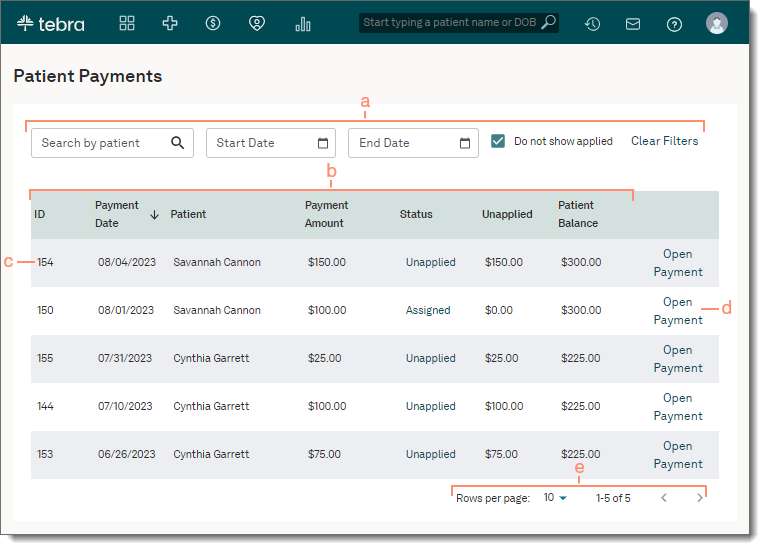
Navigate Patient Payments
- Filters: By default, all unapplied and assigned patient payments display.
- To filter by specific criteria:
- Patient search box: Start typing the patient name to select.
- Start Date and End Date: Enter a specific date range.
- "Do not show applied": Selected by default and displays unapplied and assigned payments only. To display all patient payments, click to clear the selection.
- To reset the filters back to the default settings, click Clear Filters.
- Columns: To sort by ascending or descending, hover over the column header and click the arrow.
- Payment Details: Displays the payment ID, Payment Date, Patient, Payment Amount, Status, Unapplied, and Patient Balance.
Note: Payment statuses include Unapplied, Partially Applied, Applied, and Assigned (payments assigned to charge captures that have not yet been approved).
- Open Payment: To view additional payment details (e.g., patient and payment information, history), and/or take applicable actions (e.g., apply payment amounts, post adjustments, record refunds, settle or reopen charges), click Open Payment.
- Pagination: By default, each page displays up to 10 payments.
- To change how many appointments are displayed per page, click the Rows per page drop-down and select 10, 25, 50, or 75.
- To navigate forward or back, click the arrows.
|
 |
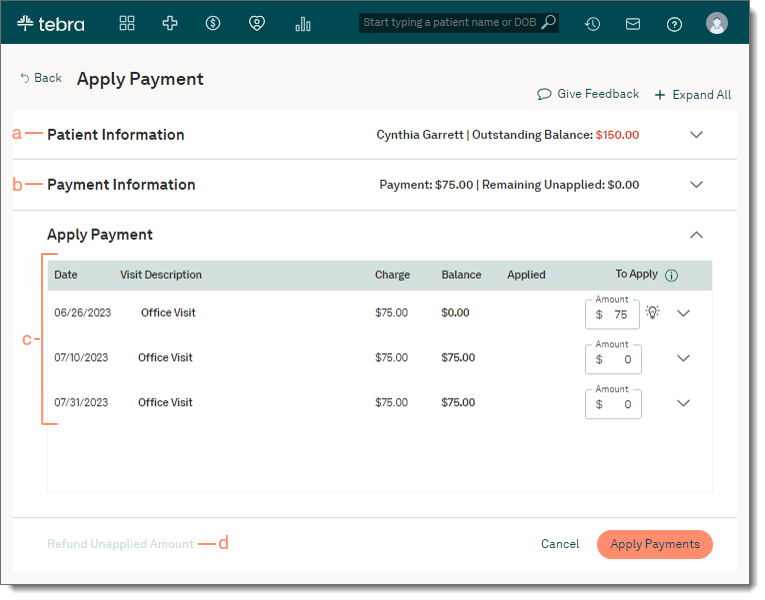
Navigate Open Payment
- Patient Information section: Collapsed by default. To view the patient's date of birth and phone number, click the arrow to expand the section.
- Payment Information section: Collapsed by default. To view the payment date, payment method, assigned amount, and notes related to the payment, click the arrow to expand the section.
- Apply Payment section: Expanded by default and displays visits with open balances.
- Date: The date of the visit.
- Visit Description: The Visit Reason selected for the appointment associated with the charge capture.
- Balance: The remaining balance amount depending on the payment amount entered under the To Apply column.
- Applied: The total of previously applied payment amounts.
- To Apply: By default, the unapplied payment amount is automatically distributed to the visit(s) starting from the oldest to newest visit date.
- To apply a different payment amount to the visit(s), enter the appropriate amount(s).
- Expand visit arrow: To view visit details (e.g., history, service line breakdown) or apply additional actions (e.g., adjustment, settle, reopen, unapply) at the visit or service line level, click the arrow to expand the section.
- Refund Unapplied Amount: Available when there is a remaining unapplied payment amount. To record a refund for the unapplied payment amount, click Refund Unapplied Amount.
|
 |