Updated: 01/08/2026 | Views: 25982
With the New Practice Setup wizard, setting up a practice takes about 30 minutes or less. This wizard guides you in completing all necessary data fields for setting up a practice so that you can quickly begin the billing process.
The setup wizard launches if you:
- Sign into the Desktop Application (PM) and have no practices set up.
- Select an existing practice for which the setup was not completed.
- Add a new practice to the Tebra account.
Note: If you are adding an additional practice to your Tebra account, the insurance companies and plans that have already been set up can be shared between those practices; however, patient records cannot be shared.
New Practice Setup
- Click Settings > Company > New Practice. The New Practice Setup wizard launches.
Note: To prevent duplication when there are multiple practices, find the practice first and verify it is not in the system. Then, click New at the bottom of the Find Practice window and continue to step 2.
|
 |
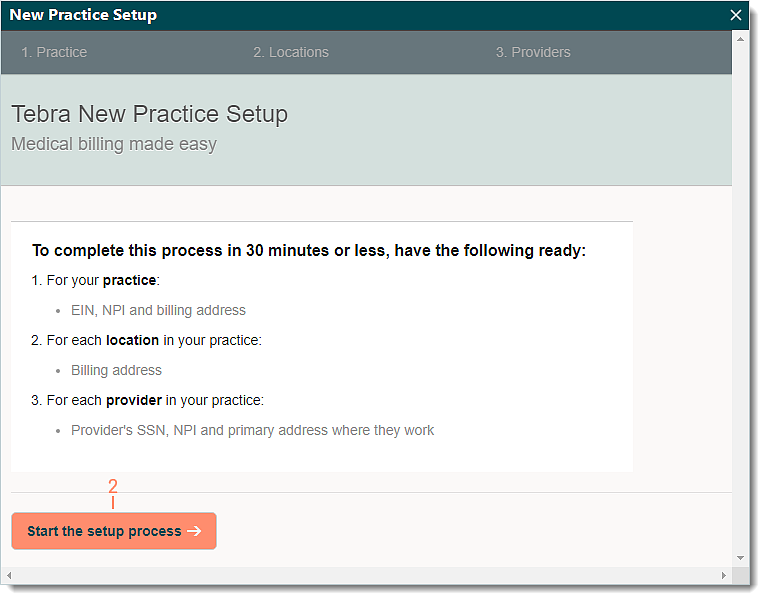
- Click Start the setup process. The first step, New Practice Setup, displays.
Note: To complete the process without delay, have the listed information readily available. If the setup wizard is exited at any time, the information entered will be saved.
|
 |
- Enter the practice information.
- Practice Name: The name for the practice.
- Address line 1, Line 2, City, State, and ZIP: The physical address (not a PO Box) of the practice.
- Practice EIN: The Employer Id Number assigned to the practice by the IRS.
- Group NPI number: The National Provider Identifier used when the provider is credentialed to bill payers as a group.
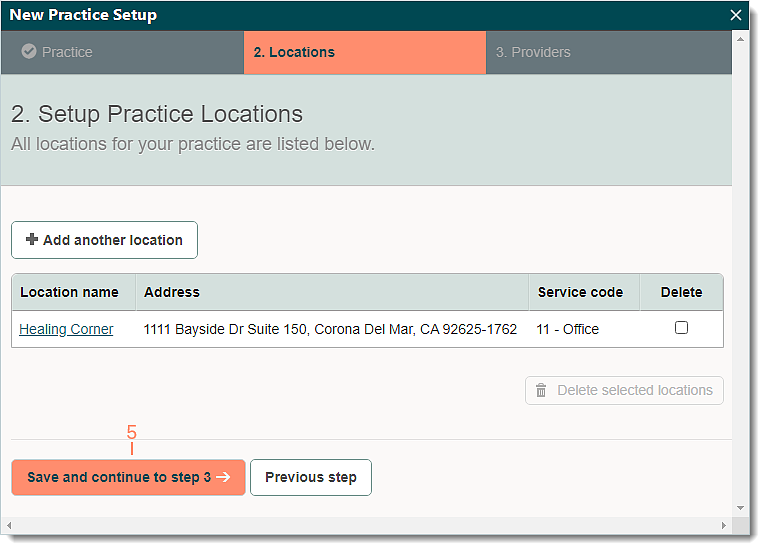
- Click Save practice and continue to step 2. The second step, Setup Practice Locations, displays.
|
 |
- Click Save and continue to step 3. The third step, Add Your Medical Providers, displays.
- To add more service locations, click + Add another location.
- To edit a listed service location, click the location name. Edit Location displays.
- To delete a service location, click to select the checkbox under the Delete column for the location. Then, click Delete selected locations.
|
 |
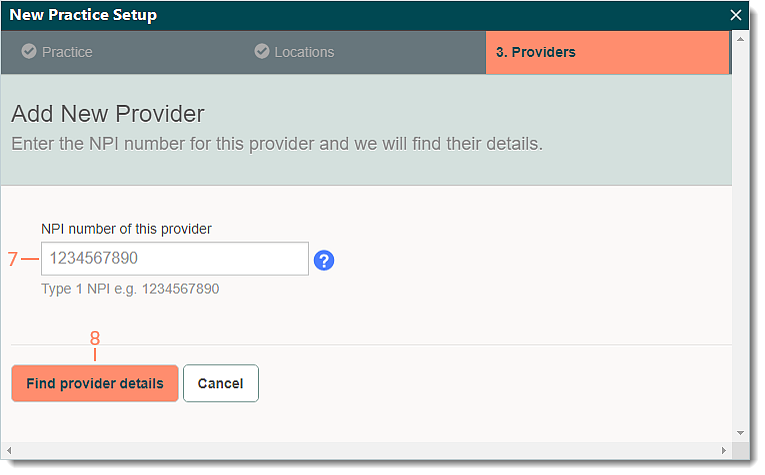
- Click + Click here to add a provider. Add New Provider displays.
|
 |
- Enter the NPI number for the provider.
- Click Find provider details. The provider details display.
- If the NPI could not be found, the Warning pop-up message displays. To continue with the entered NPI, click Continue.
|
 |
- Enter or edit the provider information as necessary.
- NPI: The individual National Provider Identifier assigned to the provider who is providing services.
- First name, Middle, Last name, and Degree: The provider's full name and degree (e.g., MD, PhD).
- Email Address: The email address associated with the provider's Tebra user account.
 Important Note: Do not use a staff member's email address for providers. Use the provider's valid email address or create a temporary user and update it at a later time. Important Note: Do not use a staff member's email address for providers. Use the provider's valid email address or create a temporary user and update it at a later time.
- Main location/address: Click to select the main location for the provider in the drop-down menu.
- If the address is not listed, click Enter a new address for this provider.
- Primary taxonomy code: The provider's taxonomy.
 Tip: Click Lookup taxonomy codes to search for taxonomy name or specialty. Tip: Click Lookup taxonomy codes to search for taxonomy name or specialty.
- Social security number: The provider's social security number (SSN) may be appropriate for providers that are credentialed to bill with their SSN.
- How the provider is credentialed: Click to select how the provider is credentialed to bill in the drop-down menu.
Note: Confirm with the payer(s) directly if there is any uncertainty.
- Click Save provider. Add Your Medical Providers again displays.
|
 |
- Click to select the listed provider checkbox(es) to add the provider(s) to the practice.
- To add more providers, click + Add another provider. Then repeat steps 7-10.
- To edit a listed provider's details, click the provider name. Edit Provider displays.
- To delete a listed provider, click the provider name. Edit Provider displays then click Delete in the lower right of the window.
- Click to select the acknowledgement to be billed for the added provider(s). For details, review Tebra's pricing and billing policies.
- Click Save and finish the setup process. The Practice Setup Complete confirmation window opens.
|
 |
- Click Go to my Practice Home to open the practice.
- If any changes or future additions need to be made, access the Settings menu from the Practice Home.
|
 |