Updated: 01/23/2025 | Views: 309
Tebra Payments activated customers have the ability to run payouts reports to validate and reconcile payment activity. System Administrators and users with the Business Manager, and/or Biller web user roles can filter, sort, view, and manage payout information, including net amounts and fees. Additionally, the payouts report can be customized and exported as a CSV or Excel file.
Note: To access the Payouts report in the web platform, review Navigate Payouts.
Navigate to Payouts Report
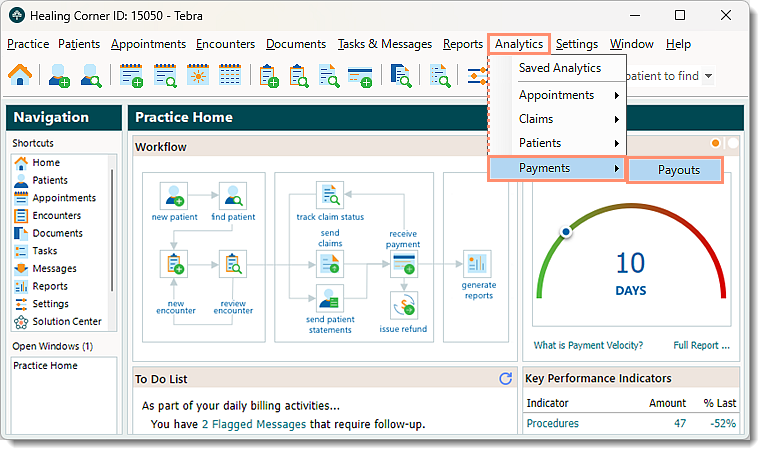
- Click Analytics > Payments > Payouts. The Payouts report opens.
|
 |
Navigate Payouts Report
The Payouts report can be customized to include specific data and how the data displays.
Note: Customization of the report does not save. Once a user closes the report, the default report view displays when the report is opened again. To save a customized report, the report can be exported as a CSV or Excel file.
- Search: Click the search icon to search for specific report data.
- Refresh Data: Click the refresh icon to refresh the report data as necessary.
- Table Filters: By default all payouts display.
- To filter by specific date or date range, click the filter icon and add the Date Range filter. Then, enter the Start Date and End Date or select a date range option.
- To remove a filter, click X.
- Table Configuration: Click the gear icon to adjust the table density (e.g., Compact, Standard, Comfortable) and/or manage the table columns to hide/show a column.
- Table Actions: Click to export the report to CSV or Excel.
|
 |
- Columns: Customize the report to only display specific columns and in the preferred order. Available options depend on the column data.
- To reorder the columns, click the column header then drag and drop in the preferred order.
- To sort by ascending or descending, hover over the column header and click the arrow.
- To sort more than one column, hold down the Shift key on the keyboard and click to select the column(s).
- To sort, unsort, hide or manage columns, hover over the column header and click the more options icon.
- To group all records by a specific column, hover over the column header and click the more options icon. Then, select Group by (column name).
Note: Once applied, an additional column displays with the grouping.
- To aggregate a column by size (count), sum, average, etc., hover over the column header and click the more options icon. Then, select the appropriate option from the Aggregation drop-down menu.
Note: Once applied, values display at the footer of the report table and at the group level when grouping data.
- Payout Summary: Scroll as necessary to view information.
- Date: Displays the date the payout was made.
- Bank Account: Displays the account type and the last four digits of the account number the payout was deposited to.
- Trace ID: Displays the trace identifier (ID) of the payout.
Note: Provide the bank the trace ID to troubleshoot issues (e.g., missing payment).
- To copy the ID, hover over and click the trace ID. The ID is copied to the clipboard.
- Transactions: Displays the amount of transactions included in the payout.
- Gross Charges: Displays the total transactions amount before fees.
- Fees: Displays the amount of fees deducted from the gross charges (total transactions amount).
- Net Payout: Displays the payout amount deposited into the practice's bank account.
|
 |
View Payout Details
- Navigate to the Payouts report then click the payout date under the Date column. The Payout Detail information displays.
- Trace ID: Displays the trace identifier (ID) of the payout.
Note: Provide the bank the trace ID to troubleshoot issues (e.g., missing payment).
- Payout Breakdown:
- Total Amount Processed: Displays the sum of all transactions processed within the batch that was paid out.
- Refunded: Displays the sum of all refunds issued within the batch.
- Tebra Transactions Fees: Displays the sum of transaction processing fees for the batch that was paid out.
- Additional Fees & Adjustments: Displays the sum of other fees and adjustments if applicable (e.g., chargebacks, change requests, etc.) Review the Pricing Policy to learn more about other fees.
- Total Payout: Displays the payout amount deposited into the practice's bank account after all fees, refunds, and adjustments.
|
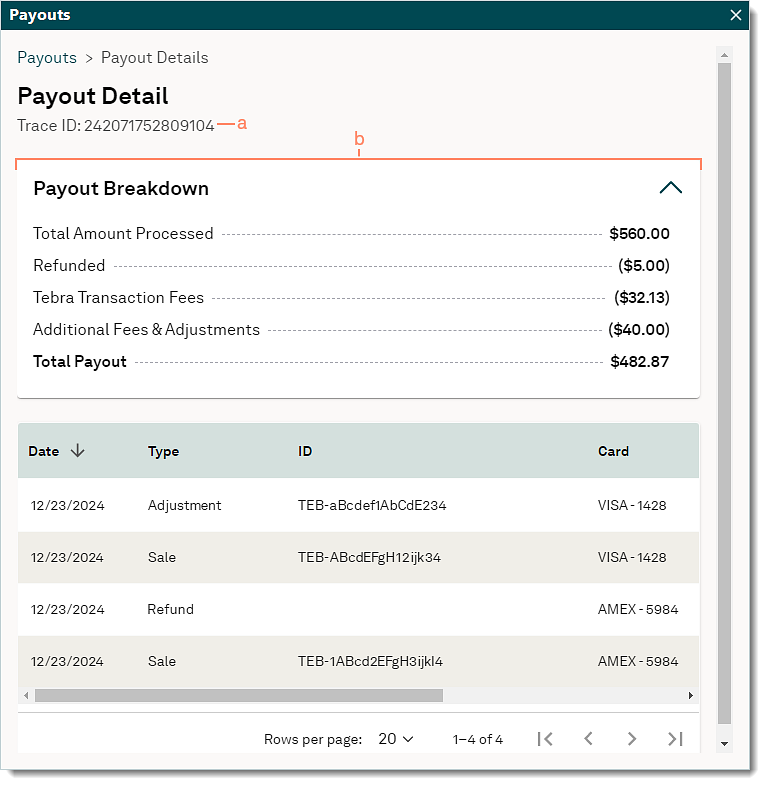 |
- Payout Details:
- Columns: Customize to only display specific columns and in the preferred order.
- To reorder the columns, click the column header then drag and drop in the preferred order.
- To sort by ascending or descending, hover over the column header and click the arrow.
- To sort more than one column, hold down the Shift key on the keyboard and click to select the column(s).
- To sort, unsort, hide or manage columns, hover over the column header and click the more options icon.
- Date: Displays the date and time the transaction was made.
- Type: Displays whether the transaction is a Sale (e.g., patient payment), Refund, or Adjustment.
- ID: Displays the transaction identifier (ID) assigned by Tebra.
Note: Provide Customer Care the transaction ID to troubleshoot issues (e.g., refund failed).
- To copy the ID, hover over and click the transaction ID. The ID is copied to the clipboard.
- Card: Displays the payment card type and last 4 digits of the card used to complete the transaction.
- Charged: Displays the transaction amount.
- Fees: Displays the amount of processing fees deducted from the gross charges (total transactions amount).
- Net: Displays the payout amount after fees are deducted.
- Pagination: By default, each page displays up to 20 payouts.
- To change how many payouts are displayed per page, click the Rows per page drop-down and select 10, 20, 50, or 100.
- To navigate forward or back, click the arrows.
|
 |