Updated: 08/16/2024 | Views: 2102
Telehealth is the next generation HIPAA compliant video visit solution. Telehealth visits can be conducted on a computer or mobile device. Providers can optionally complete a pre-call test prior to joining a telehealth visit to help identify potential technical issues.
The pre-call test ensures the provider's camera, speaker, microphone, and network connection is working properly for the visit. If any issues are detected, providers can review Telehealth Visit Best Practices and Troubleshooting for best practices and troubleshooting tips. Additionally, the providers can enable low data mode which lowers the resolution of their video feed to improve call performance.
Review Patient Experience: Telehealth Visit to learn more about the patient's view.
Access Telehealth Visit
Providers should join the Telehealth visit from the Dashboard to be granted host permission. This will give the providers the ability to approve or deny participants access to the visit room.
- Click Join on the Scheduled telehealth appointment. The video appointment opens in a new browser window.
Note: The button to join is accessible for all users in the practice. It displays 30 minutes before the appointment start time and remains available until 2 hours after the appointment end time.
- If necessary, activate the microphone and camera. Click Request permissions.
- Click Allow to use the microphone and camera.
|
 |
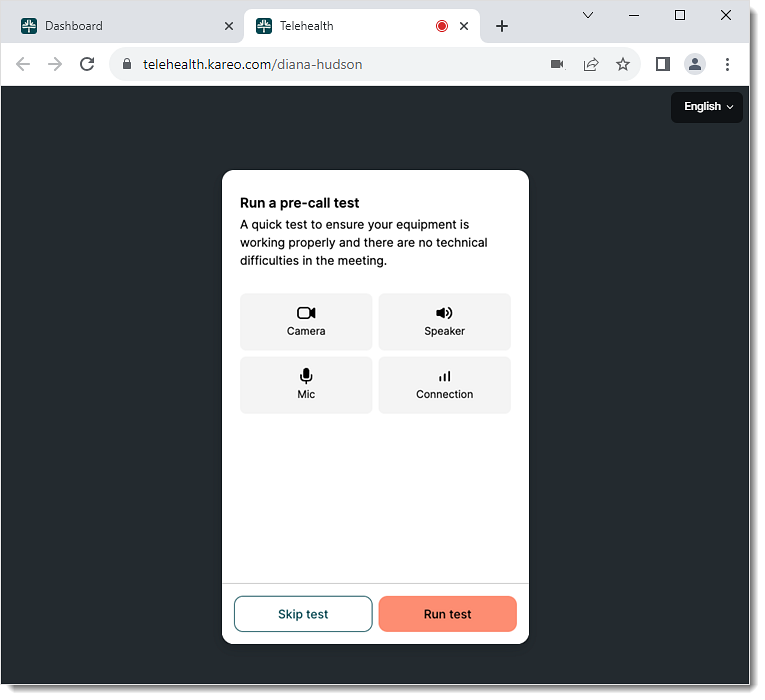
Run Pre-Call Test
The pre-call test is optional for providers and they can choose to skip the test.
- Click Run test to start the test.
- To join the visit without completing the pre-call test, click Skip test.
|
 |
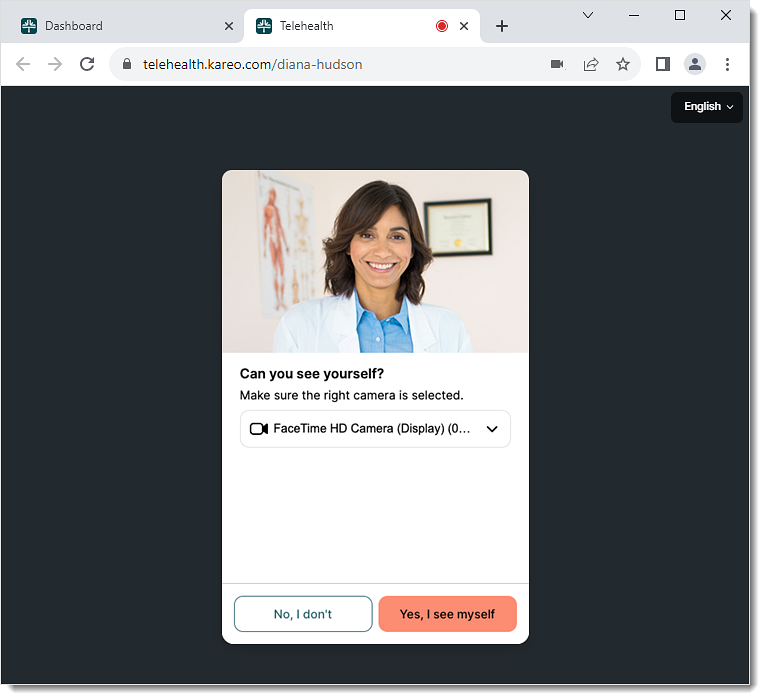
- Verify camera: Select the appropriate video source and the provider verifies they can see themselves.
- Click Yes, I see myself to continue.
- If the provider cannot see themselves, click No, I don't.
|
 |
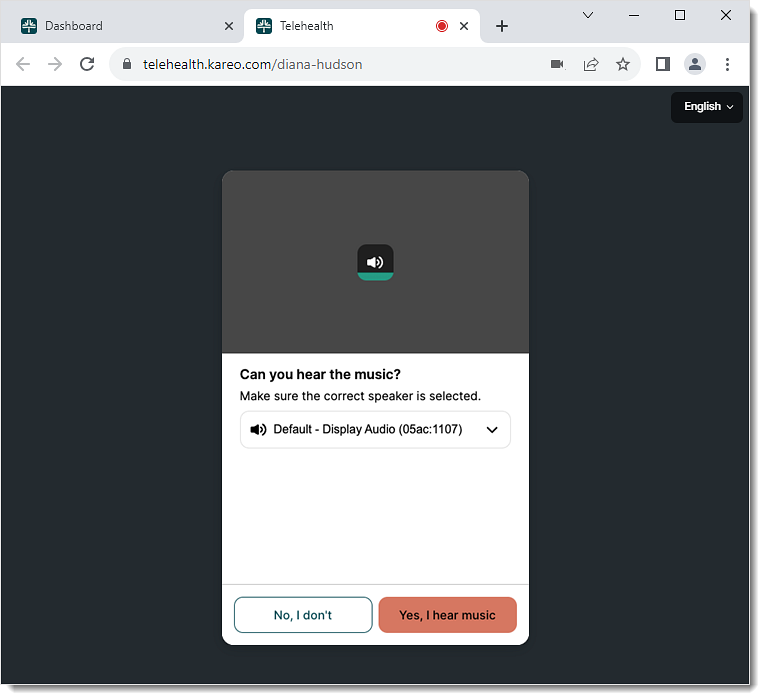
- Verify speaker: Select the appropriate speaker source and the provider verifies they can hear the system generated music.
- Click Yes, I hear music to continue.
- If the provider cannot hear the music, click No, I don't.
|
 |
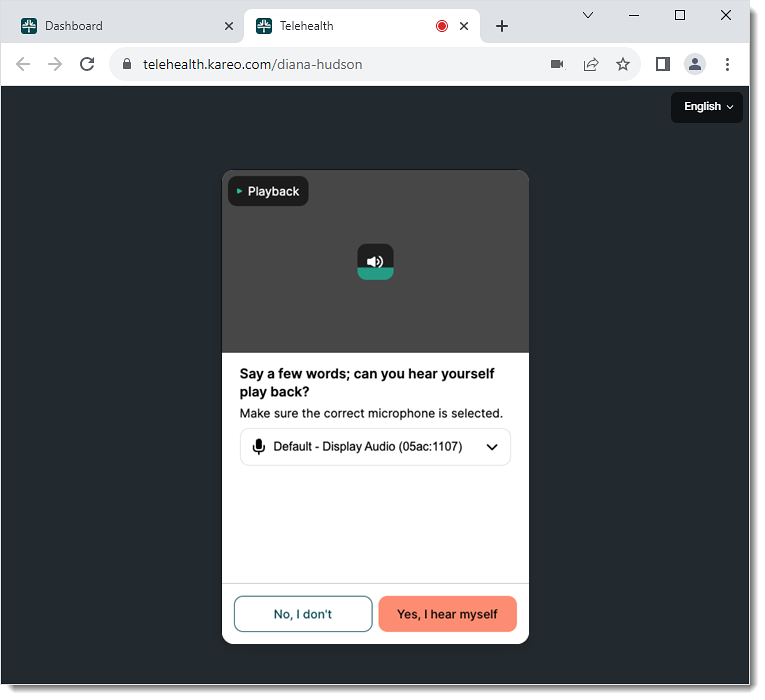
- Verify microphone: Select the appropriate microphone source. The provider records a short audio clip and verifies they can hear the playback.
- Click Yes, I hear myself to continue.
- If the provider cannot the hear recording, click No, I don't.
|
 |
- Connection: The system automatically tests the network connection speed.
|
 |
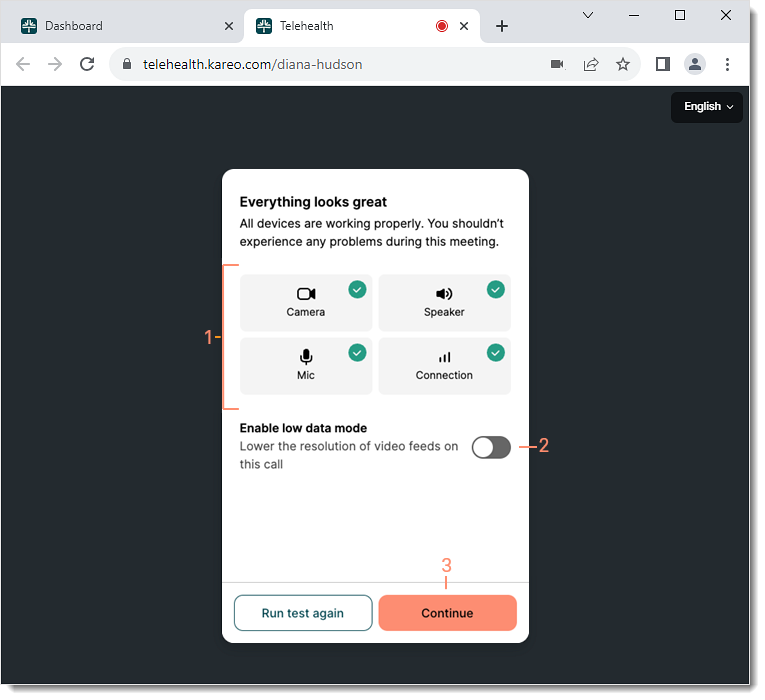
Test Results
- Review the results: A green check mark icon indicates the equipment is working. A red x icon indicates the equipment may not be working properly. For network connections only, a yellow question icon indicates the network connection may be unstable.
- If all equipment is working properly, proceed to step 2.
- If issues are detected, click Help me fix this to review Telehealth Visit Best Practices and Troubleshooting for best practices and troubleshooting tips.
Note: If necessary, proceed to step 2 without resolving the issues. However, this may impact the visit performance.
- To repeat the test after troubleshooting, click Run test again. Then, proceed to step 2 when the issues are resolved.
- If applicable, click the Enable low data mode toggle to lower the resolution of the videos and improve visit performance.
- Click Continue to join the telehealth visit room.
|
 |