Updated: 06/09/2023 | Views: 2328
System Administrators and Providers can copy another user's custom note type and modify it for their own purpose. After entering a new name for the note, sections can be added, removed, renamed, or rearranged, as desired. Users who've been assigned the System Admin role can copy any note type created within the practice. Providers can copy another user's custom note type if it is published/shared.
Access Note Types
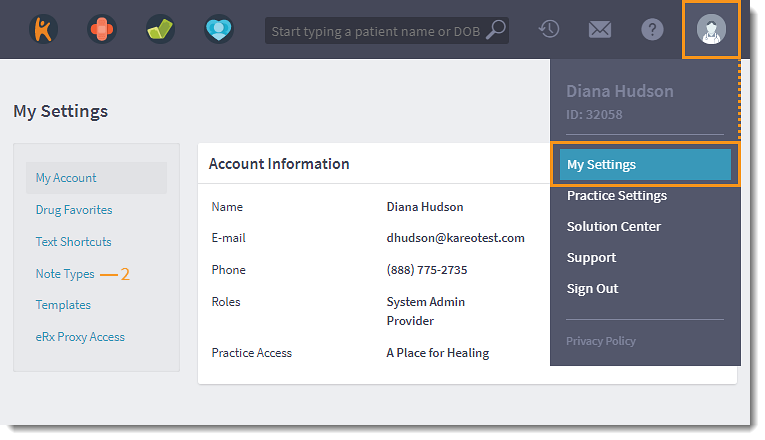
- Hover over the User icon and click on My Settings. The My Settings page opens.
- Click Note Types. The Note Types page opens.
|
 |
Copy Custom Note Type
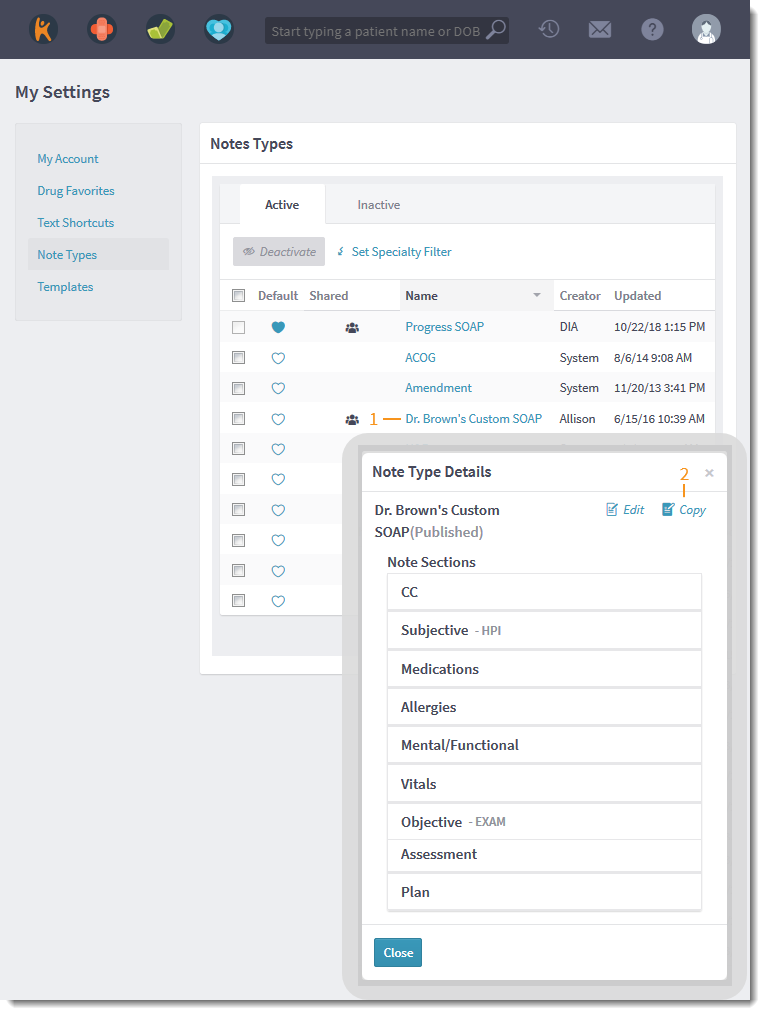
- Click the name of the custom note type to copy. The Note Type Details pop-up window opens.
- Click Copy. The Create Note Type pop-up window opens.
|
 |
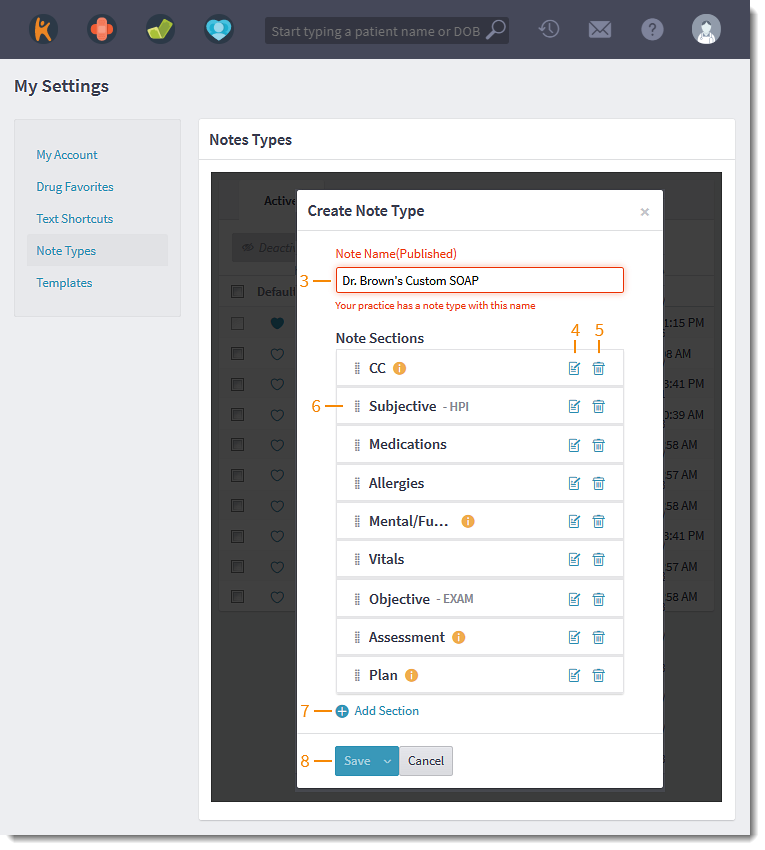
- Enter a Note Name for the custom note.
- To rename a section, click the edit icon. The Edit Section editor opens. Then, enter the new Section Name and click Save.
- To remove a section from the note, click the trash icon.
- To reorder the list, click and drag the bar icon.
- To add a new section, click +Add Section. The Add New Section pop-up window opens. Click the plus icon in each section to add to the note.
- Save the note when finished.
- To save changes, click Save. The new note type will be available to you and other System Admins.
- To share the custom note with all users in the practice, click the drop-down arrow and select Save and Publish. Once shared, the new custom note type displays as an active note type for all users.
Note: Published notes cannot be unpublished, however, they can be deactivated.
|
 |


