Kareo and PatientPop are now Tebra. Becoming Tebra will take time and we appreciate your patience as we transition to the new brand experience.Learn More
Tebra Help Center

Deactivate or Reactivate Allergy

Updated: 12/15/2023|Views: 695

Mark the patient's allergy as inactive to indicate the allergy is resolved or no longer applicable. If necessary, the deactivated allergy can be reactivated at a later time.

If the allergy was incorrectly added, mark the allergy as an error.

Access Patient Allergies

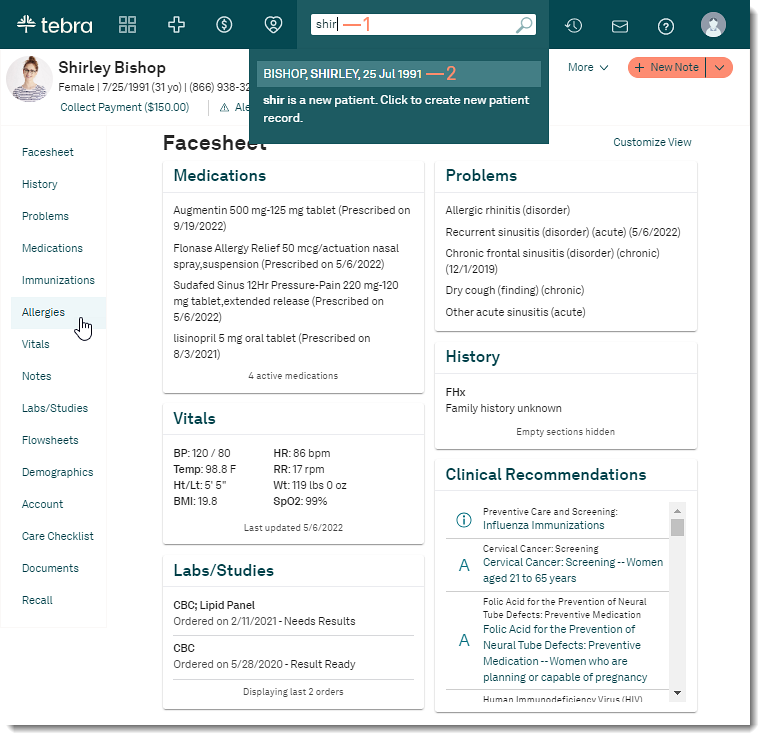
  1. Enter the first 2–3 letters of the patient's name or date of birth (mm/dd/yyyy) in the top navigation bar search box.
  2. Click to select the patient from the auto-populated results. The patient's Facesheet page opens.
  3. Click Allergies. The Allergies page opens.
Clinical_Allergies_Access.png

Deactivate Allergy

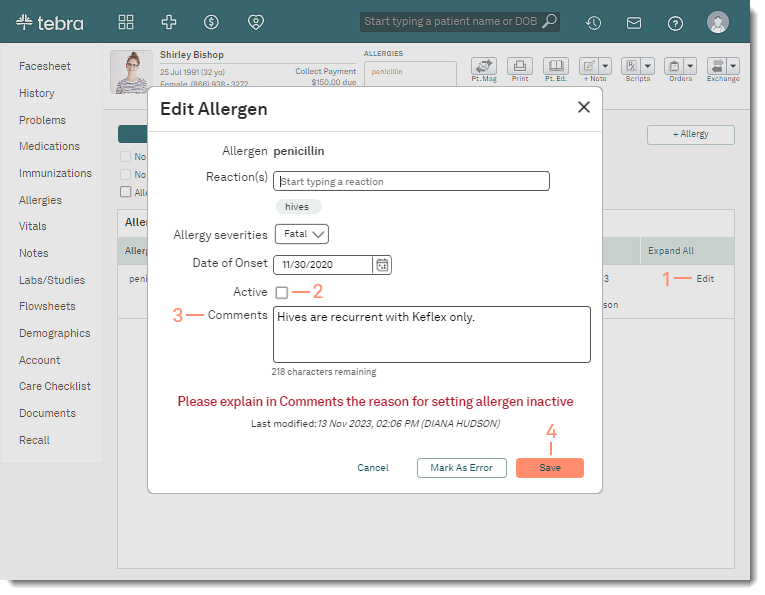
  1. Click Edit. The Edit Allergen pop-up window opens.
  2. Click to clear the "Active" checkbox.
  3. Enter the reason the allergen is being set as deactivated in Comments.
  4. Click Save when finished. The allergy is moved to the Inactive tab.
Clinical_Allergies_DeactivateAllergy.png

Reactivate Allergy

If necessary, reactivate an allergy to indicate the allergy is active.

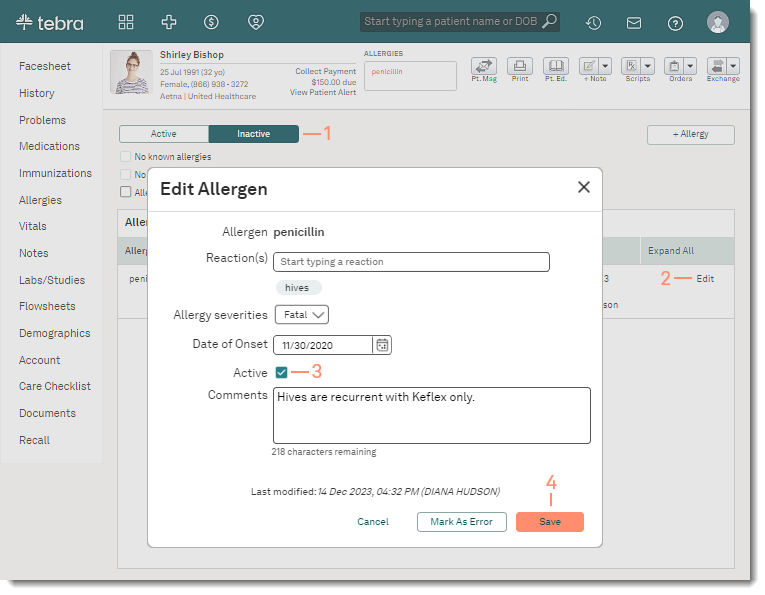
  1. Click the Inactive tab. The inactive allergies display.
  2. Click Edit. The Edit Allergen pop-up window opens.
  3. Click to select "Active".
  4. Edit or enter applicable notes about the allergy reactivation in Comments.
  5. Click Save when finished. The allergy is moved to the Active tab.
Clinical_Allergies_ReactivateAllergy.png
  • Was this article helpful?