Set Up Direct Messaging
Direct Message is a secure electronic messaging system that enables transmission of protected health information (PHI) when referring a patient to other authenticated providers. Upon initiating the first referral, you will be prompted to set up Direct Message and authentication with Updox. If you need assistance with the set-up process, contact Customer Care.
Access Direct Message Setup
|
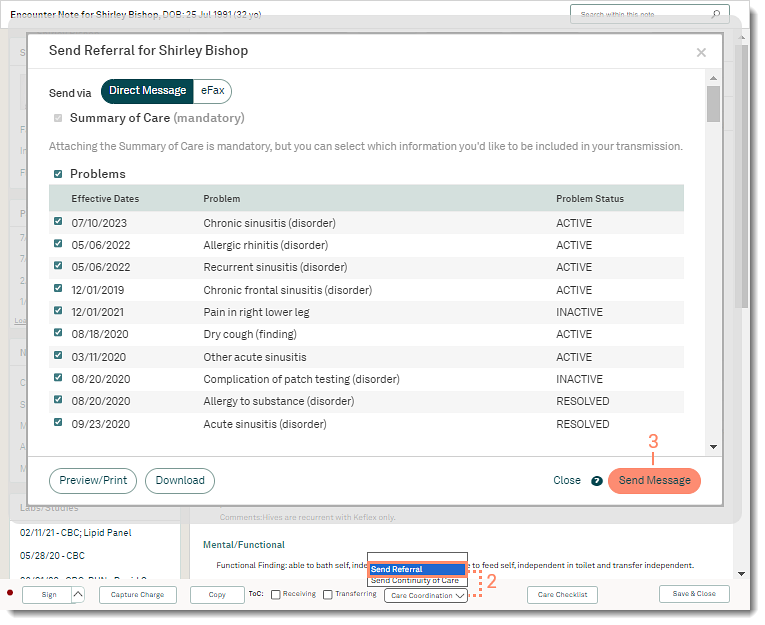 |
Create Domain NameIf this is the Direct Message initial setup for the practice, create a practice-wide domain name.
|
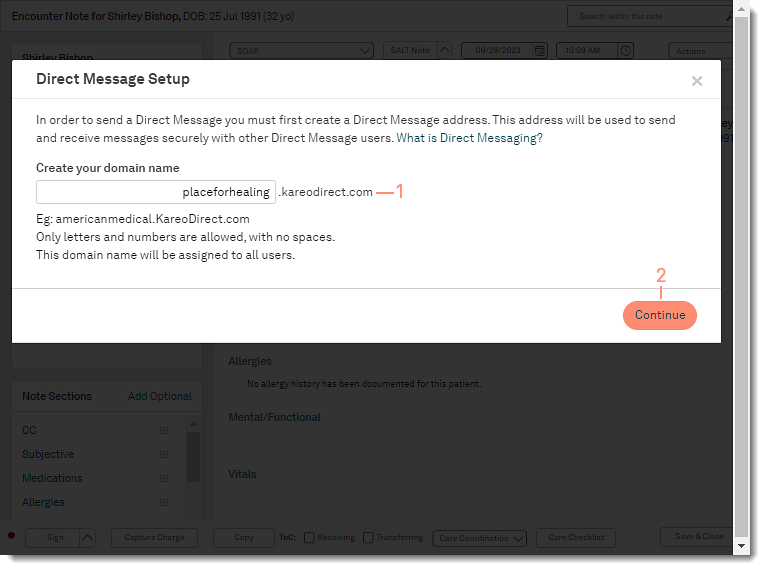 |
Create Username
|
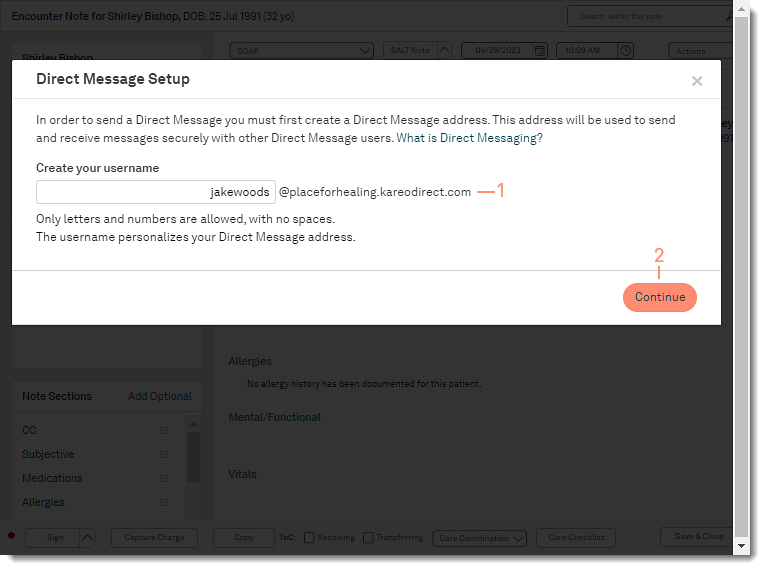 |
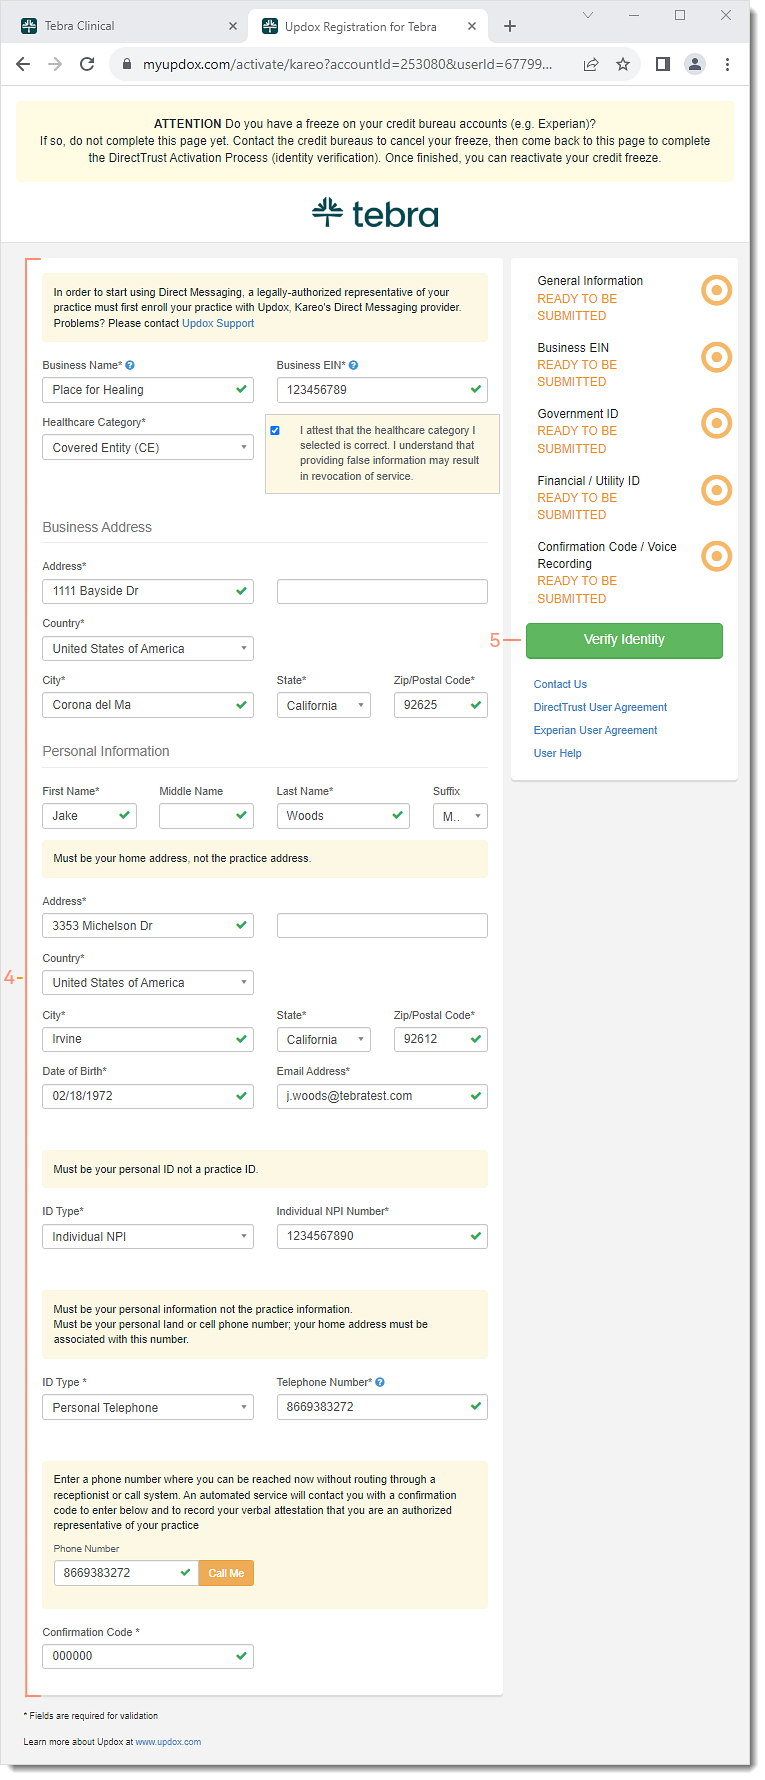
Direct Message AuthenticationA one-time authentication process must be completed by a legal representative of the practice. Once completed, the authentication is applied to the entire practice.
|
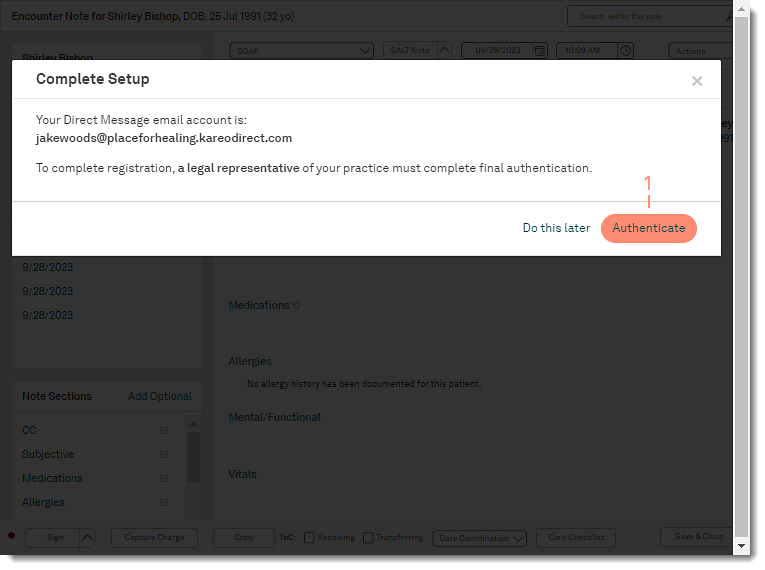 |
|
 |