Updated: 06/23/2023 | Views: 4903
Custom automated recall messages support return business for your practice by reminding patients when they are due for continuing care. Once a Patient Recall Message has been created, it can be applied to a patient record.
In order for a patient to receive patient communications:
- Automated patient communication preferences must be set on the Profile tab of the patient's Demographics page.
- An email address must be entered on the Profile tab of the patient's Demographics page.
Available for Engage subscribers.
Access Patient Communications
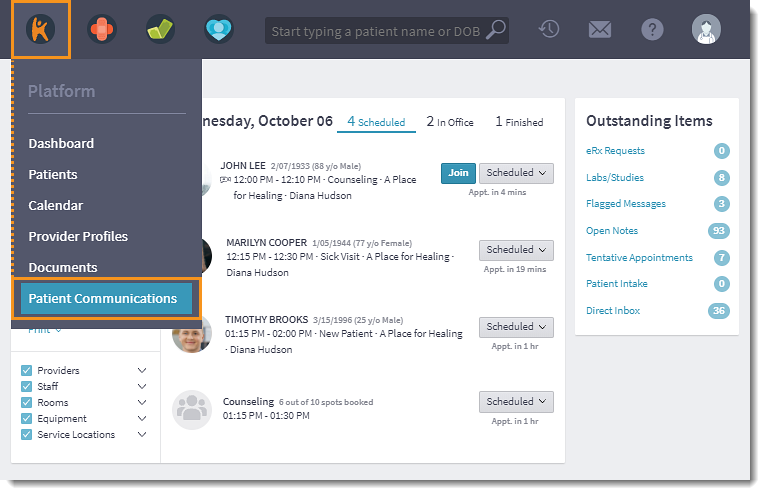
- Hover over the Platform icon and click on Patient Communications. The Patient Communications page opens.
- Click the drop-down arrow to select the provider these settings apply to.
- If applicable, click Turn on patient communications to activate Patient Communications for the provider.
|
 |
Create Patient Recall Message
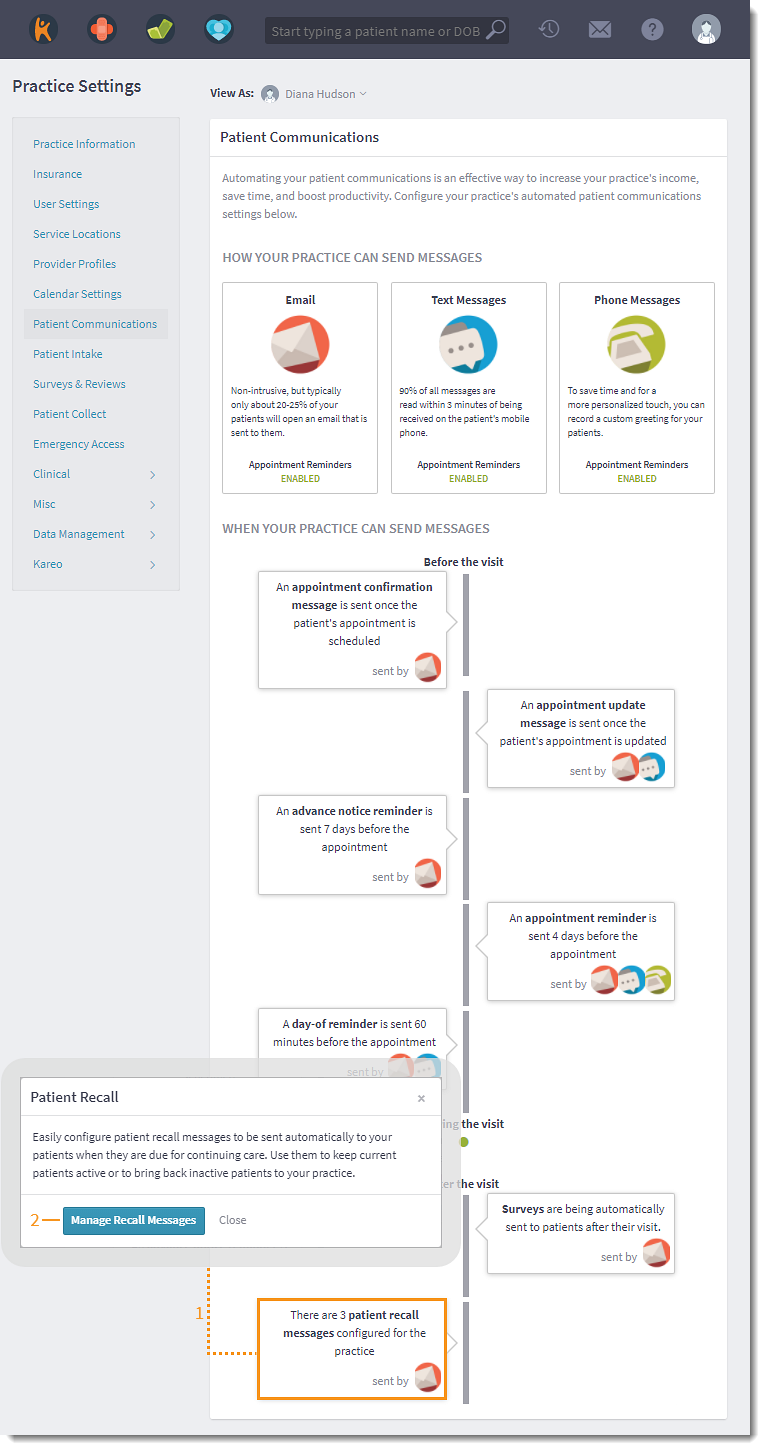
- Click the Patient Recall Message. The Patient Recall pop-up window opens.
- Click Manage Recall Messages. The Patient Recall page opens.
|
 |
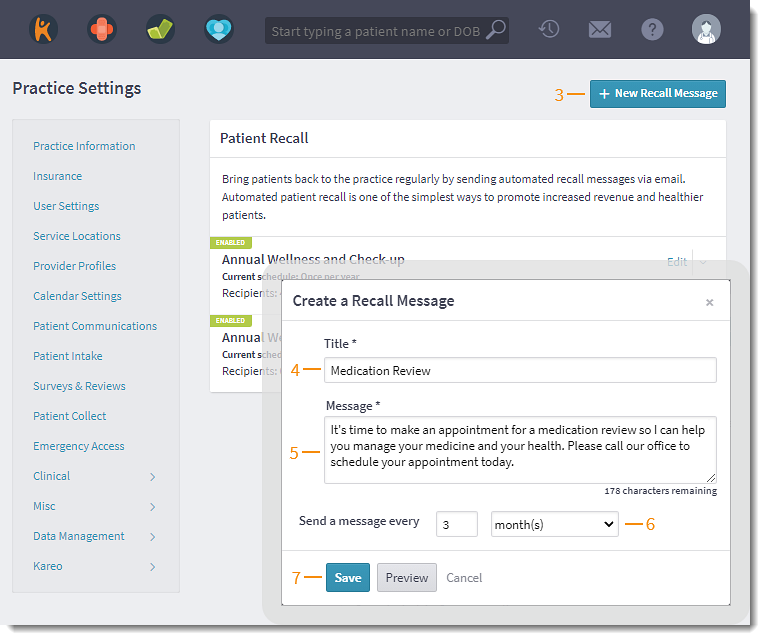
- Click + New Recall Message. The Create a Recall Message pop-up window opens.
- Enter a Title for the message. This will appear in the notice sent to the patient.
- Enter the Message text for this notice.
- Select the number of times and recurrence interval (week(s), month(s), year(s)) for sending the message.
- Click Preview to see how this message will look when sent to the patient.
- Click Save when finished. The recall message is added to the Patient Recall list.
|
 |


