Updated: 04/01/2026 | Views: 3712
Tebra helps manage patient appointments more efficiently. In Calendar Settings, you can set color-coded blocks for schedules and breaks, making it easier to adjust availability. Practices can specify provider locations, preferred patient types, and break times. Once set, these blocks appear as color-coded zones on the calendar with labels to indicate their purpose.
Access Calendar Settings
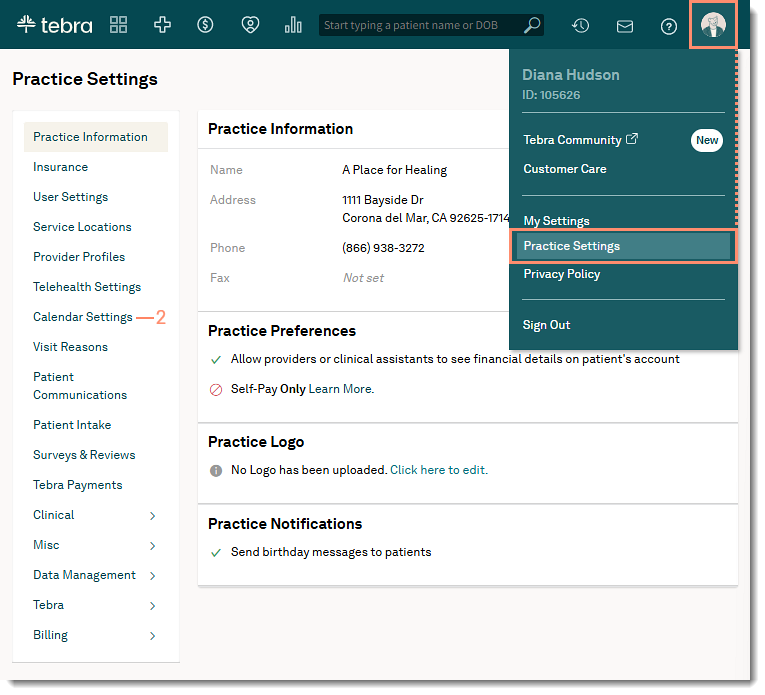
- Hover over the User icon and click on Practice Settings. The Practice Settings page opens.
- Click Calendar Settings. The Calendar Settings page opens.
|
 |
Configure Schedules
Before proceeding, verify the provider and staff office hours are configured.
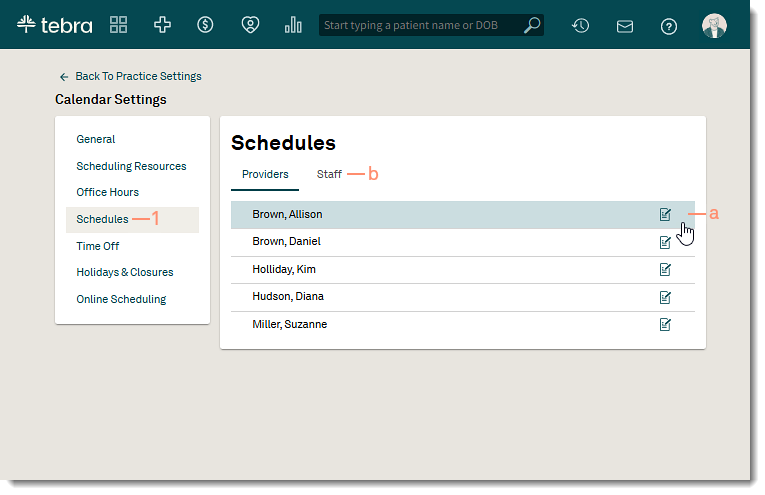
- Click Schedules. The Schedules page opens.
- Manage a provider or staff schedule:
- To configure a provider's schedule, click the edit icon. The Schedules - Provider page opens.
- To configure a staff's schedule, click on the Staff tab. Then, click the edit icon. The Schedules - Staff page opens.
Note: Staff members must be created in Scheduling Resources before Schedules can be configured.
|
 |
Add Time Slot
- Click Add Time Slot. The Add Time Slot pop-up window opens.
- Add Details:
- Name: Enter the time slot name that displays on the calendar.
- Color: Click and select a color to highlight the time slot on the calendar.
 Tip: If applicable, specify a color using RGB (e.g., 0, 73, 82), HSL (e.g., 187, 100%, 16%), or HEX (e.g., #004952). Click the color mode to change the mode and enter the color value or code. Tip: If applicable, specify a color using RGB (e.g., 0, 73, 82), HSL (e.g., 187, 100%, 16%), or HEX (e.g., #004952). Click the color mode to change the mode and enter the color value or code.
Note: Multiple clicks may be required to display the applicable color mode.
- Start Date: Click to select the time slot start date.
- Start Time and End Time: Click to select the start and end time for the time slot.
- Reoccurrence: By default, Does not repeat is selected. If applicable, click to select a different pre-set recurring schedule (Daily (Mon - Fri), Weekly, Every other week, Monthly, or Annually) or set a Custom recurring schedule.
Note: The day of the week and month is based on the Start Date of the time slot.
- Ends: If applicable, click to select when the time slot ends, Never or On a specific day.
- If custom is selected, select how often the time slot repeats weekly, the days the time slot repeats, and when it ends (never or on a specific day). Then, click Done.
- Service Location: If applicable, click to select a service location to associate to the time slot.
- Block Schedule: Click to select the option to block appointments from being created during this time slot.
- Click Save when finished. The Schedules page opens and the time slot displays on the calendar.
|
 |
Edit or Delete Time Slot
- Click the more option icon and select Edit. The Add Time Slot pop-up window opens.
- To delete the time slot, select Delete. Then, click Delete on the confirmation pop-up window.
- Make applicable changes:
- Name: Update the time slot name that displays on the calendar.
- Color: Click and select a different color to highlight the time slot on the calendar.
Tip: If applicable, specify a color using RGB (e.g., 0, 73, 82), HSL (e.g., 187, 100%, 16%), or HEX (e.g., #004952). Click the color mode to change the mode and enter the color value or code.
Note: Multiple clicks may be required to display the applicable color mode.
- Start Date: Click to select a different time slot start date.
- Start Time and End Time: Click to select the start and end time for the time slot.
- Reoccurrence: Click to select a different pre-set recurring schedule (Does not repeat, Daily (Mon - Fri), Weekly, Every other week, Monthly, or Annually) or set a Custom recurring schedule.
Note: The day of the week and month is based on the Start Date of the time slot.
- Ends: If applicable, click to select when the time slot ends, Never or On a specific day.
- If custom is selected, select how often the time slot repeats weekly, the days the time slot repeats, and when it ends (never or on a specific day). Then, click Done.
- Service Location: Click to select a different service location to associate to the time slot.
- To remove the associated service location, click to select None.
- Block Schedule: Click to select the option to block appointments from being created during this time slot.
- To allow scheduling, click to clear the option.
- Click Save when finished. The Schedules page opens and the time slot updates on the calendar.
|
 |
Add Break
- Click Add Break. The Add Break pop-up window opens.
- Add Details:
- Name: By default, Break is enter as the name. If applicable, update the break name that displays on the calendar.
- Start Date: Click to select the break start date.
- Start Time and End Time: Click to select the start and end time for the time slot.
- Reoccurrence: By default, Daily (Mon - Fri) is selected. If applicable, click to select a different pre-set recurring schedule (Does not repeat, Weekly, Every other week, Monthly, or Annually) or set a Custom recurring schedule.
Note: The day of the week and month is based on the Start Date of the time slot.
- Ends: If applicable, click to select when the time slot ends, Never or On a specific day.
- If custom is selected, select how often the break repeats weekly, the days the break repeats, and when it ends (never or on a specific day). Then, click Done.
- Block Schedule: By default, the option to block appointments from being created during this break is selected.
- To allow scheduling, click to clear the option.
- Click Save when finished. The Schedules page opens and the break displays on the calendar.
|
 |
Edit or Delete Break
- Click the more option icon and select Edit. The Edit Break pop-up window opens.
- To delete the break, select Delete. Then, click Delete on the confirmation pop-up window.
- Make applicable changes:
- Name: Update the break name that displays on the calendar.
- Start Date: Click to select a different break start date.
- Start Time and End Time: Click to select the start and end time for the time slot.
- Reoccurrence: Click to select a different pre-set recurring schedule (Does not repeat, Weekly, Every other week, Monthly, or Annually) or set a Custom recurring schedule.
Note: The day of the week and month is based on the Start Date of the time slot.
- Ends: If applicable, click to select when the time slot ends, Never or On a specific day.
- If custom is selected, select how often the break repeats weekly, the days the break repeats, and when it ends (never or on a specific day). Then, click Done.
- Block Schedule: If applicable, click to clear the selection to allow scheduling or click to select the option to block appointments from being created during this break.
- Click Save when finished. The Schedules page opens and the break displays on the calendar.
|
 |