Updated: 03/26/2024 | Views: 6142
As part of the lab orders process, you can specify a default list of lab tests that clinicians can order or perform. Tebra provides a default list which you can customize to the needs of your practice by adding or removing lab tests.
Note: This list is specific to internal communications regarding lab orders within a practice, it is not used with electronic labs.
Access Lab List
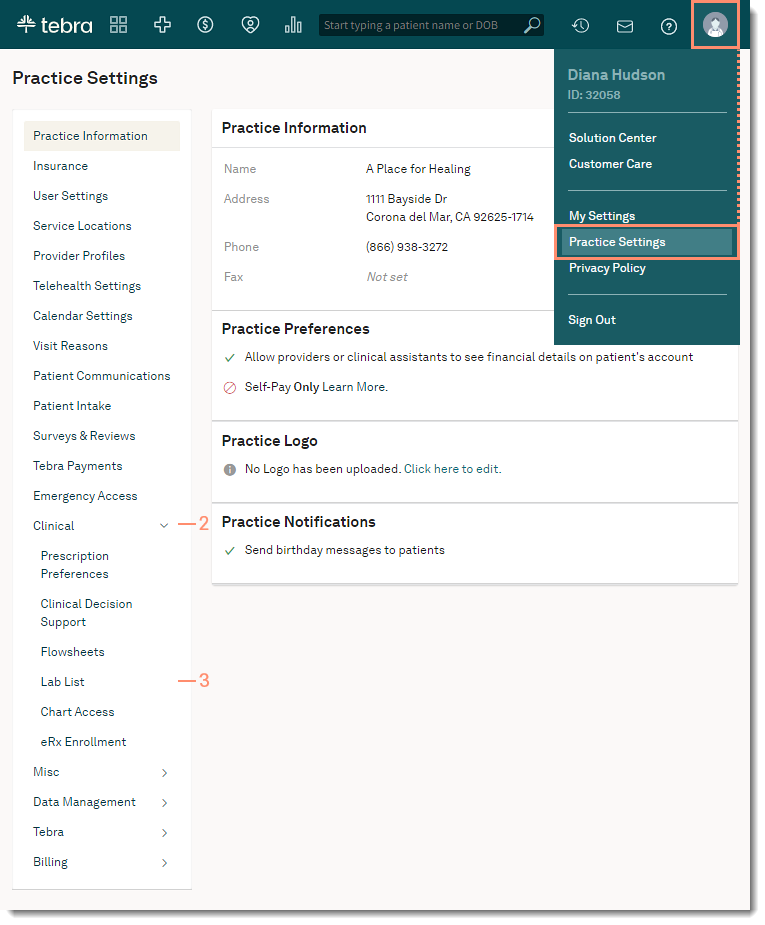
- Hover over the User icon and click on Practice Settings. The Practice Settings page opens.
- Click Clinical. Additional setting options expands.
- Click Lab List. The Lab List page opens.
|
 |
Add Lab Tests
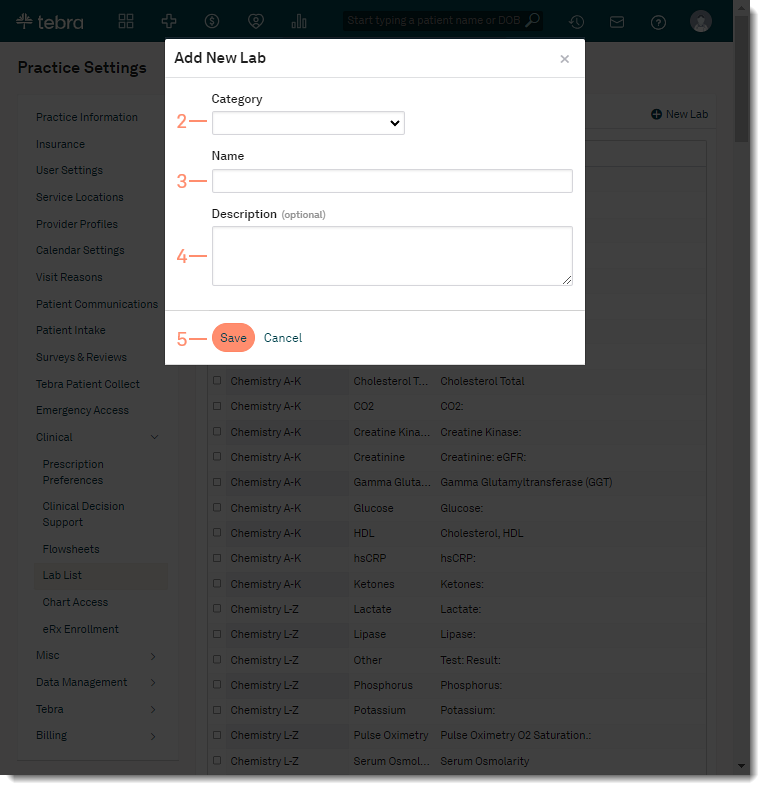
- Click New Lab. The Add New Lab pop-up window opens.
- Select a Category from the drop-down menu.
- Enter a Name for the test.
- Optionally, enter a Description of the test.
- Click Save. The lab is added to the Lab List.
|
 |
Delete Lab Tests
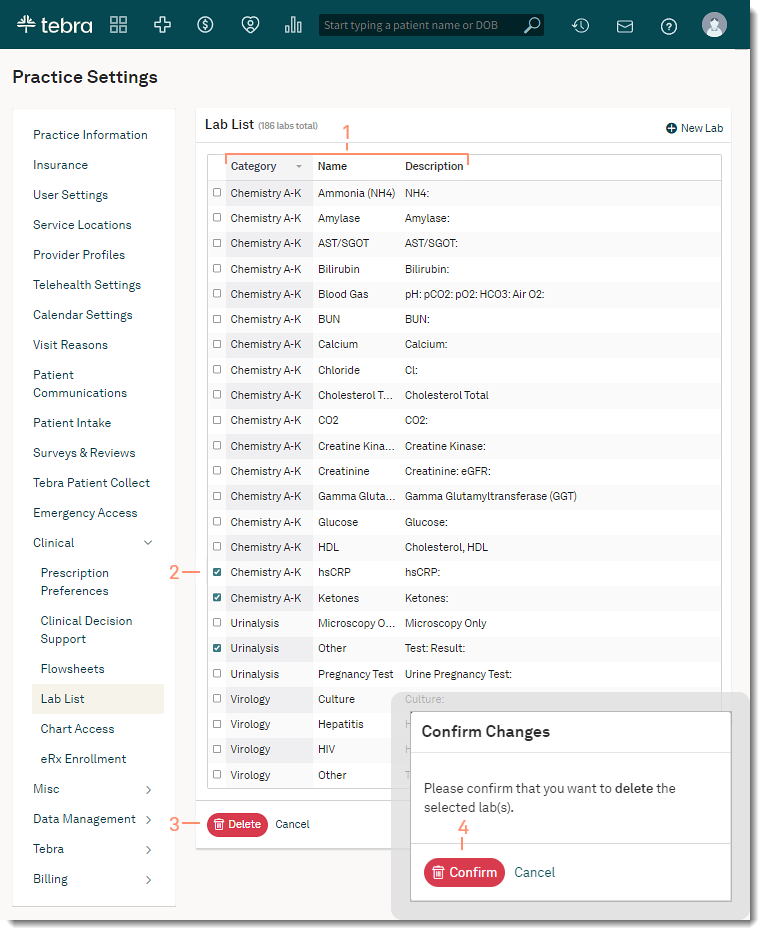
- To search for a lab test to delete, click on the headers to sort by Category, Name, or Description.
- Click to select the lab(s) to remove.
- Click Delete. The Confirm Changes pop-up window opens.
- Click Confirm. The lab test is removed from the Lab List.
|
 |