Navigate Clearinghouse Reports
- Last updated
-
-
Save as PDF
Updated: 12/19/2025 | Views: 27138
Clearinghouse reports help you manage and monitor various billing workflow tasks; from claim processing to posting payments. These reports are generated on a daily, weekly or monthly basis depending on the type of report. You can search, review and print clearinghouse reports at anytime. It is recommended to monitor clearinghouse reports and take action on a daily basis.
Navigate Clearinghouse Reports
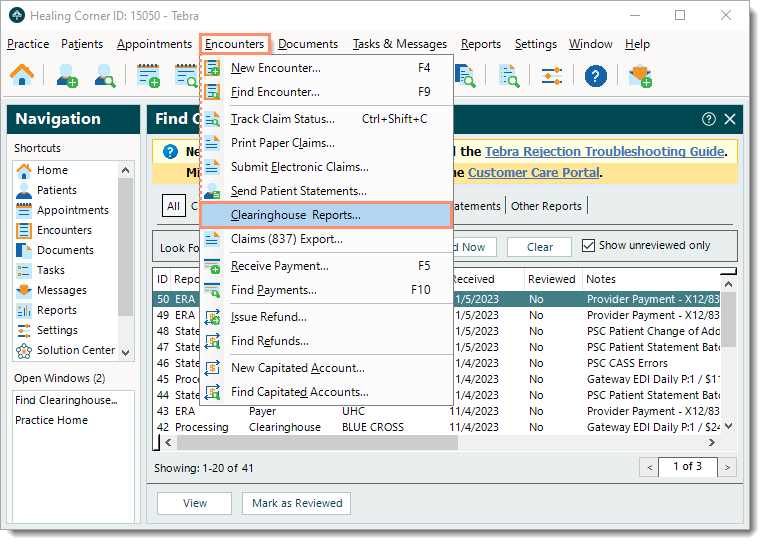
- Click Encounters > Clearinghouse Reports. The All tab of the Find Clearinghouse Report window opens by default.
|
 |
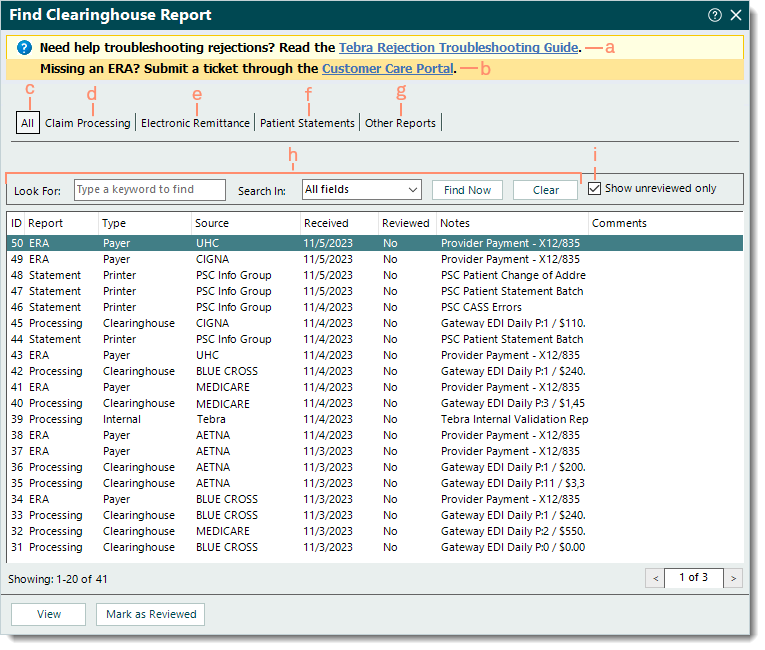
- Navigate Find Clearinghouse Report window.
- Tebra Rejection Troubleshooting Guide: To find and view help articles for common claim rejections and resolutions, click Tebra Rejection Troubleshooting Guide.
- Customer Care Portal: To submit a missing electronic remittance advice (ERA) case, click Customer Care Portal.
- All: Selected by default and displays all clearinghouse reports.
- Claim Processing: Click to display Tebra internal validation reports, clearinghouse acknowledgement/rejection reports, and payer acknowledgement/rejection reports.
- Electronic Remittance: Click to display Electronic Remittance Advice (ERA) and Electronic Funds Transfer (EFT) reports.
- Patient Statements: Click to view patient statement batch confirmation reports, patient statement error reports, and patient change of address reports.
- Other Reports: Applicable for practices/providers enrolled with Change Healthcare clearinghouse payers that support Explanation of Benefits (EOB) reports.
- Look For search box and Search In filter: Enter all or part of a keyword for the report in the search box and click the Search In drop-down arrow to select a specific field/column to search. Then, click Find Now.
- To clear the search bar and filter selection, click Clear.
- "Show unreviewed only": Selected by default and displays all reports that are not marked as reviewed.
- To also include reviewed reports, click to clear "Show unreviewed only".
|
 |
- The following report information varies depending on the Tebra services used by the practice (e.g., clearinghouses, payers, EDI services, patient statement mailing service).
- ID: Clearinghouse report ID number assigned by Tebra.
- Report: The report category (e.g., Processing, ERA, Statement, Other).
- Type: The type of report generated (e.g., Internal, Clearinghouse, Payer, Printer).
- Source: Indicates the source or payer the report is associated with (e.g., PSC Info Group, Tebra, Aetna, Medicare).
- Received: Date the file was received in Tebra.
- Reviewed: No or Yes indicates if the report was marked as reviewed.
- Notes: A brief description of the report.
- Comments: Internal comments entered on the report.
- Click to select and highlight a report or double click to open and view a report.
- View: Click to open and view a selected/highlighted report.
- Mark as Reviewed: After reviewing a report and determining no further action is necessary, click to mark the report as reviewed.
- Pagination: Click the arrows to navigate forward or back, or enter a specific page number. Each page displays up to 20 reports.
|
 |