Apply Payment from Patient or Other Payer
- Last updated
-
-
Save as PDF
Updated: 04/30/2025 | Views: 29764
Once the General information for a payment from the patient or other payer is entered, the appropriate amounts of the payment are manually applied to the corresponding service lines.
Apply Patient or Other Payment
- Find the payment then double click to open. The General tab of the Edit Payment window opens.
- Click Apply Now. The Apply tab opens.
- Use the top options to add a patient or encounter as necessary.
Note: For patient payments, the patient entered under the General tab is automatically added and all open service lines associated with the patient are listed.
- The first drop-down menu defaults to Add Patient. To add service lines by encounter ID instead, click the drop-down arrow and select Add Encounter.
Note: When an encounter is added, all service lines associated with the encounter are listed. When a patient is added, all open service lines associated with the patient are listed.
- If necessary, enter the patient's name, patient ID, or encounter ID in the open text field. Then, press Enter on the keyboard. The service lines are listed.
 Tip: When adding an encounter, enter the encounter ID + Z (e.g., 176Z) to limit results and avoid having to search and select the Encounter record. Tip: When adding an encounter, enter the encounter ID + Z (e.g., 176Z) to limit results and avoid having to search and select the Encounter record.
- If the Find Patient or Select Encounter window opens, search and select the record.
- Show Only: Defaults to Selected. Click the drop-down arrow to select to list All, Open, Settled, or Negative Balances service lines.
|
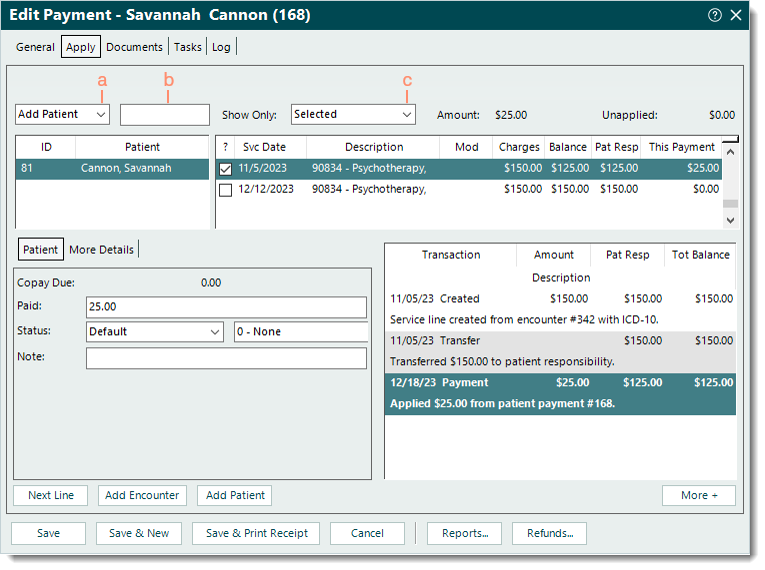 |
- Click once to select the patient and/or service line the payment amount needs to be applied to.
- Under the Patient tab, enter the following information.
Note: As the information is entered, verify the transaction lines (in bold) posted on the right side of the window are correct. Once the payment is saved, these transaction lines are posted under the Transactions section of the corresponding Claim record.
- Paid: The amount of the payment to apply to the selected service line.
- Status: If there is a remaining balance after the payment amount is applied, select the appropriate status update from the drop-down menu. Then, select a reason code from the drop-down menu if applicable.
- Note: Internal notes related to the payment amount applied that will display when viewing claim transaction line details.
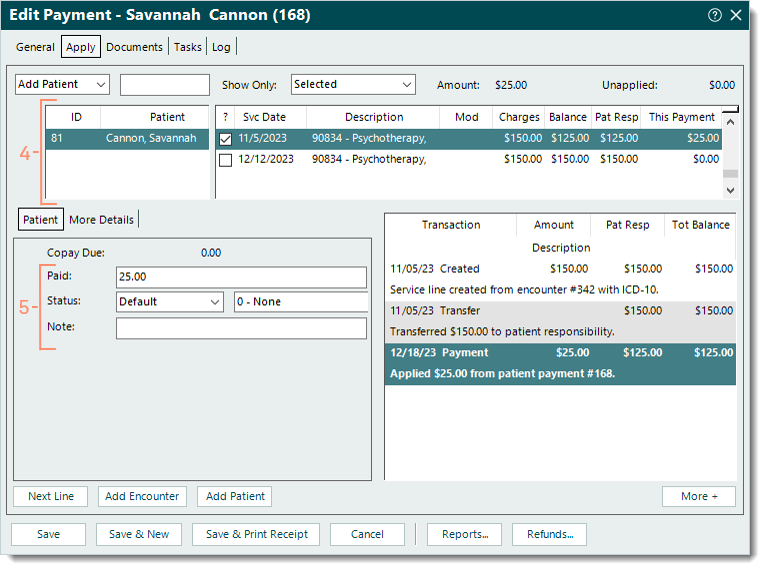
- Once the payment amount is applied to the selected service line, continue as necessary.
- To continue applying amounts of the payment, click Next Line if the amount should be applied to the next service line listed, or click to select the appropriate service line. Then, repeat steps 5-6 as necessary.
- If finished applying the appropriate amount(s) to the corresponding service line(s), click Save.
|
 |