Updated: 01/08/2026 | Views: 25779
You can create Refund records for unapplied overpayment amounts that may have resulted from reversing insurance payments or reversing patient payments. Once created, manage refunds as necessary to help accurately track refund statuses and payments associated with them.
There are two workflows to create and post refund amounts depending on how many Payment records (single or multiple) need to be added to the refund.
Single Payment Refund
Refund an unapplied overpayment amount for a single Payment record.
- Find the payment then double click to open. The Edit Payment window open.
 Tip: To return more search results, select the All tab and use the Look For search bar to enter all or part of a keyword for the payment. Then, click Find Now. Tip: To return more search results, select the All tab and use the Look For search bar to enter all or part of a keyword for the payment. Then, click Find Now.
- Click Refunds on the bottom of the window and select Refund Unapplied Amount. The New Refund window opens.
|
 |
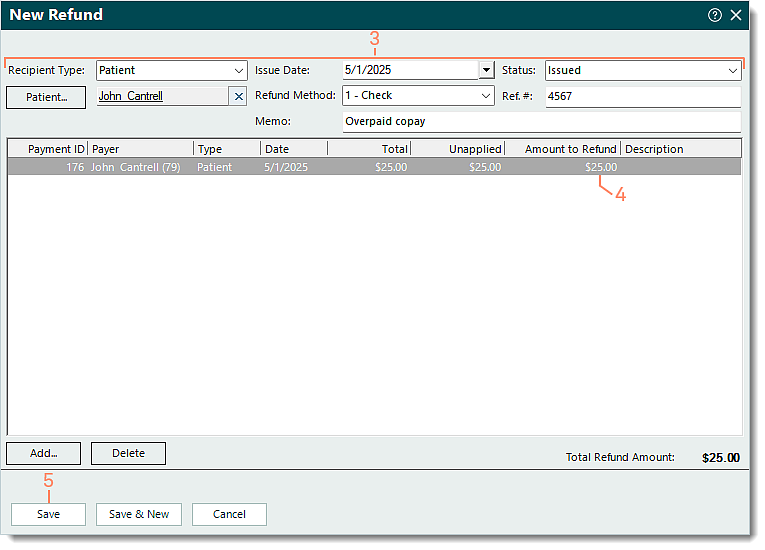
- Enter the information as necessary.
Note: Some information auto-populates from the Payment record. Edit the information as necessary.
- Recipient Type: Auto-populates from the Payment record. If necessary, click the drop-down arrow to select a different type of recipient.
- Refund Recipient: Auto-populates from the Payment record. If necessary, depending on the Recipient Type, click Patient or Insurance to search and select the refund recipient, or enter the Other refund recipient.
- Issue Date: Enter the date the refund is being issued.
- Refund Method: Click the drop-down arrow to select how the refund is being issued.
- Memo: Enter any notes related to the refund.
- Status: Click the drop-down arrow to select the status of the refund, Draft or Issued.
- Ref.#: Enter a tracking number for the refund (e.g., check, confirmation, or authorization number).
- Amount to Refund: Auto-populates with the total Unapplied amount of the Payment record. If the refund amount is less than the total unapplied amount, double click the field under the Amount to Refund column then enter the amount.
- When finished, click Save.
|
 |
Multiple Payment Refund
Create a new refund and post the refund amounts for multiple Payment records.
- To prevent duplication, find the refund and verify the refund is not in the system. Then, click New on the bottom of the Find Refund window. The New Refund window opens.
- Enter the information as necessary.
- Recipient Type: Defaults to Insurance. Click the drop-down arrow to select Patient or Other.
- Refund Recipient: Depending on the Recipient Type, click Patient or Insurance to search and select the refund recipient, or enter the Other refund recipient.
- Issue Date: Defaults to the current date. If the refund is being issued on a different date, enter the date.
- Refund Method: Click the drop-down arrow to select how the refund is being issued.
- Memo: Enter any notes related to the refund.
- Status: Click the drop-down arrow to select the status of the refund, Draft or Issued.
- Ref.#: Enter a tracking number for the refund (e.g., check, confirmation, or authorization number).
|
 |
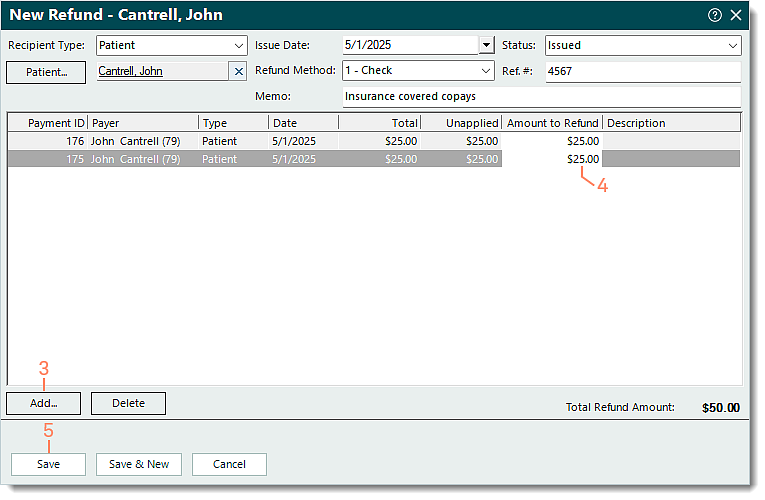
- Click Add. The Select Payment window opens. Search for and double click to select the Payment record to add to the refund. Repeat this step as necessary.
- To remove a Payment record, click to select it. Then, click Delete.
- Once all Payment records are added, double click the field under the Amount to Refund column and enter the refund amount for each Payment record listed.
- When finished, click Save.
|
 |