
Release Notes November 2026
On November 18, 2026, your Tebra account will be upgraded to the latest version. Features will be available the following day with the exception of specified timelines.
Billing |
Patient Collections Report
Track patient-assigned balances and statement history with the Patient Collections report. Designed to minimize bad debt, this report streamlines statement workflows, follow-ups, and overall patient collections process.
|
View Patient Collections Report
|
 |
For more details, review Navigate Patient Collections Report. |
 |
All Payments Report
The All Payments report is designed to enhance financial reporting for daily bank reconciliation and income auditing. By focusing on precision and customization, this report aims to streamline financial workflows, reduce manual labor and enhance the overall efficiency of managing payments.
|
View All Payments Report
|
 |
For more details, review Navigate All Payments Report. |
 |
Billing General Improvements
- The All Patients Report includes new data fields and filters (e.g., Next and Last Appointment Date, Patient Balance, Payer Scenario, etc.) for deeper segmentation and custom reporting.
- Tebra’s Claim Review feature that checks for validation errors now automatically runs when a charge capture is sent to Billing and submitted to the Desktop Application (PM). If any validation errors are identified, they will display when the encounter (created from the submitted charge capture) is opened in the Desktop Application (PM). Feature will be available by the end of November 2026.
- Electronic Remittance Advice (ERA) claim matching was enhanced to improve posting accuracy and prevent mismatch errors when patients have multiple visits with different providers at the same practice.
Billing Resolved Issues
- Fixed an issue where the encounter Claim Review incorrectly triggered an NPPES NPI Registry mismatch validation warning
- Fixed an issue where the Modifiers data was incorrectly blank when exporting analytics reports
- Fixed an issue where the encounter Claim Review incorrectly triggered the Medicare Beneficiary Identifier (MBI) format validation warning
- Fixed an issue where online patient payments collected during the afternoon defaulted to the following day as the post date
- Fixed an issue where users experienced an error when initiating the Claims (837) Export
- Fixed an issue where users experienced a timeout error in the Desktop Application (PM)
Clinical
Clinical Resolved Issues
- Fixed an issue where AI Notes generated a duplicated of a previous note instead of a new note
- Fixed an issue where users did not received push notifications in the mobile app
- Fixed an issue where users experienced a blank page when clicking on a saved or new vitals record
- Fixed an issue where users were unable to reply to messages in the mobile app after the iOS 27.0.1 update
Patient Experience
Patient Experience Resolved Issues
- Fixed an issue where the online calendar availability did not match the calendar in the web application
Platform
Enhancements: Visit Reasons
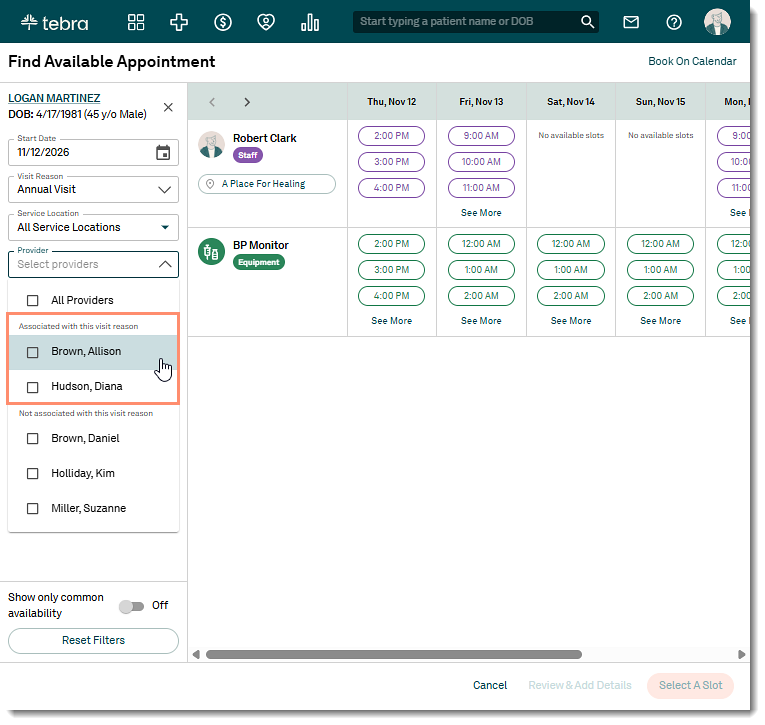
Streamline scheduling workflows by mapping providers, staff, rooms, and equipment directly to specific visit reasons. These assignments clarify provider eligibility and reserve the necessary resources for each appointment type. System Administrators can also define custom visit durations and activate designated visit reasons across Tebra Care Connect profiles and the AI Voice Assistant—ensuring schedules match operational requirements, reducing manual coordination, and maximizing practice capacity.
Enable and Map Visit Reason
|
 |
Find Appointment with Mapped Resources
|
 |
New Appointment with Mapped Resources
|
 |
Tebra Payments
Platform General Improvements
- Tebra Payments activated practices can now add, edit and remove a patient’s payment card within their account in the web platform.