Kareo and PatientPop are now Tebra. Becoming Tebra will take time and we appreciate your patience as we transition to the new brand experience.Learn More
Tebra Help Center

Release Notes September 2023

Updated: 09/20/2023|Views: 771

On September 21, 2023 your Kareo account will be upgraded to the latest version.

Billing

Self-Pay Billing Workflow: Patient Payments

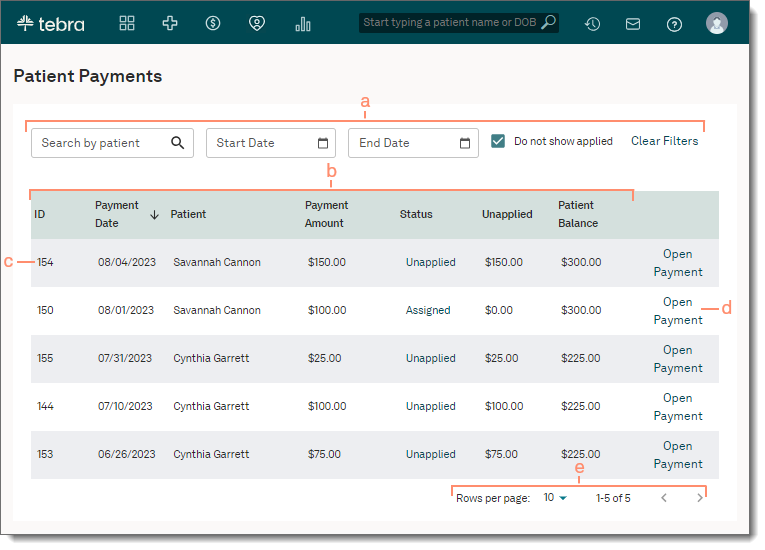
Self-Pay Only enabled practices can now view and manage patient payments in the web platform. Users with the System Admin and/or Biller roles can view payment details and history, apply and unapply payment amounts, post adjustments, record refunds, and settle or reopen charges. 

Navigate Patient Payments
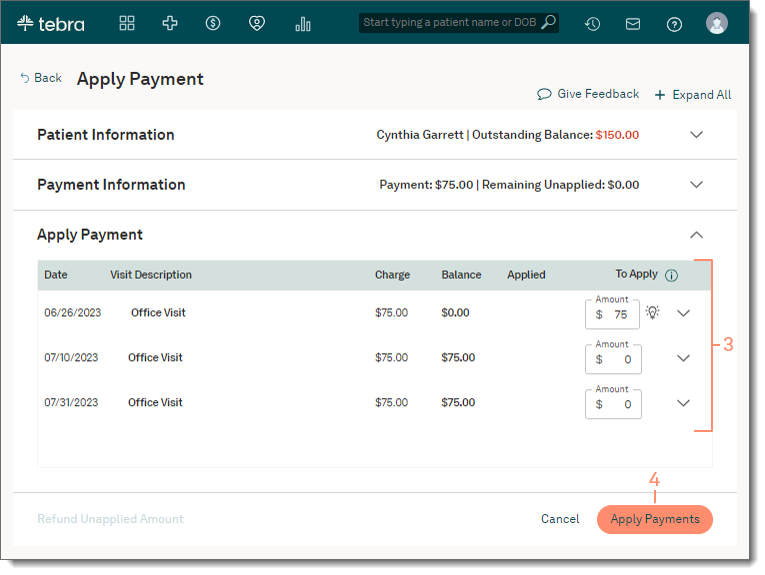
  • Hover over the Billing icon and click on Patient Payments. The Patient Payments page opens.
    1. Filters: By default, all unapplied and assigned patient payments display.
      • To filter by specific criteria:
        • Patient search box: Start typing the patient name to select.
        • Start Date and End Date: Enter a specific date range. 
        • "Do not show applied": Selected by default and displays unapplied and assigned payments only. To display all patient payments, click to deselect.
      • To reset the filters back to the default settings, click Clear Filters.
    2. Columns: To sort by ascending or descending, hover over the column header and click the arrow.
    3. Payment Details: Displays the payment IDPayment DatePatientPayment AmountStatusUnapplied, and Patient Balance.
    4. Open Payment: To view additional payment details (e.g., patient and payment information, history), and/or take applicable actions (e.g., apply payment amounts, post adjustments, record refunds, settle or reopen charges), click Open Payment.
    5. Pagination: By default, each page displays up to 10 payments.
      • To change how many appointments are displayed per page, click the Rows per page drop-down and select 102550, or 75.
      • To navigate forward or back, click the arrows.
Billing_PatientPayments_Navigate.png
Apply Payment
  1. Hover over the Billing icon and click on Patient Payments. The Patient Payments page opens.
  2. Find the payment and click Open Payment. The Apply Payment page opens.
  3. Under the Apply Payment section, the unapplied payment amount is automatically distributed to the visit(s) starting from the oldest to newest visit date.
    • To apply a different payment amount to the visit(s), enter the amount under the To Apply column. 
    • To view visit details (e.g., history, service line breakdown), or apply additional actions (e.g., adjustment, settle, reopen, unapply) at the visit or service line level, click the arrow to expand the section.  
  4. When finished, click Apply Payments to save. 
    Note: The service lines of the visit are automatically settled if the applied payment amounts create zero balances.
Billing_PatientPayments_Apply.png

Billing General Improvements

  • The Update Payment Method page can now be accessed from within the Desktop Application (PM).
  • The Patient Portal Settings option to automatically email patients when a balance is moved to patient responsibility was updated to be disabled by default.

Billing Resolved Issues

  • Fixed an issue where the patient's insurance case is missing from appointments in the web platform and Desktop Application (PM) 
  • Fixed an issue where the Payouts option incorrectly displayed
  • Fixed an issue for card on file transactions where transaction reference IDs from payouts did not match transaction reference IDs in transaction history 
  • Fixed an issue where "HITRUST" and "Veracode" logos were displayed at improper sizes on payment collections pages 

Back to top


Clinical

Clinical General Improvements

  • Updated Influenza Vaccines to include the 2023-2024 CDC Influenza Immunizations.

Platform

Platform General Improvements

  • The Patient Portal Settings option to automatically email patients when a balance is moved to patient responsibility was updated to be disabled by default.

Platform Resolved Issues

  • Fixed an issue where users were unable to print an encounter form from the Dashboard
  • Fixed an issue where the patient's insurance case is missing from appointments in the web platform
  • Fixed an issue where the Payouts option incorrectly displayed
  • Fixed an issue for card on file transactions where transaction reference IDs from payouts did not match transaction reference IDs in transaction history
  • Fixed an issue where "HITRUST" and "Veracode" logos were displayed at improper sizes on payment collections pages

Telehealth

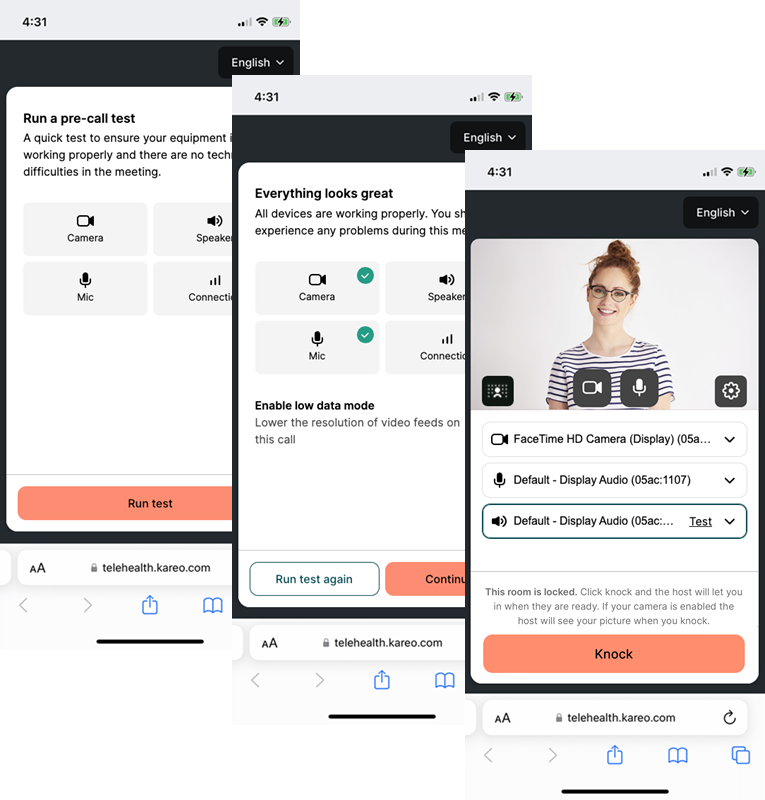
Telehealth Visit Pre-Call Test

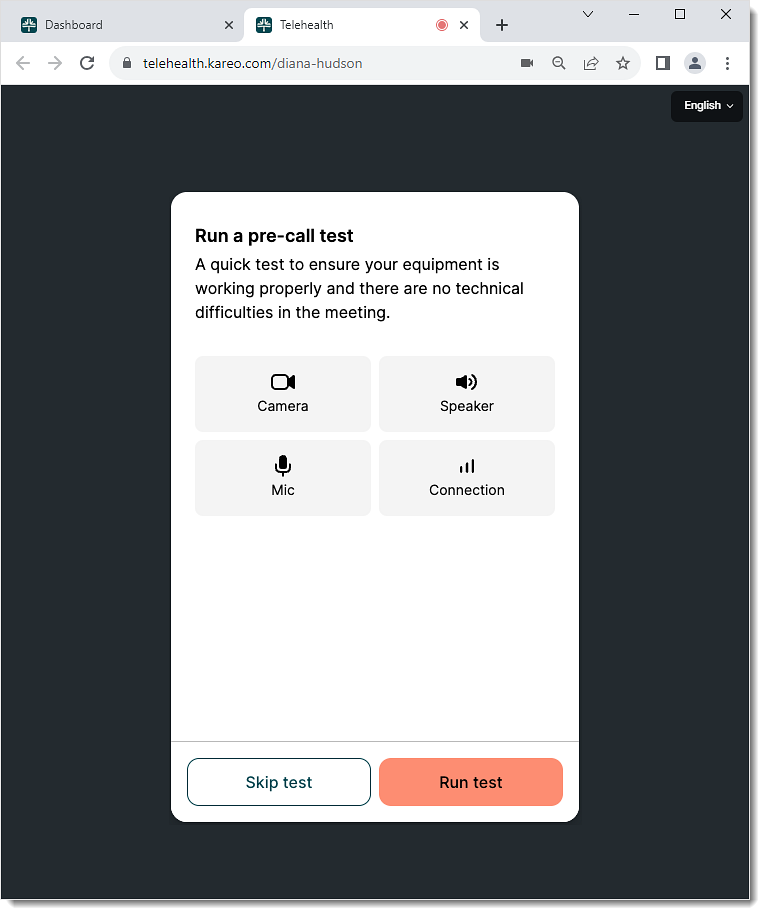
A pre-call test is now available for providers and patients to help identify potential technical issues prior to joining a telehealth visit. The pre-call test ensures the user's camera, speaker, microphone, and network connection is working properly for the visit. If any issues are detected, users can click Help me fix this, which will direct users to Telehealth Visit Best Practices and Troubleshooting. Additionally, the user can enable low data mode which lowers the resolution of their video feed to improve call performance.

Provider Pre-Call Test

The pre-call test is optional for providers and they can choose to skip the test.

If the provider chooses to run the test, the following equipment will be tested:

  1. Camera: Select the appropriate video source and ensure they can see themselves
  2. Speaker: Select the appropriate speaker source and ensure they can hear the music
  3. Microphone: Select the appropriate microphone source, say a few words into the microphone, and ensure they can hear the playback
  4. Connection: Test the network connection speed to ensure consistent quality.
Telehealth_PreCallProvider.png
To improve visit performance, providers can click the Enable low data mode toggle on to lower the resolution of the videos. Telehealth_LowDataMode.png
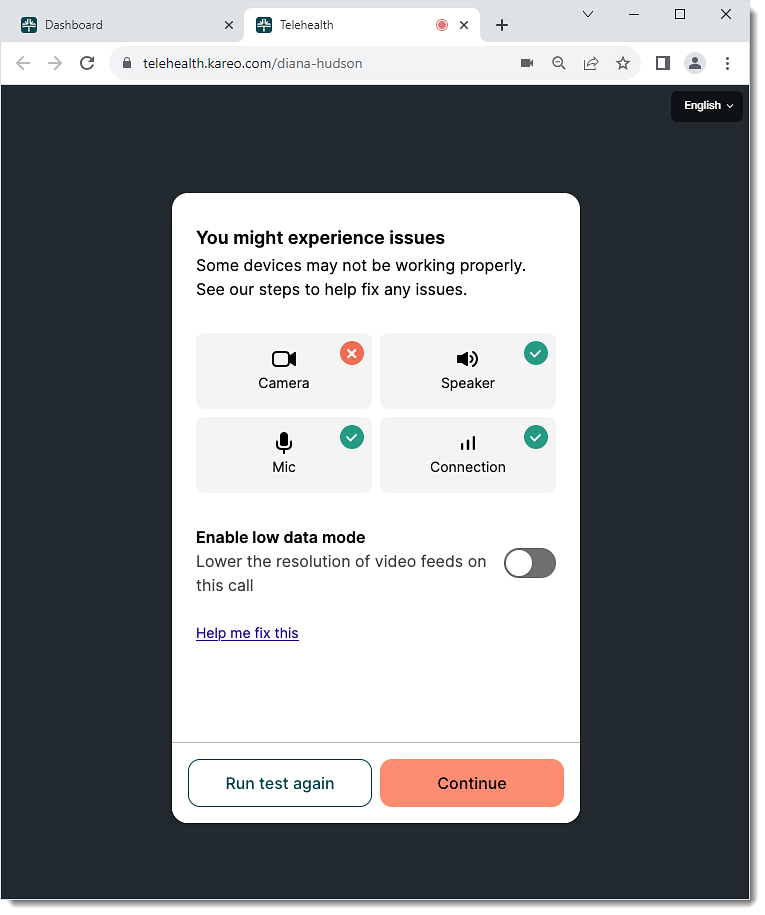
Patient Pre-Call Test

Patients must run the pre-call test before they join the visit to identify any potential technical issues.

The following equipment will be tested:

  1. Camera: Select the appropriate video source and ensure they can see themselves
  2. Speaker: Select the appropriate speaker source and ensure they can hear the music
  3. Microphone: Select the appropriate microphone source, say a few words into the microphone, and ensure they can hear the playback
  4. Connection: Test the network connection speed to ensure consistent quality.

To improve visit performance, patients can click the Enable low data mode toggle on to lower the resolution of the videos.

Telehealth_PreCall.png
  • Was this article helpful?