Kareo and PatientPop are now Tebra. Becoming Tebra will take time and we appreciate your patience as we transition to the new brand experience.Learn More
Tebra Help Center

User Account Roles

Updated: 10/26/2023|Views: 6969

System Administrators of billing company accounts and accounts created prior to May 9, 2016 can assign a user account role to each user created in the Desktop Application (PM). Assigning a user account role automatically applies a pre-defined permission set to the user. You can customize each user account role or create new user account roles at any time.

There are several preset user account roles offered:

  • Administrator: Full control and access to account and practice wide functionality.
  • Biller: Access to most billing and collections functionality.
  • Billing Manager: Access to all billing and collections functionality, practice reports and settings, and accounting options.
  • Office Manager: Access to patients and scheduling, scheduling templates and practice settings. 
  • Practice Administrator: Available for billing company accounts. Full control and access to practice wide functionality.
  • Provider: Access to most practice wide functionality and some account management functionality.
  • Scheduler: Access to most patient and scheduling functionality.

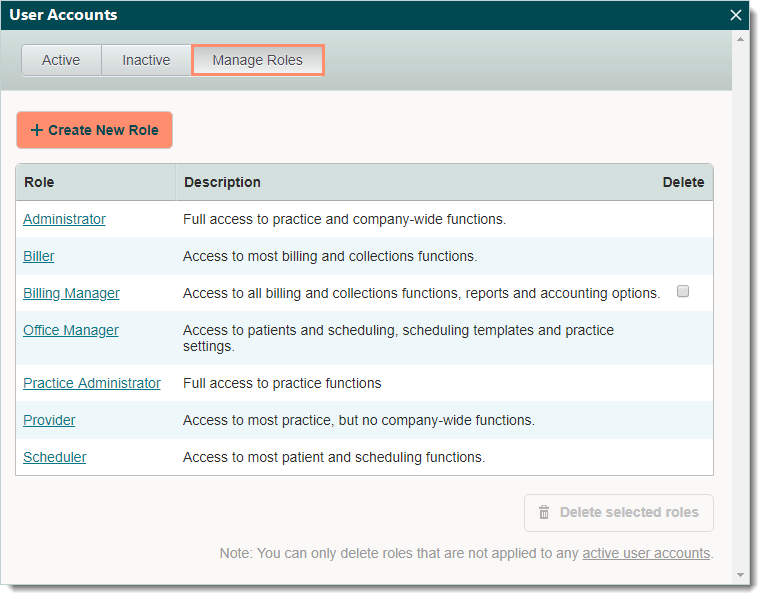
You always begin with navigating to Manage Roles before creating, editing, or deleting a user account role.

Navigate to Manage Roles

Desktop_UserAccounts_ManageRoles.png

Create New Role

Once a new role is created, the option to select it becomes available to assign to a user.

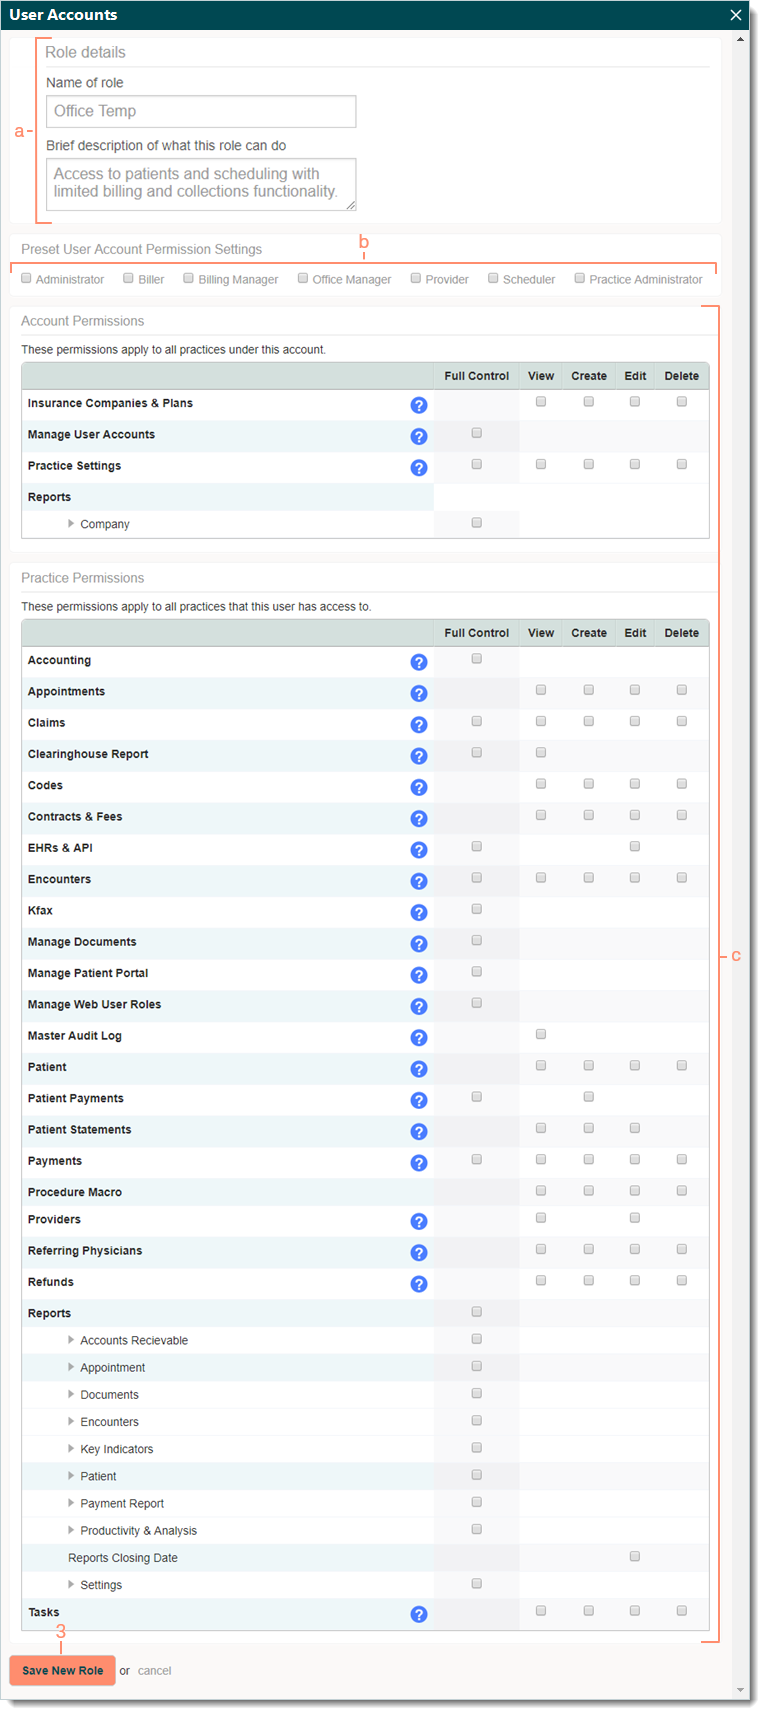
  1. To prevent duplication, navigate to Manage Roles and verify the role is not in the system then click + Create New Role.
  2. Enter the information:
    1. Role details: The name and brief description of the new role. 
    2. Preset User Account Permission Settings: To automatically apply a pre-defined permission set, select an existing user account role.
      • If selected, review the permissions and customize as necessary.
    3. Account Permissions and Practice Permissions: Click to select the permissions to include in the role. 
  3. Click Save New Role.
Desktop_UserAccounts_NewRole.png

Edit Role

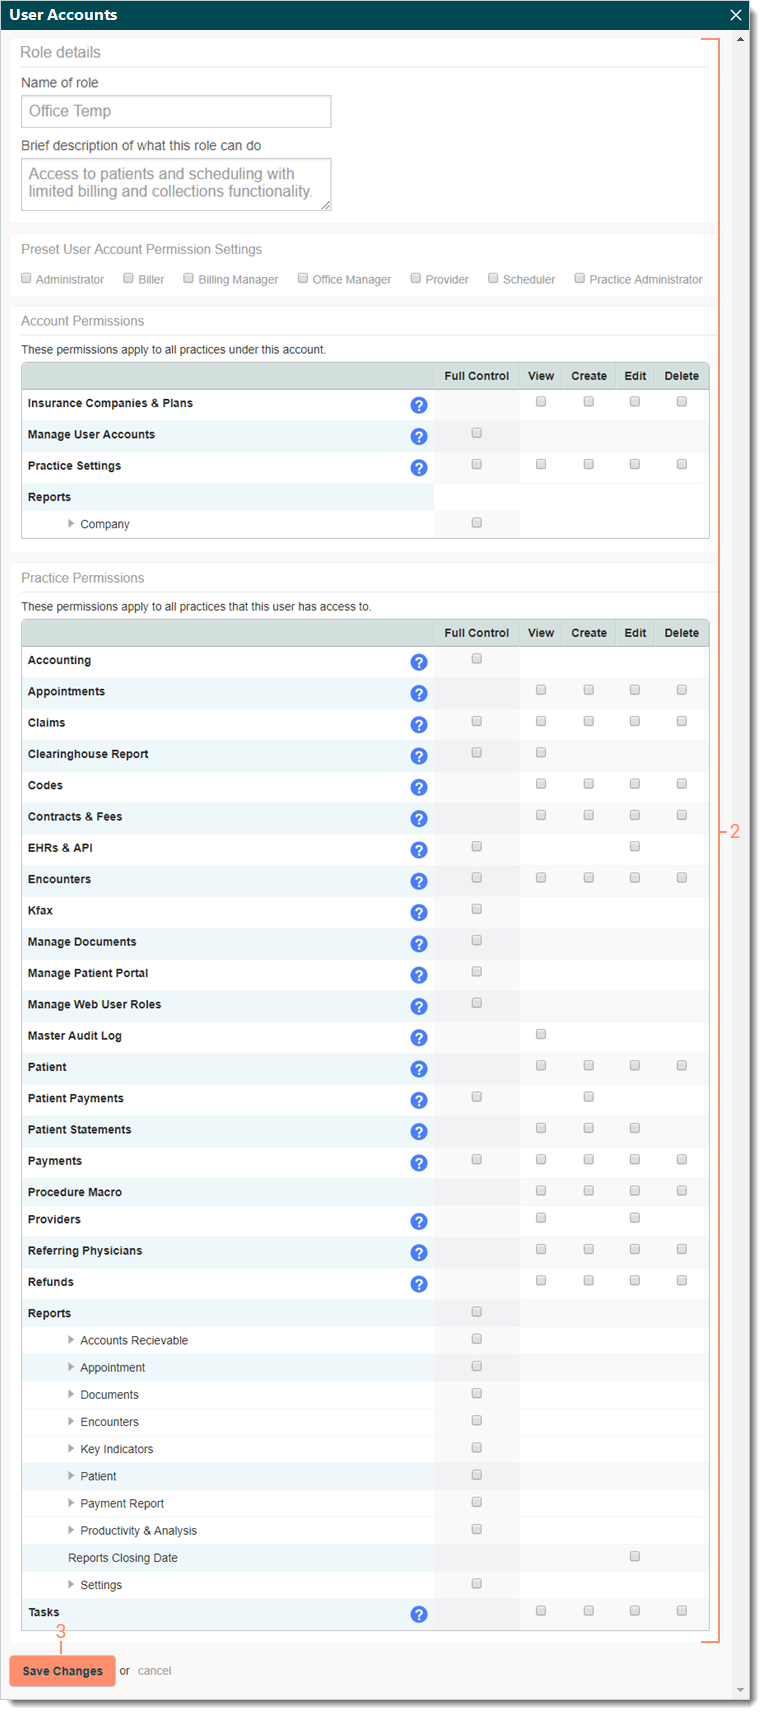
  1. Navigate to Manage Roles then click on the role to open. The role information displays.
  2. Make the necessary changes.
  3. Click Save Changes.
Desktop_UserAccounts_EditRole.png

Delete Role 

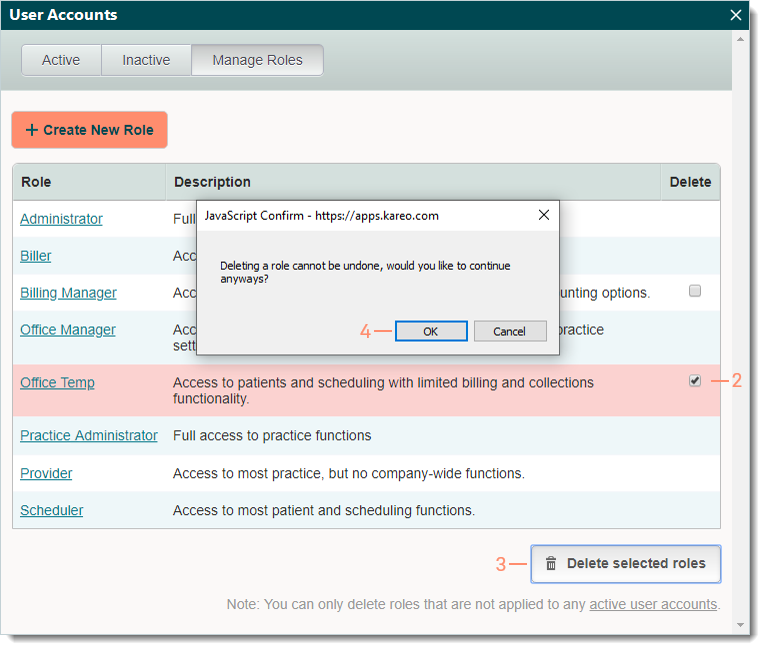
  1. Navigate to Manage Roles. The list of Roles displays.
  2. Find the role(s) and click to select "Delete" on the right of the listed role(s).
    Note: The "Delete" checkbox is only available for selection if the role has no active user accounts associated.
  3. Click Delete selected roles. A confirmation pop-up appears.
  4. Click OK to confirm the deletion. The role is deleted.
Desktop_UserAccounts_DeleteRole.png
  • Was this article helpful?