Updated: 10/26/2023 | Views: 3779
System Administrators of billing company accounts and accounts created prior to May 9, 2016 can assign the type of user for each user account created in the Desktop Application (PM). The type of user determines the information the user sees on the Practice Home window of the dashboard.
There are two types of users offered to help direct day-to-day tasks:
- Medical Office User: Default type assigned to new users and provides access to workflow processes such as patients, scheduling appointments, creating and tracking encounters, and generating reports.
- Business Office User: Provides access to workflow processes such as patients, encounters, claims, payments, patient statements, and generating reports.
Note: Access to the workflow processes varies based on the additional permissions assigned to the user.
Assign User Account Type
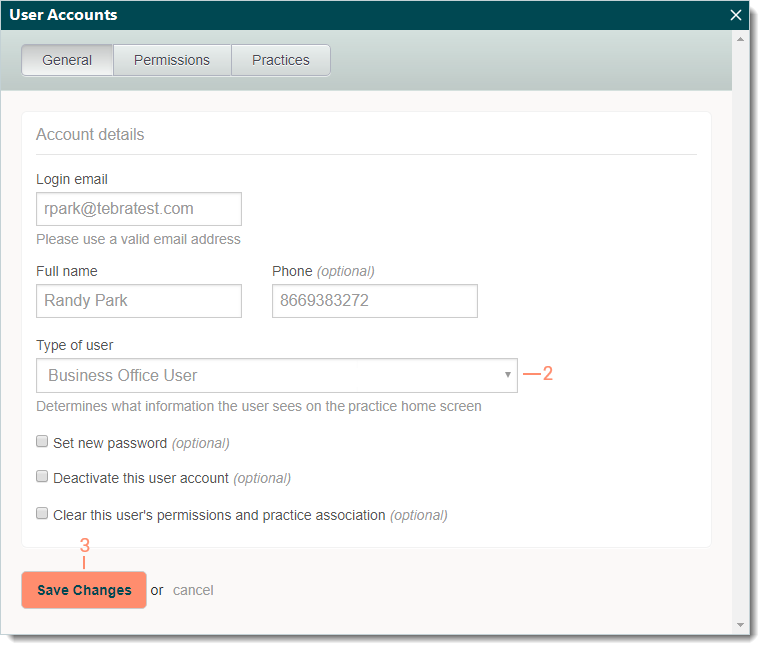
- Navigate to User Accounts then click the user to open. The user account opens the General tab by default.
 Tip: When there are numerous users listed, use the Search user accounts box to enter all or part of a user's Name or Login email. Tip: When there are numerous users listed, use the Search user accounts box to enter all or part of a user's Name or Login email.
- Select Medical or Business Office User from the Type of user drop-down menu.
- Click Save Changes.
- If the user has Account Administrator permissions, enter "ADMIN" to confirm and continue when prompted.
|
 |
Manage User Account Types
System Administrators can navigate to User Roles to view, create, edit, or delete the types of users.
Find User Role
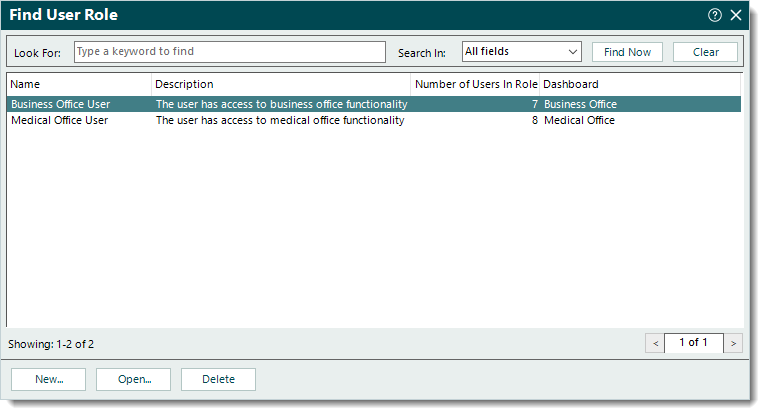
- On the top menu bar, click Help > Discontinued Screens > Settings > Other Lists > User Roles. The Find User Role window opens and displays the Name, Description, Number of Users In Role, and Dashboard for each type of user.
Tip: When there are numerous roles, use the search bar to enter all or part of a keyword for the User Role. Then, click Find Now. The search results are listed.
|
 |
|
New User Role
Once a new user role is created, it becomes available to assign to a user account.
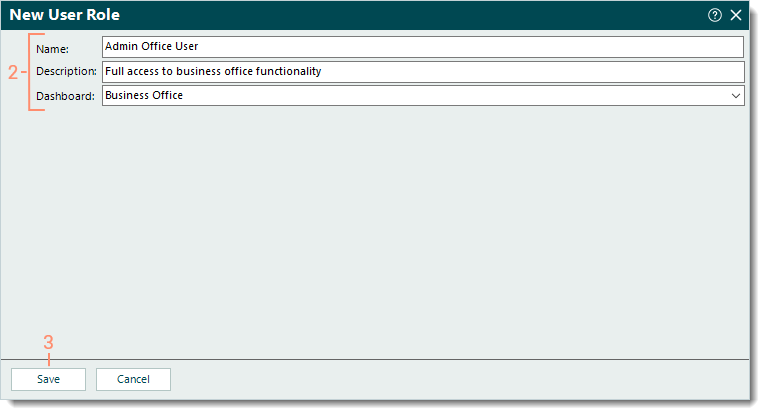
- To prevent duplication, find the user role and verify the type of user is not in the system then click New. The New User Role window opens.
- Enter the information:
- Name and Description: The name and brief description of the role.
- Dashboard: Click the drop-down arrow to select one of the following.
- Medical Office: Provides access to workflow processes such as patients, scheduling appointments, creating and tracking encounters, and generating reports.
- Business Office: Provides access to workflow processes such as patients, encounters, claims, payments, patient statements, and generating reports.
- Click Save.
|
 |
|
Edit User Role
- Find the user role then double click to open. The Edit User Role window opens.
- Make the necessary changes.
- Click Save.
|
 |
|
Delete User Role
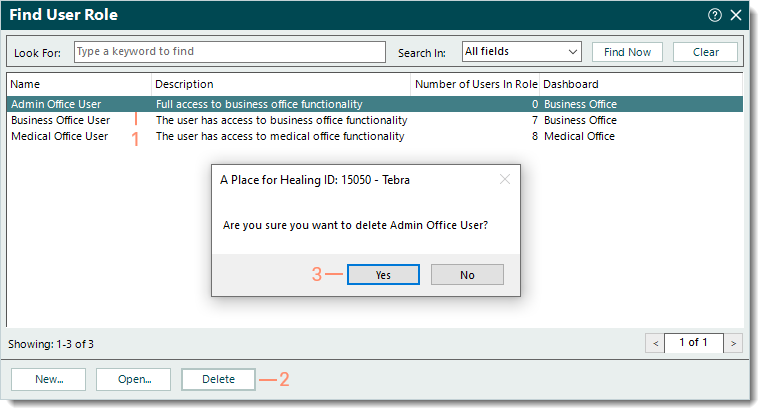
- Find the user role then click once to select it.
- Click Delete. A confirmation pop-up appears.
- Click Yes to confirm the deletion. The role is deleted.
|
 |