Updated: 01/08/2026 | Views: 20921
System Administrators of accounts created after May 9, 2016 have the option to assign Web User Roles for each user. In addition to Web User Roles, System Administrators of billing company accounts and accounts created prior to May 9, 2016 can assign the type of user, user account role, and permissions for each user created.
You always begin with navigating to User Accounts before adding, editing, or deactivating a user account.
Navigate to User Accounts
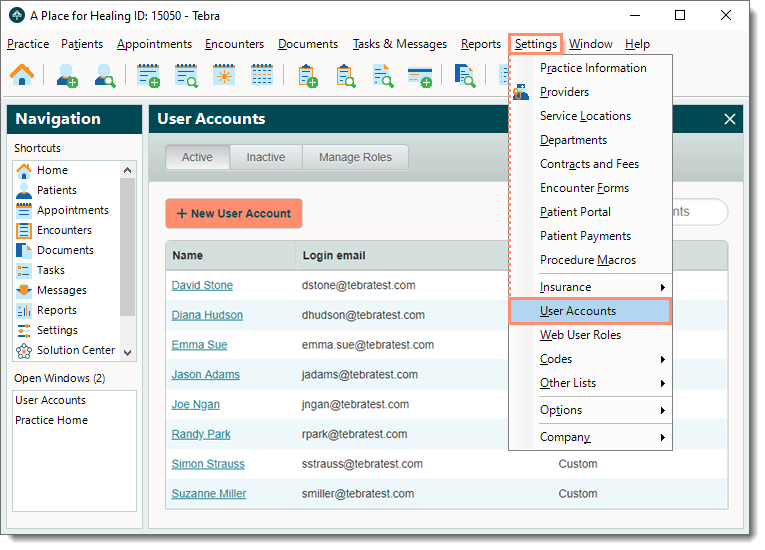
- Click Settings > User Accounts. The User Accounts window opens.
Note: Accounts created after May 9, 2016 will see the Web User Roles.
|
 |
New User Account
- To prevent duplication, navigate to User Accounts and search both Active and Inactive users to verify the user is not in the system then click + New User Account.
 Tip: When there are numerous users listed, use the Search user accounts box to enter all or part of a user's Name or Login email. Tip: When there are numerous users listed, use the Search user accounts box to enter all or part of a user's Name or Login email.
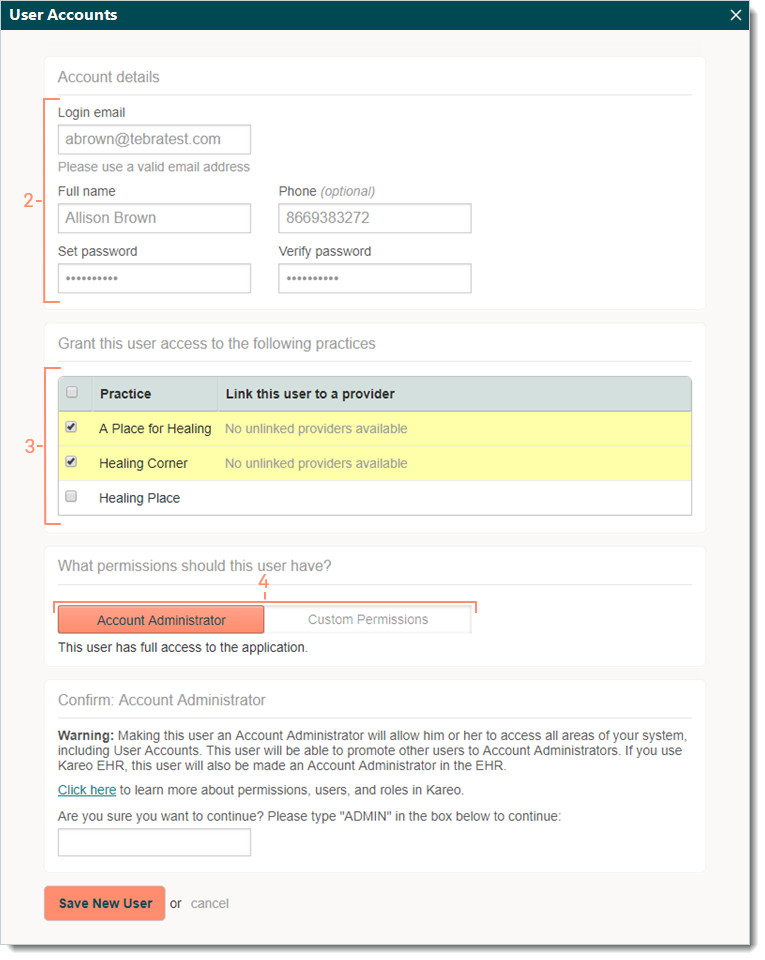
- Account details:
Note: The user's email and phone number is used as the login methods for Two-Factor Authentication (2FA). For more information, review Two-Factor Authentication FAQs.
- Login email: Enter a valid email address for the user to which only they can access their emails for security purposes.
- Full name and Phone: Enter the user's name and contact phone number.
- Set password and Verify password: Enter a temporary password and verify it by entering it again.
Note: Once the user logs in with the temporary password, they will be prompted their password has expired and to create a new password.
- Click to select the practice to grant the user access.
- If there are multiple practices within the Tebra account, click to select the specific practice(s) or use the master checkbox to select all practices.
- If the user is also a provider, select the provider record (if available) from the drop-down menu.
- Click Account Administrator or Custom Permissions.
- Account Administrator: Grants access to all areas of the system and automatically assigns the user the System Admin role in the web platform.
- If selected, review the Warning message then enter "ADMIN" to confirm and continue. Proceed to step 6.
- Custom Permissions: Provides options to customize the permissions for the user.
- If selected, proceed to step 5.
|
 |
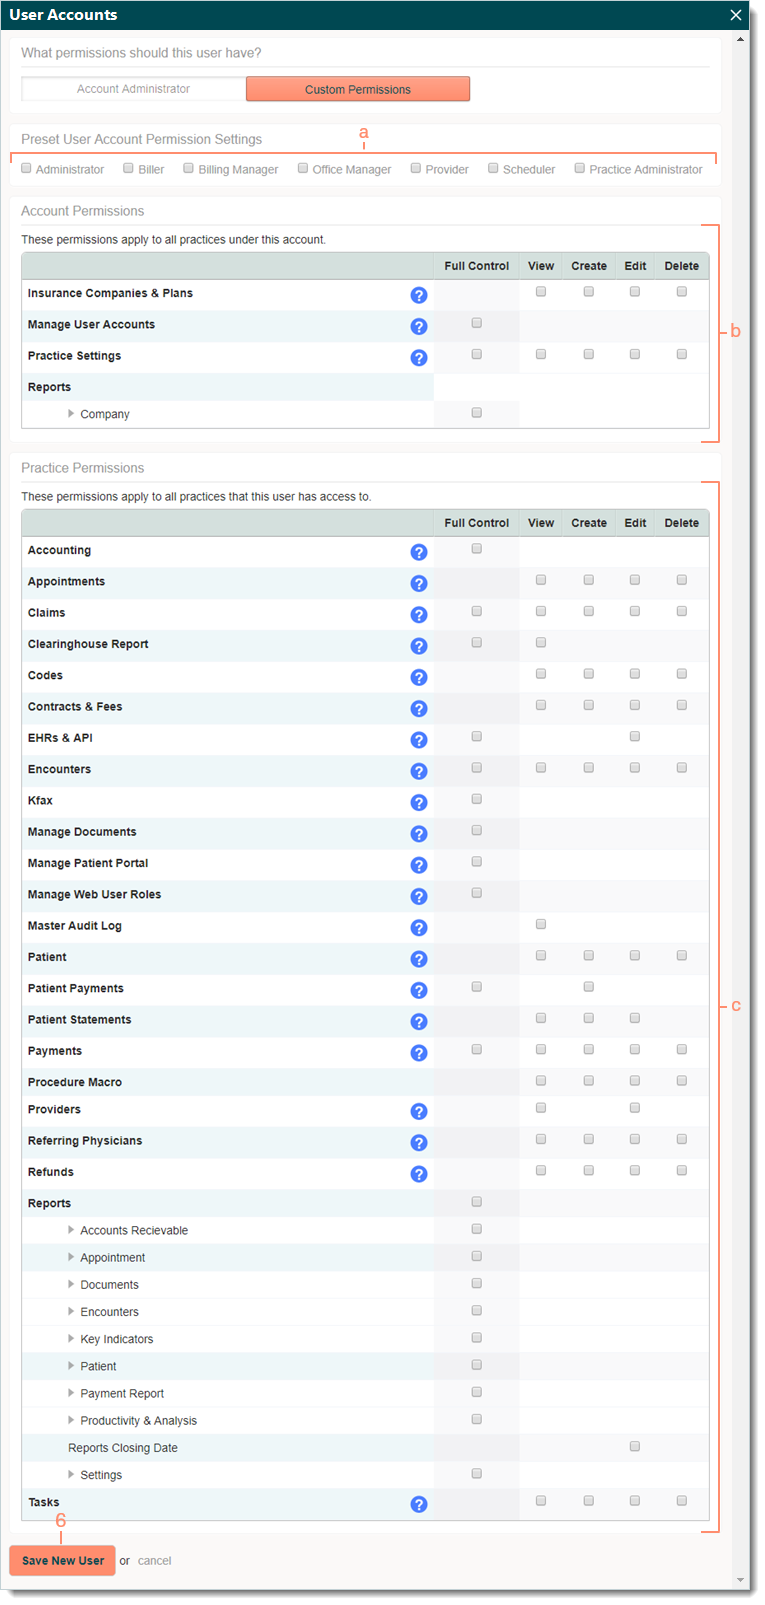
- Click to select permissions to assign the user:
- Preset User Account Permission Settings: If desired, select a user account role that automatically applies a pre-defined permission set to the user.
- If selected, review the permissions and customize as needed.
Note: Best practice is to assign a role with the minimum permissions necessary then add permissions as needed. Removing permissions will remove the user association with the role.
- Account Permissions: Applies to all practices within the account.
- Practice Permissions: Only applies to the practices the user can access.
- Click Save New User.
Once a user account is created, the option to set the Type of user becomes available.
|
 |
Edit User Account
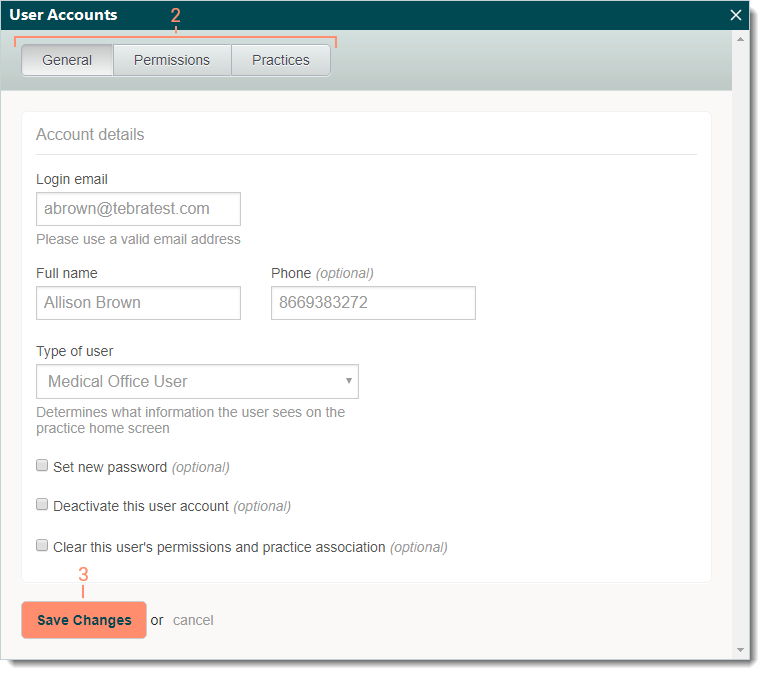
- Navigate to User Accounts then click on the user to open. The user account opens to the General tab by default.
 Tip: When there are numerous users listed, use the Search user accounts box to enter all or part of a user's Name or Login email. Tip: When there are numerous users listed, use the Search user accounts box to enter all or part of a user's Name or Login email.
- Make the necessary changes to the General information, Permissions and Practices.
- Click Save Changes.
- If the user has Account Administrator permissions, enter "ADMIN" to confirm and continue when prompted.
Once a user account has been updated, the user must log out and back into Tebra for the changes to reflect.
|
 |
Deactivate User Account
To maintain each user's transaction history within Tebra, user accounts can be deactivated but not deleted. Inactive users remain in the system and can be reactivated when necessary but should not be repurposed for a new user.
Note: Deactivating a user associated with multiple Tebra accounts deactivates the user from all of the accounts.
- Navigate to User Accounts then click on the user to open. The user account opens to the General tab by default.
 Tip: When there are numerous users listed, use the Search user accounts box to enter all or part of a user's Name or Login email. Tip: When there are numerous users listed, use the Search user accounts box to enter all or part of a user's Name or Login email.
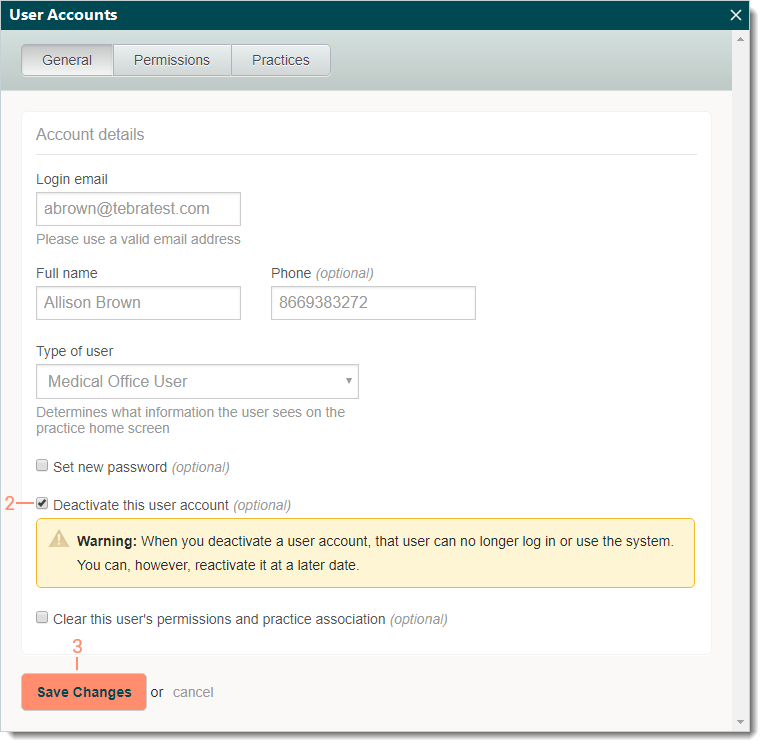
- Click to select "Deactivate this user account". The Warning message displays.
- If the user is associated with multiple Tebra accounts, click to select the checkbox to acknowledge locking the user from all Tebra accounts.
- If necessary, click to select "Clear this user's permissions and practice association".
- Click Save Changes. The user account is Inactive.
- If the user has Account Administrator permissions, enter "ADMIN" to confirm and continue when prompted.
|
 |


