Updated: 04/21/2026 | Views: 30951
Once Payment records are created, you can view a complete log of all financial transactions and find, edit, or delete them when necessary.
 Tip: To view a report of how a payment was allocated, find and open the Payment record, click Reports on the bottom of the Edit Payment window and select Payments Application.
You always begin with finding the payment before editing or deleting a payment.
Find Payment
- On the top menu bar, click Encounters > Find Payments. The Find Payment window opens.
Tip: For faster navigation, press F10 on your keyboard.
- When there are numerous payments, use the filters to narrow the search. Then, click Find Now.
- Select a tab to display a list of payments.
Note: The following tabs only display when an Online payment has been entered or received.
- All: Lists In-office and Online payments.
- In-office: Selected by default and lists payments entered via the Receive Payment option under the Encounters menu.
- Online:
- Lists payments entered via the Collect Patient Payment feature (or Collect Payment in the web platform).
- For Patient Portal, Tebra Payments, and Patient Collect (Stripe) activated customers, this tab also lists patient payments made via the Patient Portal and via the patient statements code to pay online.
- For formerly activated Instamed customers, this tab also lists patient payments made previously via the patient statements link to pay online.
- Look For: Use the search bar to enter all or part of a keyword for the payment.
- Search in: Click the drop-down arrow to select a specific field to search.
- "Show unapplied only": Selected by default and lists payments with unapplied balances only. When searching for an applied payment, click to clear the selection.
|
 |
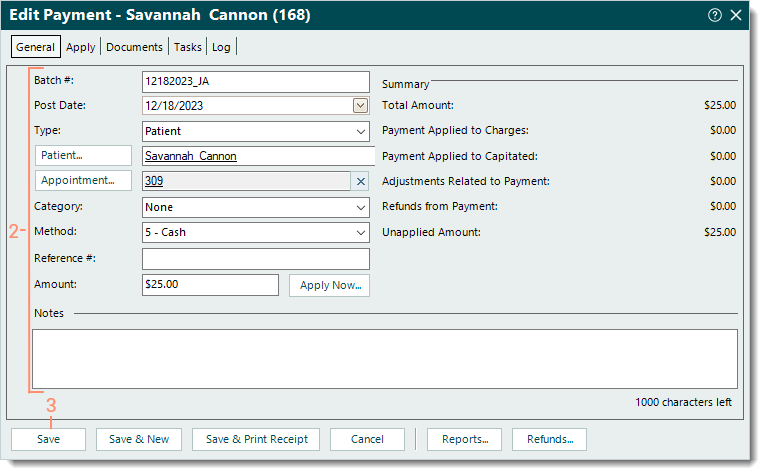
Edit Payment
- Find the payment then double click to open. The Edit Payment window opens.
- Make the necessary changes.
Note: Depending on the payment method, only certain fields of Online payments can be edited.
- Click Save.
|
 |
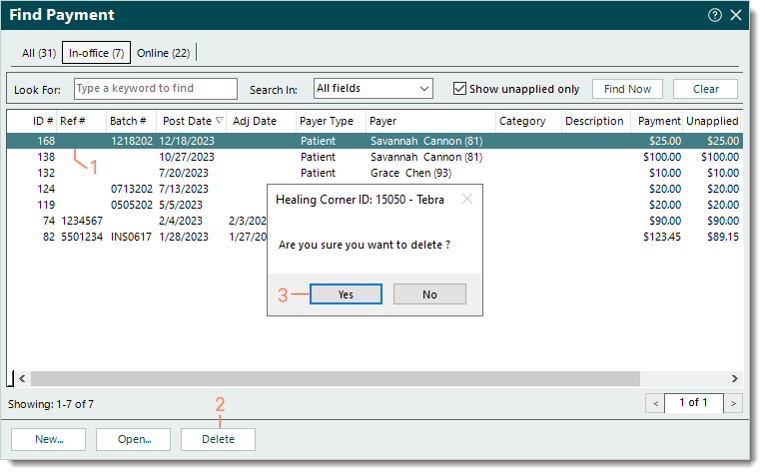
Delete Payment
- Find the payment then click to select it.
- Click Delete. A confirmation pop-up appears.
- Click Yes to confirm the deletion. The payment is deleted.
Note: Only In-office payments with no amounts applied to records, such as a claim or refund, can be deleted.
|
 |