Release Notes October 2022
Views: 1304
On October 20, 2022, your Kareo account will be upgraded to the latest version.
Billing
Billing General Improvements
- Kareo was updated with the new ICD-10 code set released by CMS, effective October 1, 2022. Visit the CMS website for more information about 2023 ICD-10-CM updates.
- System Administrators can search for users by the user's name/email in Web User Roles. Additionally, pagination to display up to 10 users per page has been added to increase performance.
- For customers with high claim volumes, A/R Aging reports now have pagination that displays 1000 records per page to increase performance.
Billing Resolved Issues
- Fixed an issue where the date range selector was not consistently working under the Patient record Account tab activity display
Clinical
Clinical General Improvements
- Kareo was updated with the new ICD-10 code set released by CMS, effective October 1, 2022. Visit the CMS website for more information about 2023 ICD-10-CM updates.
- Providers can now create notes using a Consultation or Discharge Summary standard note type.
Platform
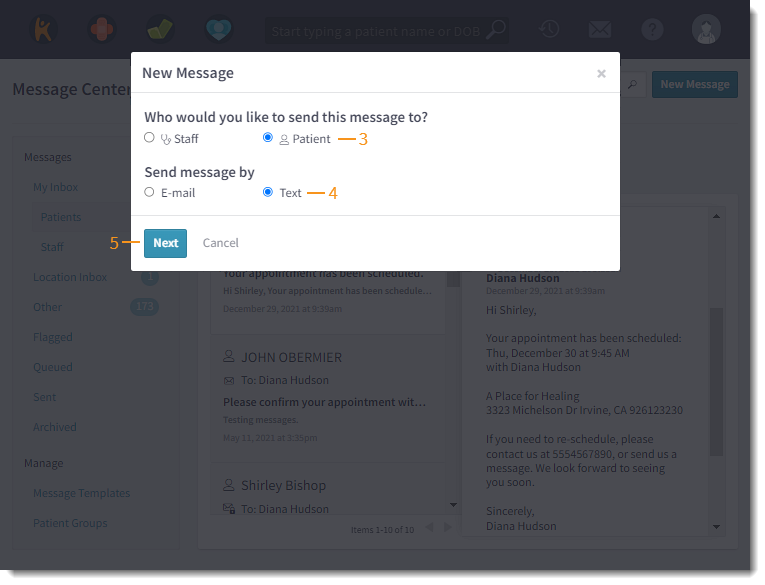
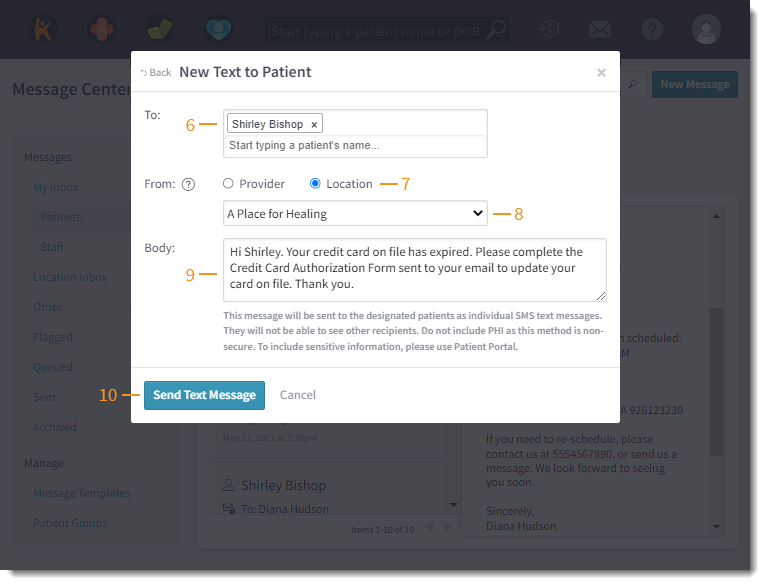
Send Text to Patient from Location
The Message Center enable users to easily communicate with patients through email or text. In addition to sending a text message from a provider, messages can now be texted directly to patients from a practice location. When a patient replies, the message populates in the new Location Inbox in the Message Center. Review the Enhanced Message Center to learn more.
Send Text to Patient
|
 |
|
 |
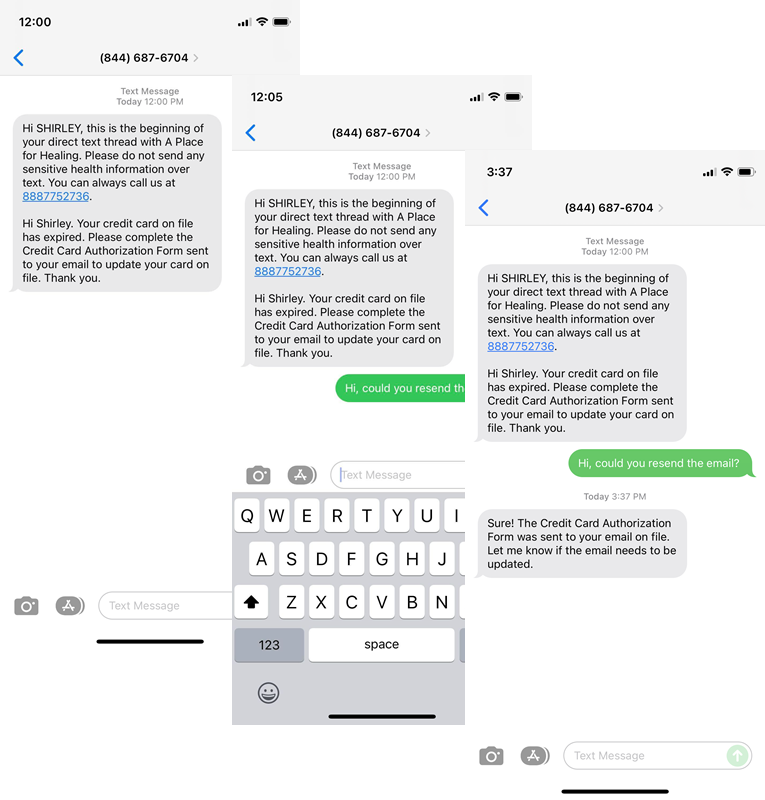
| Patient Experience: Text Message from Location The patient receives a text message from the practice and they can reply to the practice via text message. Patient replies populates in the new Location Inbox folder in the Message Center. Review the Enhanced Message Center to learn more. |
 |
Enhanced Message Center
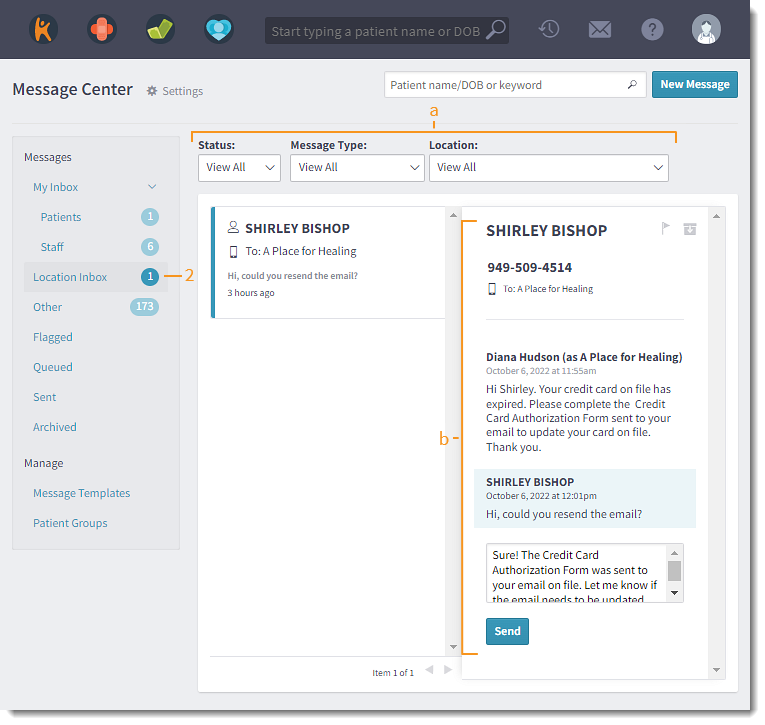
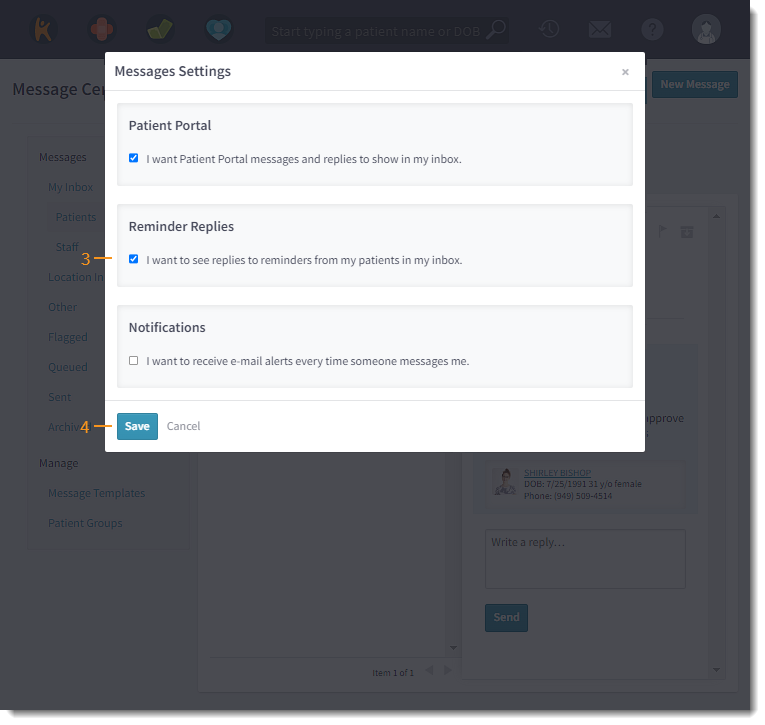
The Message Center has been updated to a redesigned, focused folder structure. The new Patients folder allow users to view messages from patients sent directly to them. The new Location Inbox folder allow users to view front-office message between patients and a practice location. Optionally, the updated Message Settings allow providers and clinical assistants to opt-out of viewing replies to reminders from their patients.
New Folder Structure
|
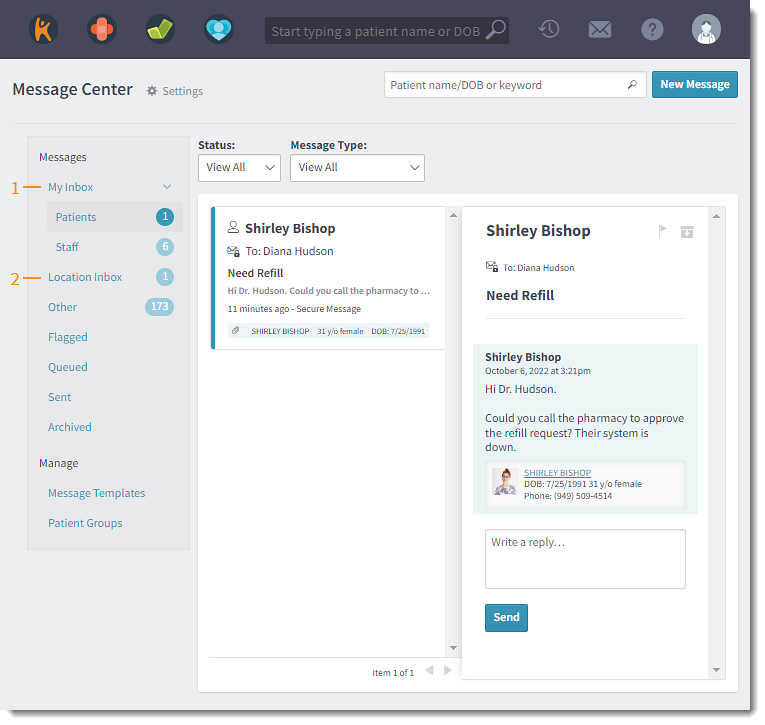 |
| New Location Inbox By default, users with an Office Staff role can review all emails and text messages between a patient and practice location. Additionally, providers can view all messages between their patients and the practice location. If applicable, providers and clinical assistants can opt-out of viewing replies to reminders from their patients.
|
 |
| New Message Settings Providers and clinical assistants can opt-out of viewing replies to reminders from their patients.
|
 |
Platform General Improvements
- System Administrators can search for users by the user's name/email in User Settings. Additionally, pagination to display up to 10 users per page has been added to increase performance.
- The new charge capture experience is now available from a group appointment.
Platform Resolved Issues
- Fixed an issue where tentative appointments displayed an incorrect list of visit reasons
- Fixed an issue where the patient's date of birth shows one day ahead on the Facesheet
- Fixed an issue where users received an error or latency when attempting to access the dashboard
