Release Notes October 2023
On October 19, 2023, your Practice Operations account will be upgraded to the latest version.
Billing
Customize Reports
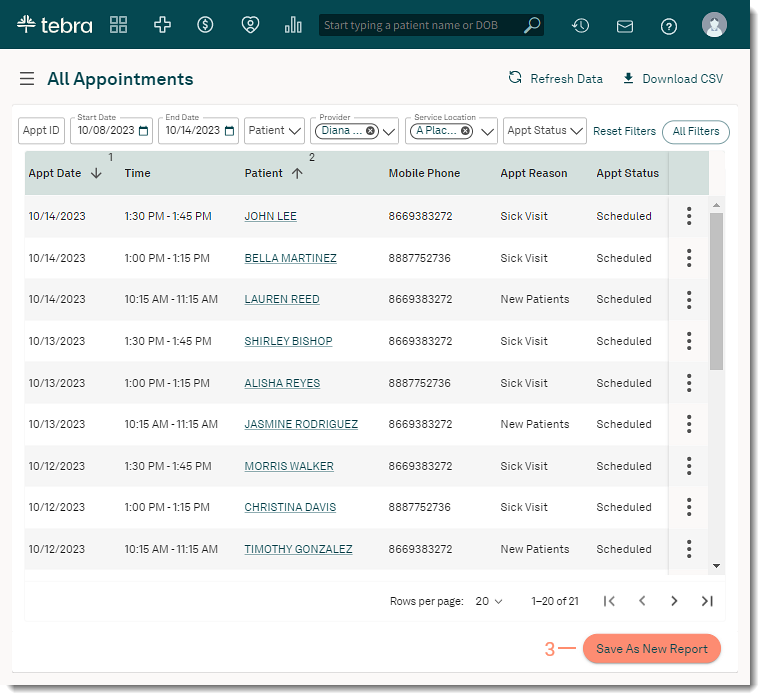
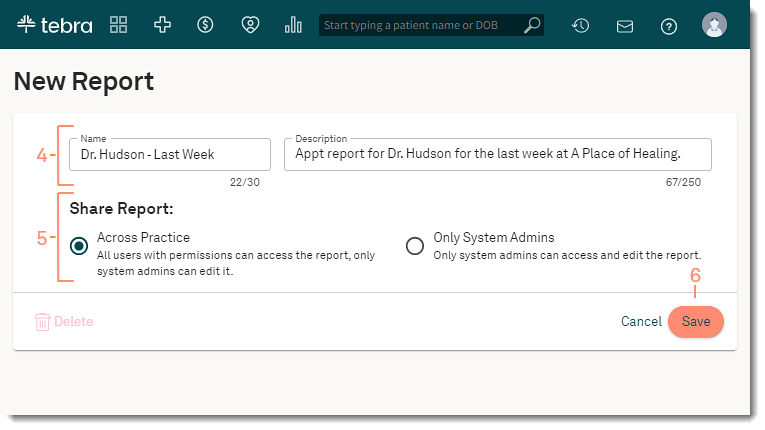
Practices can now create and save customized reports based on the All Appointments or the Missed Charges report. System Administrators have the ability to customize the reports (e.g., specify filters or hide/show specific columns) to fit the needs of their practice. Once the customizations are made, save the report as a customized report to share with all users in the practice with the appropriate permissions or with other System Administrators only.
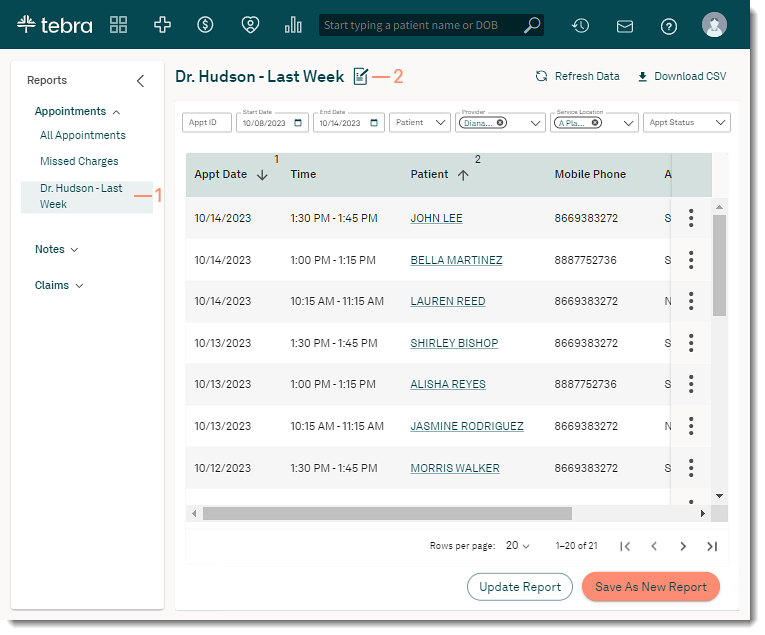
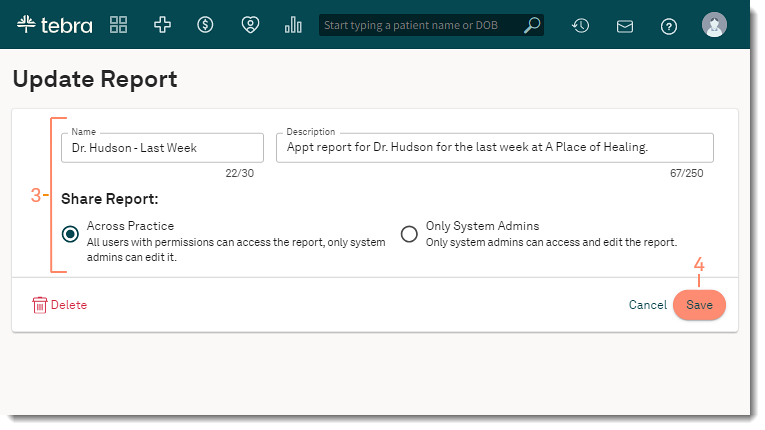
System Administrators can also edit the customized reports settings, update and save new customizations to an existing customized report, or delete a customized report.
Save Customized Report
|
 |
|
 |
| Edit Customized Report If necessary, a System Administrator can edit the name of the customized report, the description, and who has access to the report.
|
 |
|
 |
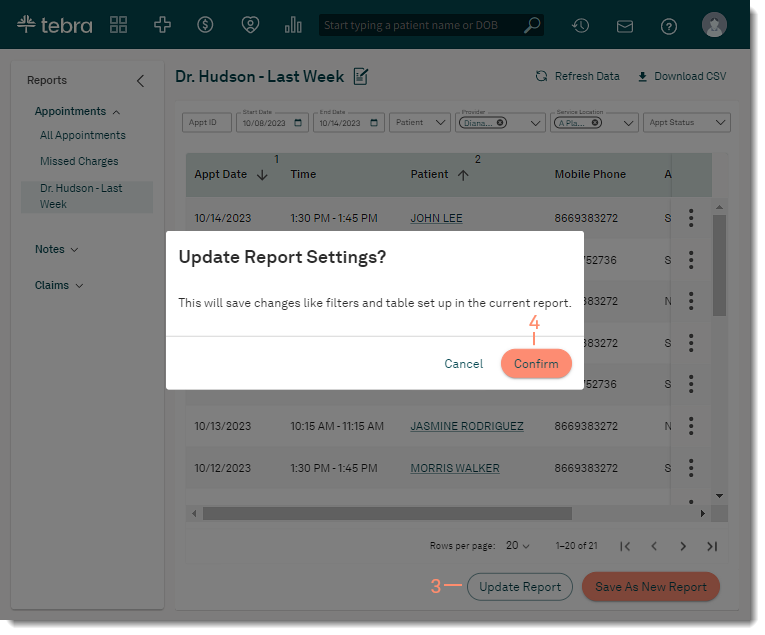
| Update Customized Report If necessary, a System Administrator can update an existing customized report to change what data is included and how it displays.
|
 |
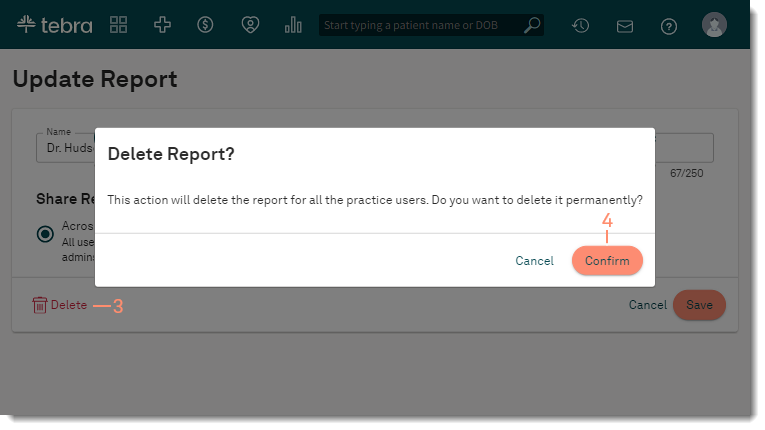
| Delete Customized Report A System Administrator can permanently remove a customized report when the report is no longer applicable for the practice.
|
 |
Billing General Improvements
- Tebra was updated with the new ICD-10 code set released by CMS, effective October 1, 2023. Visit the CMS website for more information about 2023 ICD-10-CM updates.
Billing Resolved Issues
- Fixed an issue where users could not access the web platform or Desktop Application (PM)
- Fixed an issue where patient payments could not be processed via card on file
Clinical
Electronic Case Reporting
Tebra is pleased to announce that it now offers automatic submission of reportable conditions to public health agencies (PHAs). Electronic Case Reporting (eCR) is the automated generation and transmission of case reports from EHRs to public health agencies for review and action. This reduces the burden on healthcare providers on reporting requirements and improves the timeliness and completeness of reports at a local, state, and national levels.
For any customers participating in Traditional MIPS Incentive Programs, integration with public health agencies for the transmission of Electronic Case Reporting is a mandatory measure under the Public Health and Clinical Data Exchange objective in the Promoting Interoperability category. In order to receive credit for 2023 reporting period, you must meet Pre-Production and Validation requirements. This first step can be accomplished by registering as outlined below. After registration, contact Tebra by creating a Customer Care case. Tebra will then assist you through the testing and validation phase of the implementation.
Tebra is here to assist with your integration. This is a multi-step process that we will work with you one-on-one. At this time though, it is very important that you contact your state public health agency and the CDC to indicate your intent to submit cases electronically.
- Connect with your appropriate PHA to register your intent. Public Health Agencies are listed on the following CDC website: Appendix IV - State and Local Public Health Readiness for Interoperability
- Contact the eCR Onboarding Team at ecr@cdc.gov to express interest and receive onboarding materials (e.g., eCR Provider Intake Form, eCR Facility List Template)
Clinical General Improvements
- Tebra was updated with the new ICD-10 code set released by CMS, effective October 1, 2023. Visit the CMS website for more information about 2023 ICD-10-CM updates.
- The Respiratory Syncytial Virus (RSV) vaccines are now available to order, administer as new, or add as historical.
Clinical Resolved Issues
- Fixed an issue where providers were unable to add ABRYSVO as an administered vaccine
- Fixed an issue where users received an error message when accessing patient notes
- Fixed an issue where users were unable to filter patient notes by any available note types
Platform
Platform Resolved Issues
- Fixed an issue where users could not access the web platform or Desktop Application (PM)