Send Message from Patient Chart
- Last updated
-
-
Save as PDF
Updated: 03/27/2025 | Views: 1378
Patient chart messages streamlines communication by centralizing messages in the patient's profile, boosting healthcare delivery and administrative efficiency, as well as, ensuring timely and consistent patient interactions, increasing satisfaction and strengthening relationships.
System Administrators can enable Chart Messages for all practice users to send messages directly from the patient's chart in addition to viewing the patient's complete message history (e.g., texts, emails, staff and secure portal messages).
|
|
 |
Send New Staff Message
- Click to select "Staff".
- Click Next. The New Message to Staff pop-up window opens.
|
 |
- Enter the first 2–3 letters of the staff's name and click to select the staff from the auto-populated results. If necessary, add additional staff.
- If applicable, reference a document. Click Add Document to browse uploaded documents or attach a new document (not to exceed 10MB).
- Enter the Subject and a message in the Body field.
- Click Send when finished.
|
 |
Initiate Patient Message
- Click to select "Patient". Additional send message by options displays.
- Select how to send the message:
- Email: Click to select this option to send the patient an email.
- Text: Click to select this option to send the patient a text to their mobile phone.
- Secure: Click to select this option to send the patient a secure message via
- Click Next. The New Email to Patient pop-up window opens, the New Text to Patient pop-up window opens, or the New Messages page opens in the Patient Portal for secure messages.
|
 |
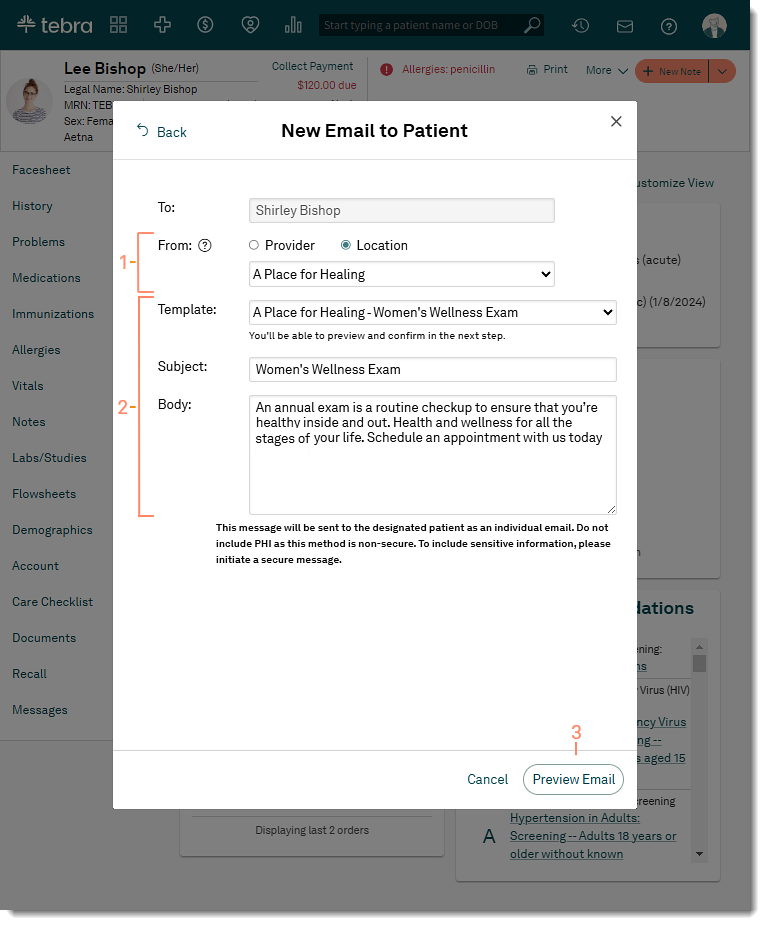
Send Patient Email
Do not include PHI as this method is non-secure. To include sensitive information, send a secure message via the Patient Portal.
- Select who the message will be sent from:
- Provider: Select a specific provider from the drop-down menu.
- Location: The location name auto-populates for single-location practices. If the practice has multiple locations, select a location from the drop-down menu.
- Message: Send the email using a message template or write a new message.
- Template: Select a message template from the drop-down list. The Subject and Body auto-populates from the selected template.
- New Message: Enter the Subject and a message in the Body field.
- Click Preview Email to see how the message will appear to recipients.
- Click Send Email to send the message or click Edit to revise the message.
|
 |
Compose New Text
Do not include PHI as this method is non-secure. To include sensitive information, send a secure message via the Patient Portal.
- Select who the message will be sent from:
- Provider: Select a specific provider from the drop-down menu.
- Location: The location name auto-populates for single-location practices. If the practice has multiple locations, select a location from the drop-down menu.
- Enter a message in the Body field.
- Click Send Text Message.
|
 |
Send Secure Message
- If applicable, click the drop-down to select a different provider to include in the message. Then, click New Message and click the To drop-down to search for the patient.
- Enter the Subject and Message.
- Click Send Secure Message when finished. The patient receives an email notification to view the new message in the Patient Portal.
|
 |