Updated: 06/09/2023 | Views: 5529
A Clinical Summary of the patient's visit can be generated before or after a note is signed to provide to the patient. The Clinical Summary includes specific information from the clinical note, such as the assessment and plan. However, providers can choose to exclude items in the summary.
Access Clinical Note
- Enter the first 2–3 letters of the patient's name or date of birth (mm/dd/yyyy) in the top navigation bar search box.
- Click to select the patient from the auto-populated results. The patient's Facesheet page opens.
- Click Notes. The Notes page opens.
- Click Open or View. The Encounter Note page opens.
|
 |
Generate Clinical Summary
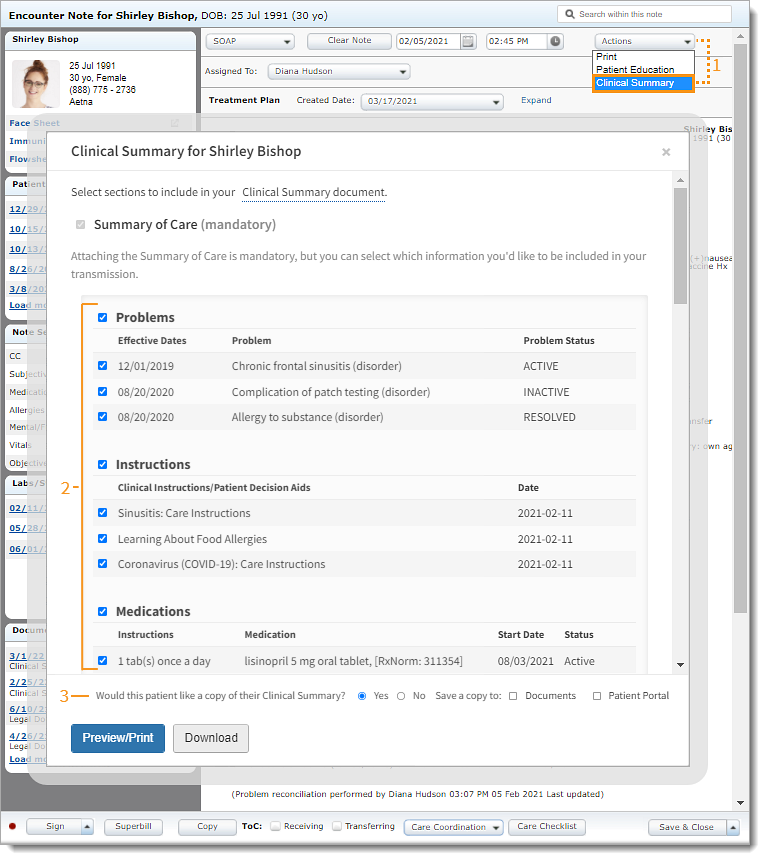
- Click the Actions drop-down arrow and select Clinical Summary. The Clinical Summary pop-up window opens.
- If the note is signed, click Clinical Summary on the note header. The Clinical Summary pop-up window opens.
- By default, all items are selected to be included in the Clinical Summary.
- To remove a section from the Clinical Summary, click to clear the selection next to the section header(s).
- To remove specific information from the Clinical Summary, click to clear the selection next to the item(s).
- By default, "Yes" is selected to indicate the patient would like a copy of their Clinical Summary.
- If the patient declines a copy, click to select "No".
|
 |
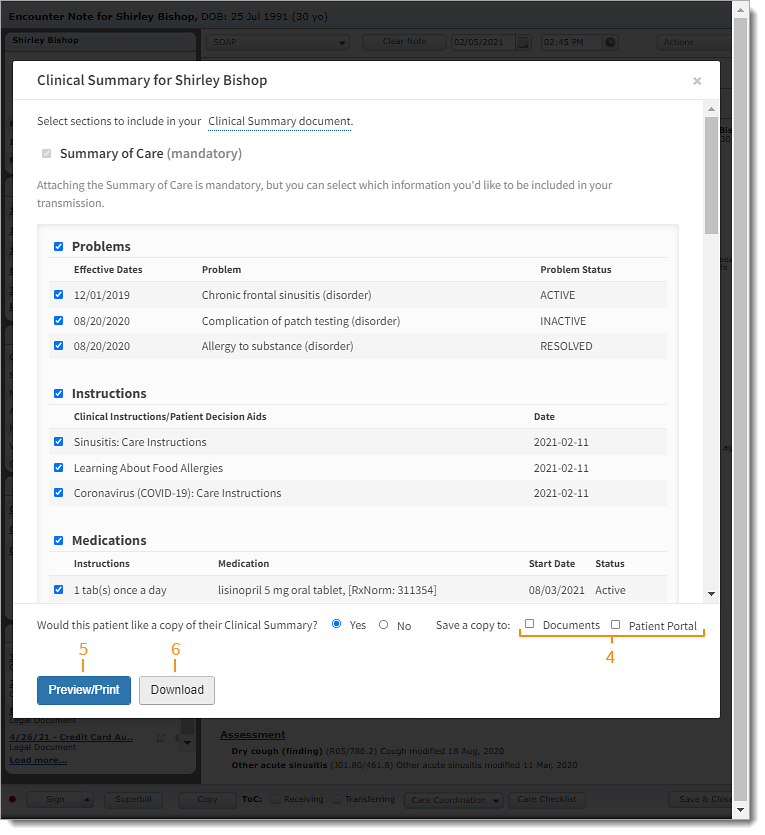
- To save a copy of the Clinical Summary to the patient's Documents or to the Patient Portal, click to select "Documents" and/or "Patient Portal". Then, click Save.
Note: The Clinical Summary is available under View Health Record in the Patient Portal.
- To print the Clinical Summary, click Preview/Print. The Preview page opens in a new browser. Click Print, to generate the document using the web browser's functions.
- To save the Clinical Summary as an XML file, click Download.
|
 |


