Change Patient Appointment Status
The Dashboard provides an efficient process for managing and tracking patients throughout the office visit after scheduling a patient appointment. An appointment status can be changed from different locations: the patient's appointment on the Dashboard, the appointment card, and the Edit Patient Appointment or Edit Group Appointment page.
Scheduled AppointmentsThe status is automatically changed to Confirmed when patients confirm their appointment via the appointment reminder. Mark Patient as ArrivedWhen a patient arrives for an appointment, initiate the check-in process.
|
 |
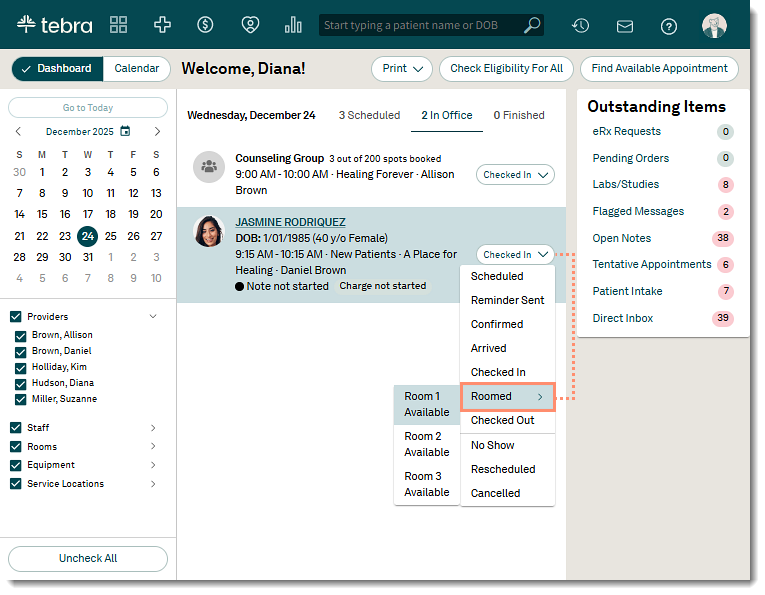
In Office AppointmentsAfter an appointment is moved to the In Office tab, the clinical note status displays as Note not started. Clinical staff can create a note from the appointment. Once the note is created, the status updates to Note in progress. Mark Patient as Checked InWhen a patient has been marked as Arrived and the front office check-in process is complete, change the appointment status to Checked In.
|
 |
Room PatientIf applicable, assigned to an exam room to the appointment.
|
 |
Finished AppointmentOnce the patient visit is completed, mark the patient as checked out. After the clinical note for the appointment is signed, the note status updates to Note Signed.
|
 |
Other StatusIf applicable, change an appointment to No Show, Rescheduled, or Cancelled.
|
 |
|
 |