Updated: 01/08/2026 | Views: 19414
The Documents page allows users to perform advanced search, expanded document options, bulk document actions, upload documents, import Summary of Care, and manage document labels.
- If you are integrated with Billing, documents you upload through Clinical, Billing, or the Mobile App are viewable in both systems. Uploaded documents are stored on the patient's Documents in Clinical and under Documents in Billing.
- Once a document is assigned to a patient, it cannot be changed to a different patient. If a document is assigned to a patient in error, delete the document and start again.
- Up to 20 documents can be uploaded at one time.
- The size of a file cannot exceed 10MB.
Access Documents
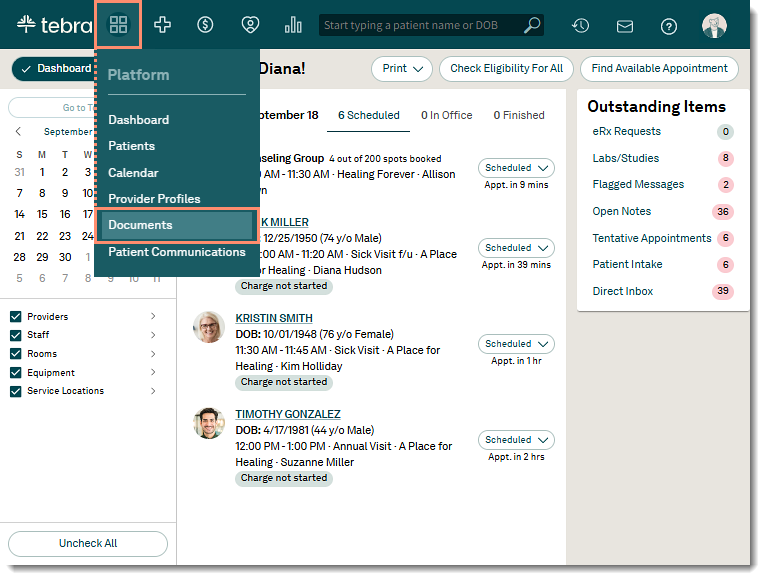
- Hover over the Platform icon and click on Documents. The Documents page opens.
|
 |
Navigate Documents
The Documents page can be customized to include specific data and how the data displays.
Note: Practices must be a Clinical subscriber with kFax enabled (Billing Subscriber) to access outbound faxing features.
- Document Actions: Select multiple documents. Then, click the Document Actions drop-down and select Download, Share to Patient, Send Via Fax, or Delete the documents.
- Shared files are only sent to the Patient Portal when the document is associated to a patient and has not been previously shared.
- Upload Document: Click to upload a new document.
Note: Document labels can be managed from the upload documents workflow.
- Advanced Search: Filter documents based on multiple dimensions such as patient name, document type, and date range. Advanced search makes it easier for users to find specific documents, such as those related to a patient within a particular time frame. For example, searching for "legal 2021 grace chen" will display legal documents from 2021 for patient Grace Chen.
- Refresh Data: Click the refresh icon to refresh the report data as necessary.
- Table Filters: By default, all documents display. Click the filter icon to filter by specific criteria and add the appropriate filter(s).
 Tip: A badge displays to indicate how many filters have been applied to the data. Tip: A badge displays to indicate how many filters have been applied to the data.
- Available filters: Date Range, Document Name, File Type, Label, Status, File Size, and Patient.
- To remove the filter, click X.
- To remove all filters, click Reset Filters.
- Table Configuration: Click the gear icon to adjust the table density (e.g., Compact, Standard, Comfortable) and/or manage the table columns to hide/show a column.
|
 |
- Columns: Customize the report to only display specific columns and in the preferred order. Available options depend on the column data.
- To reorder the columns, click the column header then drag and drop in the preferred order.
- To sort by ascending or descending, hover over the column header and click the arrow.
- To sort more than one column, hold down the Shift key on the keyboard and click to select the column(s).
- To group all documents by the label, hover over the column header and click the more options icon. Then, select Group by Label.
Note: Once applied, an additional column displays with the grouping.
- Document Details: Displays the document Name, Document Date, File Type, File Size, Label, Patient Name, associated Provider, Status, if the file has been Share to Patient, and Notes. Scroll as necessary to view more information.
- More Options: Click the more options icon on the right to select View, Download, Merge to Chart, Share to Patient, Send Via Fax, Edit, or Delete the document.
Note: Document labels can be managed from the edit document workflow.
- Fax History: Click to view faxed document details.
Note: The Fax History tab is only available when kFax is enabled (Billing Subscriber).
|
 |