Updated: 04/01/2026 | Views: 7398
Tebra’s comprehensive scheduling features allow you to streamline your practice by integrating non-provider staff, exam rooms, and specialized equipment directly into your patient workflow. By configuring these resources within Calendar Settings, you can establish individual schedules and manage their availability.
After resources are created and staff's schedules are configured, you can create and view appointments for any resources in the Dashboard or Calendar.
Access Calendar Settings
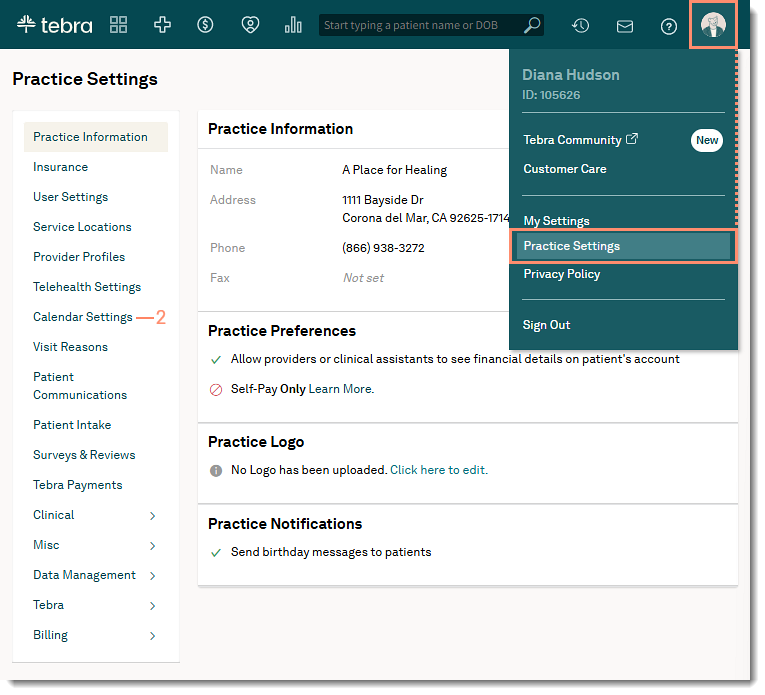
- Hover over the User icon and click on Practice Settings. The Practice Settings page opens.
- Click Calendar Settings. The Calendar Settings page opens.
|
 |
Manage Staff
Create non-provider staff members who see patients. Each staff member will have an individual appointment schedule that automatically appear in the Dashboard or Calendar.
After the staff is created, configure the staff's schedule to manage patient appointments.
- Click Scheduling Resources. The Scheduling Resources page opens.
- Manage staff: Create, update, or remove a non-provider staff members who see patients.
- Add Staff: To add a new staff, click + Add Staff. Then, enter the staff Name and click Add when finished. The staff member displays on the calendar.
Note: Configure the staff's schedule to schedule and manage patient appointments.
- Edit Staff: To update how the staff name displays on the calendar, click the edit icon. Then, update the staff Name and click Save when finished.
Note: Log out and back into the web platform to see the changes in the schedule.
- Delete Staff: To permanently remove a staff, click the trash icon. Then, click Delete to confirm. The staff is removed from the list.
Note: Edit existing scheduled appointments to remove the deleted staff and if necessary, add a different staff to the appointment.
|
 |
Manage Rooms
Incorporate exam rooms into the appointment workflow by assigning the room to an appointment during the patient visit.
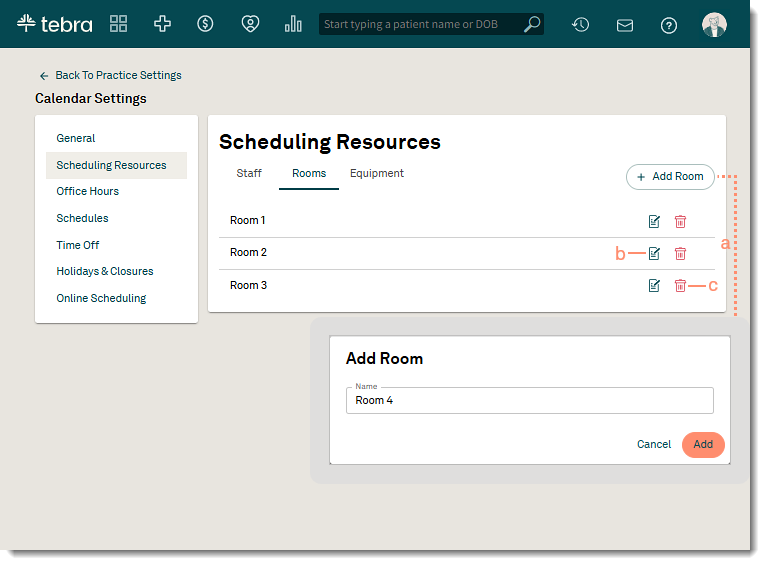
- Click Scheduling Resources. The Scheduling Resources page opens.
- Click the Rooms tab. The rooms tab displays.
- Manage Rooms: Create, update, or remove a room from the scheduling workflow.
- Add Rooms: To add a room, click + Add Room. Then, enter the room Name and click Add when finished. The room displays on the calendar and is available to assign to an appointment.
- Edit Rooms: To update how the room name displays on the calendar, click the edit icon. Then, update the room Name and click Save when finished.
Note: Log out and back into the web platform to see the changes in the schedule.
- Delete Rooms: To permanently remove a room, click the trash icon. Then, click Delete to confirm. The room is removed from the list.
Note: Edit existing scheduled appointments to remove the deleted room and if necessary, add a different room to the appointment.
|
 |
Manage Equipment
Equipment scheduling works just like providers and non-provider staff. Once equipment is added as a resource, the practice can incorporate equipment into the appointment workflow.
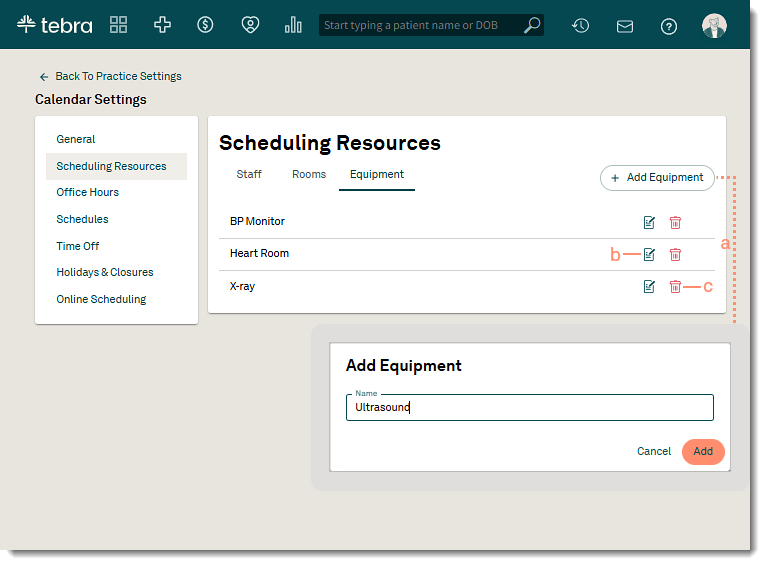
- Click Scheduling Resources. The Scheduling Resources page opens.
- Click the Equipment tab. The equipment tab displays.
- Manage Equipment: Create, update, or remove an equipment from the scheduling workflow.
- Add Equipment: To add an equipment, click + Add Equipment. Then, enter the equipment Name and click Add when finished. The equipment displays on the calendar and is now available to add when scheduling an appointment.
- Edit Equipment: To update how the equipment name displays on the calendar, click the edit icon. Then, update the equipment Name and click Save when finished. The new equipment name updates for all scheduled appointments and displays when scheduling a new appointment.
Note: Log out and back into the web platform to see the changes in the schedule. The new equipment name updates for all scheduled appointments and displays when scheduling a new appointment.
- Delete Equipment: To permanently remove an equipment, click the trash icon. Then, click Delete to confirm. The equipment is removed from the list.
Note: Edit existing scheduled appointments to remove the deleted equipment and if necessary, add a new equipment to the appointment.
|
 |