Updated: 01/15/2026 | Views: 20289
Patient cases are created to manage insurance policy selection as well as the order in which two or more insurance plans are billed. Separate cases (e.g., Commercial, Self-Pay, Workers' Compensation, Auto) should be created for each policy type. For example, you may have a patient that is being treated for injuries sustained from an auto accident that is covered under one insurance policy; yet that patient may receive treatment during the same visit for a condition unrelated to the auto accident and for which a different policy is billed.
Information associated with a case is organized under three tabs: General, Condition, and Authorizations. While the General tab of a new case includes basic information about the case, it's also where you add one or more insurance policies that may provide reimbursement for services related to the case.
Note: There are some payer scenarios (e.g., Attorney Lien, Workers' Comp) that will prompt the addition of the Attorneys and/or Workers' Compensation tabs.
Unless you are adding a case at the time of creating a new patient record, you typically begin with navigating to the Cases tab (of the Patient record) before adding, editing, or removing a case.
Navigate to Cases
- Find the Patient record then double click to open. The Edit Patient window opens.
- Select the Cases tab. The Cases tab information displays.
|
 |
Add New Case
One or more cases can be added to the Patient record either at the time of creating a Patient record or at a later time to an existing patient record.
- To prevent duplication, navigate to Cases and verify the case is not in the system.
- Click Add on the right of the window. The General tab of the New Case window displays by default.
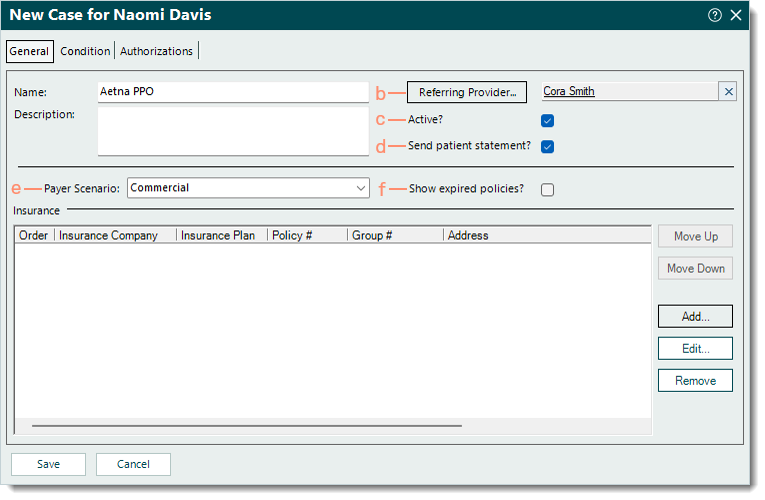
- Enter the General tab information.
- Name and Description: The name for the case that will help distinguish it from other cases, and if applicable, a brief description about the purpose or use of the case (e.g., the condition for which the patient is being seen).
|
 |
- Referring Provider: If applicable, auto-populates from the Patient record.
- To search and select a provider, click Referring Provider. If the provider is not listed, click New at the bottom of the Select Referring Physician window and create a new Referring Physician.
- "Active?": Selected by default. To change the case to inactive at any time, click to clear the selection.
- "Send patient statement?": Selected by default and allows statements related to the case to be sent to the patient. To prevent patient statements from being sent, click to clear the selection.
- Payer Scenario: Click the drop-down arrow to select the payer scenario.
- "Show expired policies?": Click to select to see expired insurance policies for this case.
|
 |
- Enter additional information for the case as applicable.
- To add an insurance policy, click Add under the Insurance section.
- To enter information about the cause that prompted treatment, select the Condition tab.
- To add authorization information from the insurance that documents approval for medical services, select the Authorizations tab.
- If the Payer Scenario is related to an attorney lien, select the Attorneys tab to add attorney information.
- If the Payer Scenario is related to workers' compensation, select the Attorneys tab and then the Workers' Compensation tab to add the information.
- Click Save at the bottom of each relevant window until it is no longer available.
|
 |
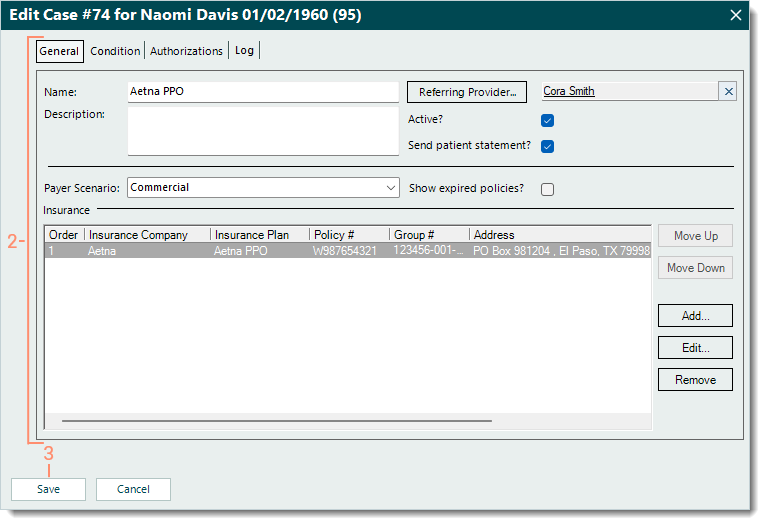
Edit Case
- Navigate to Cases then double click the case to open. The General tab of the Edit Case window displays by default.
- Make the necessary changes to:
- Click Save at the bottom of each relevant window until it is no longer available.
|
 |
Remove Case
- Navigate to Cases then click once to select the case.
- Click Remove. A confirmation pop-up appears.
- Click Yes to confirm the removal. The case is deleted.
Note: Only cases with no other records associated, such as an encounter or appointment, can be deleted.
- Click Save.
- If the deleted case was the only patient case, a Warning pop-up appears.
- To add a new case, click Yes.
- To continue to save the deletion of the only patient case, click No.
|
 |