Stripe Terminal: Collect Payment
- Last updated
-
-
Save as PDF
Updated: 11/05/2026 | Views: 10974
Patient Collect (Stripe) activated practices that purchased a Stripe terminal and have completed the setup can begin to use the countertop card reader to take secure in-person payments. The terminal supports chip, swipe, and contactless payments, including Apple Pay and Google Pay. To collect patient payments manually or with a saved card, review Patient Collect (Stripe): Collect Payment. To learn about the feature in the Desktop Application (PM), review Patient Collect (Stripe): Collect Patient Payment.
For Tebra Payments activated practices, review Tebra Payments: Collect Payment or Tebra Payments Terminal: Collect Payment.
Note: This feature is available for Billing subscribers>.
Initiate Payment
- Hover over the Platform icon and click on Dashboard. The Dashboard opens.
- Click on the appointment to view the appointment card.
- Click More Options > Collect Payment. The Collect a Payment page opens.
|
 |
Collect Patient Payment
- Verify patient information, review outstanding charges, and any unapplied payments.
- Payment Amount: By default, the Total Account Balance populates. If necessary, enter a different payment amount.
- To enter additional details about the payment (e.g., date of service), click Add Payment Note. This note is only visible to the practice and does not print on the patient receipt.
- Payment Method: Keep "Credit Card" selected by default. Then, click to select the Stripe terminal.
- If card information needs to be manually entered, click + Manually Enter New Card and enter the information. When finished, click Finalize Payment and submit the payment.
- Click Connect To Terminal. The Waiting for customer to insert, tap or swipe to pay pop-up message displays.
- To cancel the payment, click cancel payment.
|
 |
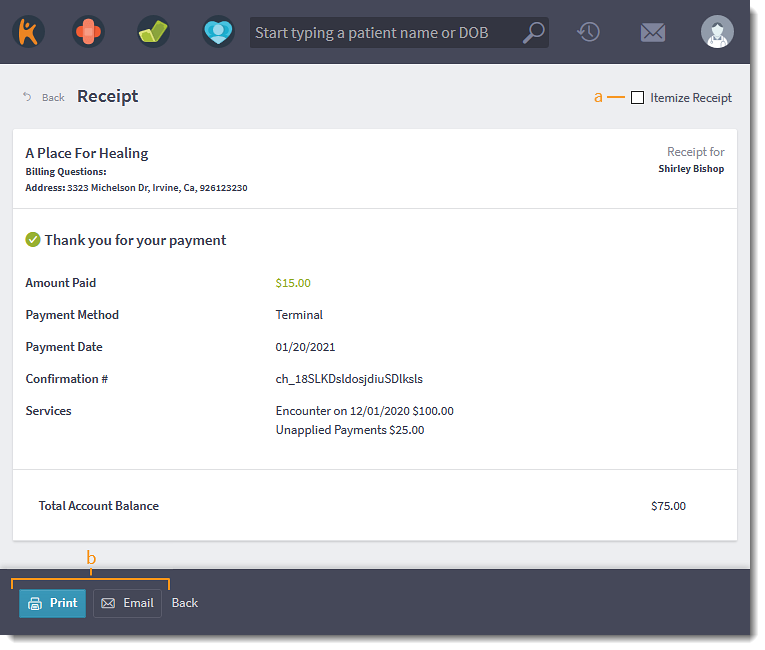
- Once the patient payment has successfully processed, the Receipt page opens.
Note: The submitted payment creates a Payment record in the Desktop Application (PM) as an Unapplied Payment until it is applied to the appropriate service(s) associated with the patient.
- For a detailed receipt (e.g., FSA/HSA patients), click to select "Itemize Receipt".
- Click Print or Email to print or email the receipt.
|
 |
