Updated: 03/27/2026 | Views: 7346
Tebra Payments and Patient Collect (Stripe) activated practices with Patient Portal enabled have the option to send Text Balance Reminders and/or Email Balance Reminders to accelerate patient collections and drive online payments. After balance reminders are sent, review the Patient Statements Delivery Report as part of the monthly closing activities.
Email Balance Reminders can be sent to patients who are opted into receiving email communications ("Send Email Notifications" is selected in their Patient record).
Patient Experience
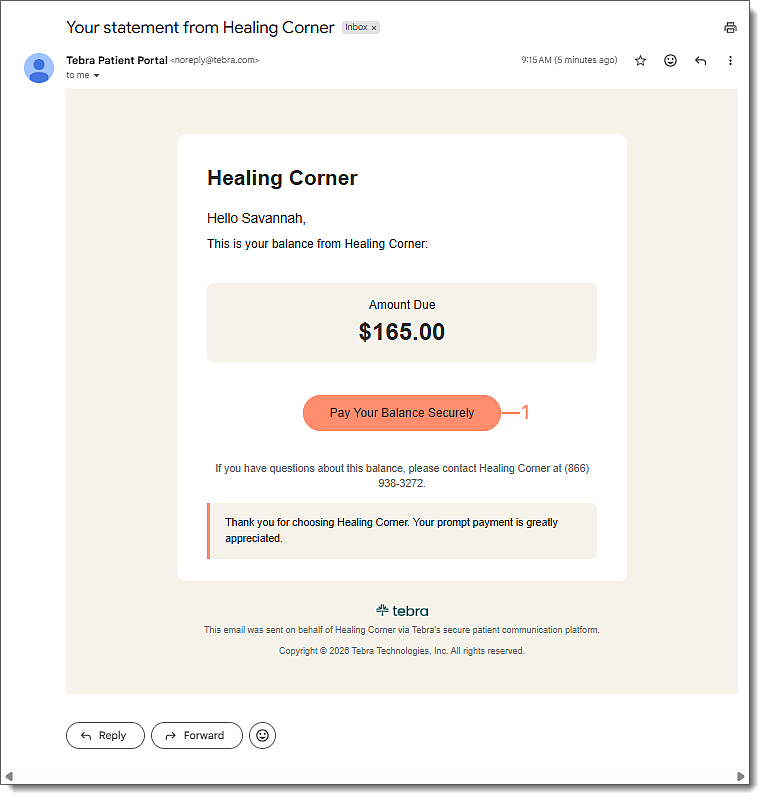
Patients receive the email within an hour of the Email Balance Reminders being sent so they can securely make a payment or access the Patient Portal (if activated) and view the details of their statement.
Note: Email Balance Reminders include the billing phone number and global messages configured in the Patient Statement Options as applicable.
Make a Payment
- The patient clicks Pay Your Balance Securely within the email. The Make a Payment page opens in a new browser.
Note: For security purposes, the Pay Your Balance Securely link expires after 30 days or after the fifth use (each time the Make a Payment page is loaded or refreshed). Should the link expire, the patient will need to contact the practice and request a new email balance reminder be sent to them.
|
 |
Make a Payment (Tebra Payments)
- The patient chooses the payment amount to pay in Step 1 of the Make a Payment page.
Note: Patients that have Patient Portal activated can click I want to see my statement before I pay to access the Patient Portal and view their statement. Patients that do not have Patient Portal activated will not see this option and need to contact the practice to request their statement.
- "Pay full Amount": The patient clicks to select and pays the total amount owed.
- "Pay other amount": The patient clicks to select and enter a different payment amount to pay.
- The patient clicks Next. Step 2 of the Make a Payment page opens.
|
 |
- The patient enters the Card Number, Expiration Date, and CVV code.
Note: If any of the card information needs to be corrected after it was entered, all card information fields will automatically clear for security purposes.
- The patient clicks Process Transaction to charge the card. The Payment Successful page opens with a receipt and the option to print.
Once processed, the payment shows as an unapplied payment under the Online tab of the Find Payment window in the Desktop Application (PM).
|
 |
Make a Payment (Stripe)
- The patient chooses the payment amount to pay.
Note: Patients that have Patient Portal activated can click I want to see my statement before I pay to access the Patient Portal and view their statement. Patients that do not have Patient Portal activated will not see this option and need to contact the practice to request their statement.
- "Pay full Amount": The patient clicks to select and pays the total amount owed.
- "Pay other amount": The patient clicks to select and enter a different payment amount to pay.
- The patient enters the credit card information.
- If the patient has Apple Pay, Google Pay, or Microsoft Pay set up, the Choose payment method section displays an icon for selection to process the payment.
- If the patient has Patient Portal activated with a saved card on file and is currently signed in, they can choose to use the saved card or to Use a new credit card.
- If the patient chooses to Use a new credit card, the option to save the card on file becomes available and is selected by default.
- The patient clicks Submit Payment. The Payment Successful page opens with a receipt and the option to print.
Once submitted, the payment shows as an unapplied payment under the Online tab of the Find Payment window in the Desktop Application (PM).
|
 |
View Statement
Patients that have Patient Portal activated can view their statement.
- The patient clicks Pay Your Balance Securely within the email. The Make a Payment page opens in a new browser.
- The patient clicks I want to see my statement before I pay. The Patient Portal sign in page opens.
- The patient enters their credentials then clicks Sign in. The Your Bill Details page opens for them to review the information.
|
 |
- The patient clicks Pay Now to make a payment. The Make a Payment page opens.
|
 |


